
Manual
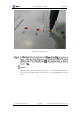


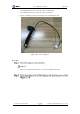
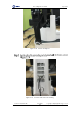
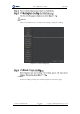
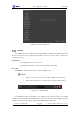
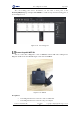
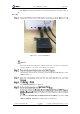
Table Of Contents
- 1. Security Precautions
- 2. Quick Start
- 3. Introduction
- 4. Interface Description
- 5. Operation
- 5.1 Introduction to the DobotStudio
- 5.2 Performing Teaching & Playback Tasks
- 5.3 Working in Offline Mode
- 5.4 Writing and Drawing
- 5.5 Performing Laser Engraving Tasks
- 5.6 Engraving a Grayscale Image
- 5.7 Controlling with your Hand Gesture
- 5.8 Controlling with your Mouse
- 5.9 Operating 3D Printing
- 5.10 Calibration
- 5.11 Connecting with WIFI Kit
- 5.12 Connecting with Bluetooth Kit
- 5.13 Operating Blockly
- 5.14 Scripting
- 5.15 Operating Stick Controller Kit
- 5.16 Operating Sliding Rail
- 5.17 Multiplexed I/O Demo
- Appendix A Dobot Magician Homing Operation

Dobot Magician User Guide 5 Operation
Issue V1.7.0 (2019-01-09) User Guide Copyright © Yuejiang Technology Co., Ltd.
142
Figure 5.173 Auto levelling result
Homing
Dobot Magician has been calibrated before being shipped out. If the Dobot Magician has been
hit or the motor has lost step, leading data abnormal, you need to operate homing to improve the
positioning accuracy.
Prerequisites
Dobot Magician has been powered on.
Dobot Magician has been connected to DobotStudio successfully.
Procedure
Click Home on the DobotStudio page, as shown in Figure 5.174.
NOTICE
Please remove the end-effector from the Dobot Magician before homing.
Please ensure that there are no obstacles in the workspace during homing.
Figure 5.174 Operate homing
Dobot Magician will rotate clockwise to the limited position and then return to the default
homing point automatically and the LED indicator on the base turns blue and is blinking. After the
homing is successful, there is a beep sound and the LED indicator turns green.