
Manual
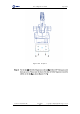
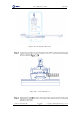
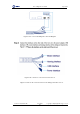
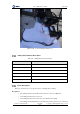
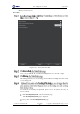
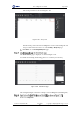
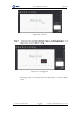
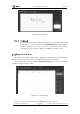

Table Of Contents
- 1. Security Precautions
- 2. Quick Start
- 3. Introduction
- 4. Interface Description
- 5. Operation
- 5.1 Introduction to the DobotStudio
- 5.2 Performing Teaching & Playback Tasks
- 5.3 Working in Offline Mode
- 5.4 Writing and Drawing
- 5.5 Performing Laser Engraving Tasks
- 5.6 Engraving a Grayscale Image
- 5.7 Controlling with your Hand Gesture
- 5.8 Controlling with your Mouse
- 5.9 Operating 3D Printing
- 5.10 Calibration
- 5.11 Connecting with WIFI Kit
- 5.12 Connecting with Bluetooth Kit
- 5.13 Operating Blockly
- 5.14 Scripting
- 5.15 Operating Stick Controller Kit
- 5.16 Operating Sliding Rail
- 5.17 Multiplexed I/O Demo
- Appendix A Dobot Magician Homing Operation

Dobot Magician User Guide 5 Operation
Issue V1.7.0 (2019-01-09) User Guide Copyright © Yuejiang Technology Co., Ltd.
164
Figure 5.202 Trigger lines
Dobot Magician starts writing. Take the first trigger point as an example, after writing
the first letter a, the saved points list on the Teaching&Playback page is triggered,
and Dobot Magician moves to the set position to perform the related operations
according to the saved points list. Then, Dobot Magician continues to write.
Multiplexed I/O Demo
The addresses of the I/O interfaces in Dobot Magician are unified. Most of I/O interfaces have
multiple functions. For details, please see 4.3 Multiplexed I/O Interface Description.
You can set I/O interfaces on the advanced Teaching&Playback page to control the peripheral
equipment, as shown in Figure 5.203.
Figure 5.203 I/O setting page
Now, demos of level output, level input, and PWM output are given below.