
Manual
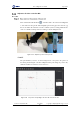
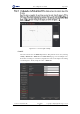
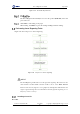
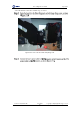

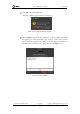

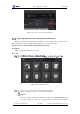
Table Of Contents
- 1. Security Precautions
- 2. Quick Start
- 3. Introduction
- 4. Interface Description
- 5. Operation
- 5.1 Introduction to the DobotStudio
- 5.2 Performing Teaching & Playback Tasks
- 5.3 Working in Offline Mode
- 5.4 Writing and Drawing
- 5.5 Performing Laser Engraving Tasks
- 5.6 Engraving a Grayscale Image
- 5.7 Controlling with your Hand Gesture
- 5.8 Controlling with your Mouse
- 5.9 Operating 3D Printing
- 5.10 Calibration
- 5.11 Connecting with WIFI Kit
- 5.12 Connecting with Bluetooth Kit
- 5.13 Operating Blockly
- 5.14 Scripting
- 5.15 Operating Stick Controller Kit
- 5.16 Operating Sliding Rail
- 5.17 Multiplexed I/O Demo
- Appendix A Dobot Magician Homing Operation

Dobot Magician User Guide 5 Operation
Issue V1.7.0 (2019-01-09) User Guide Copyright © Yuejiang Technology Co., Ltd.
68
Figure 5.58 The PenDown parameter
The Dobot Magician automatically moves above the position (PenDown) of the start
point of the text.
Click Start to start writing on the paper.
When writing, click Pause to pause the writing and Stop to halt the writing.
Performing Laser Engraving Tasks
Figure 5.59 shows the process of laser engraving.
Figure 5.59 The process of laser engraving
NOTICE
The LaserEngraving is different is from the grayscale engraving. The former uses the
same firmware and DobotStudio function module as those of the Write & Draw
function, and it can only engrave a vector graphics by drawing lines while the latter can
engrave a grayscale image. For more information about the grayscale engraving, see 5.6
Engraving a Grayscale Image.
Installing a Laser Kit
Procedure