
Manual
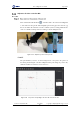
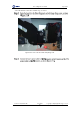

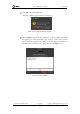
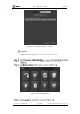
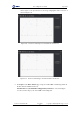
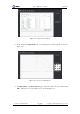
Table Of Contents
- 1. Security Precautions
- 2. Quick Start
- 3. Introduction
- 4. Interface Description
- 5. Operation
- 5.1 Introduction to the DobotStudio
- 5.2 Performing Teaching & Playback Tasks
- 5.3 Working in Offline Mode
- 5.4 Writing and Drawing
- 5.5 Performing Laser Engraving Tasks
- 5.6 Engraving a Grayscale Image
- 5.7 Controlling with your Hand Gesture
- 5.8 Controlling with your Mouse
- 5.9 Operating 3D Printing
- 5.10 Calibration
- 5.11 Connecting with WIFI Kit
- 5.12 Connecting with Bluetooth Kit
- 5.13 Operating Blockly
- 5.14 Scripting
- 5.15 Operating Stick Controller Kit
- 5.16 Operating Sliding Rail
- 5.17 Multiplexed I/O Demo
- Appendix A Dobot Magician Homing Operation

Dobot Magician User Guide 5 Operation
Issue V1.7.0 (2019-01-09) User Guide Copyright © Yuejiang Technology Co., Ltd.
73
Figure 5.67 Choose Laser as the end-effector
Importing Image Files and Setting Engraving Parameters
When performing a laser-engraving task, a built-in or a custom image file is required. Only a
PLT or SVG image can be used. The built-in image file is located in the directory:
Installation Directory\DobotStudio\config\prefab\system\source.
Prerequisites
A PLT or SVG image file has been created.
Procedure
Figure 5.68 Click Write & Draw
NOTICE
The imported image should be placed within the annular area on the Write & Draw page,
as shown in Figure 5.69. If not, the robotic arm reaches its limited position and thus