4-085-842-12 R DIRECTV Digital Satellite Receiver Operating Instructions Before you begin using your Digital Satellite Receiver for the first time, follow the instructions in “Getting Started” on pages 1-6. Also, make sure your Satellite Dish Antenna has been properly installed and call your service provider to begin service: DIRECTV: 1-800-DIRECTV (347-3288) SAT-A65A SAT-B65A © 2002 Sony Electronics Inc. Reproduction in whole or in part without written permission is prohibited. All rights reserved.
Covered by one or more of the following U.S. Patents: 6,075,526;5,828,419; 5,751,372; 5,694,176; and 5,635,989. This product is subject to one or more U.S. or foreign patents pending. Sony Software License Agreement ATTENTION: USE OF THE SOFTWARE IS SUBJECT TO THE SONY SOFTWARE LICENSE TERMS SET FORTH ON PAGE 48. USING THE SOFTWARE OR THE PRODUCT IN WHICH IT IS INCORPORATED INDICATES USER’S ACCEPTANCE OF THESE LICENSE TERMS.
For your safety and protection, read this entire Owner's Manual before you attempt to install or use your satellite system. In particular, read this safety section carefully. Keep this safety information where you can refer to it if necessary. Important Safety Instructions Heed Cautions–All cautions on the product and in the operating instructions should be adhered to. Follow Instructions–All operating and use instructions should be followed.
INSTALLATION Polarization – This DIRECTV Receiver is equipped with a plug that will fit into the power outlet only one way. Do not modify the plug defeating this feature. If the plug does not fit, contact your electrician to replace your outlet. To prevent electric shock, do not use this plug with an extension cord or outlet unless you can fully insert the blades without blade exposure Power Sources – Operate this DIRECTV Receiver only from the type of power source indicated on the marking label.
SERVICE Servicing–Do not attempt to service this DIRECTV Receiver yourself as opening or removing covers may expose you to dangerous voltage or other hazards. There are no user serviceable parts inside. Refer all servicing to qualified service personnel. Conditions Requiring Service–Unplug the DIRECTV Receiver from the wall outlet and refer servicing to qualified personnel under the following conditions: •When the power supply cord or plug has been damaged.
Federal Communications Commission (FCC) Regulatory Information Declaration of Conformity– Standards to which Conformity is declared: FCC Part15 This Device complies with Part 15 of the FCC Rules. Operation is subject to the following two conditions: (1) this device may not cause harmful interference, and (2) this device must accept any interference received, including interference that may cause undesired operation. • Responsible Party’s Name: Sony Electronics Inc.
Contents Getting started. . . . . . . . . . . . . . . . . . . . . . . . 1 Setup overview . . . . . . . . . . . . . . . . . . . . . . . . . . . . 1 Attach the antenna cable . . . . . . . . . . . . . . . . . . . 2 Connect your TV . . . . . . . . . . . . . . . . . . . . . . . . . 3 Determine antenna angles . . . . . . . . . . . . . . . . . . 4 Testing your system . . . . . . . . . . . . . . . . . . . . . . 5 Adding system components . . . . . . . . . . . . . 7 Connecting components . . . . . . . . . . . . . .
viii Contents
Getting started 1 This chapter explains how to: You may connect a second DIRECTV Receiver to the unused LNB output. These instructions also apply to an additional receiver. • Connect the DIRECTV satellite dish antenna to your DIRECTV Receiver (this page). • Connect your DIRECTV Receiver to your TV (see page 3). • Find antenna azimuth and elevation settings for your location (see page 4). • Test the DIRECTV System operation (see page 5).
Attach the antenna cable You can configure your system several ways, depending on what additional components (such as a VCR, DVD player, or A/V receiver) you select. For now, however, use the simplest configuration to check your antenna and cabling. • Ensure that the DIRECTV Receiver is not plugged into an electrical outlet. • Attach the RG-6 coaxial antenna cable to the SATELLITE IN connector on the back of the DIRECTV Receiver. Refer to the appropriate figure below.
Connect your TV Depending on your TV, you can connect it to the receiver in one of three ways: • S-Video cable (best picture quality) or • Video cable (very good picture quality) or • Coaxial cable (good picture quality) In addition to your video connection, use a set of audio cables (L/R) to provide stereo sound. If your TV does not have audio jacks, you will hear monophonic audio. This is acceptable for the procedures described in the next section. To connect your TV to the DIRECTV Receiver: 1.
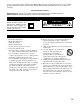
Determine antenna This section explains how to determine the proper antenna position. This is angles expressed in degrees of azimuth (horizontal) and elevation (vertical). Use the receiver front panel controls shown below to complete this procedure. DIGITAL SATELLITE RECEIVER SAT-A60 POWER MENU SELECT 1. Press the front panel MENU button to display the MAIN MENU below. 2. Use the button to highlight the System tab.
Testing your system When you have aligned your dish antenna to the azimuth and elevation angles shown on the Antenna pane: 1. Highlight the Signal tab. 2. Use the button to highlight the Source pull-down menu 3. Signal quality is indicated by a scale at the bottom of the pane and with an audible indication. The frequency and tempo of the tone increase with signal strength.
3. Press SELECT again to test the first selection on the pop-up menu. SYSTEM TEST Antenna Signal VCR Prefs Wed, Jun 13 System Tests Begin Test Xponder Test Xponder Test Satellite 101 (A) : 5317.6 Satellite 119 (B) :0.0.0.
Adding system components 2 You can configure your DIRECTV Receiver several ways depending on the additional audio/video components you want to use. This chapter explains how to: • • • • Connecting components Connect a terrestrial (broadcast) TV antenna (this page). Connect the optional RF remote control antenna (this page). Connect and set-up a VCR (see page 8). Integrate the DIRECTV Receiver into your existing audio or A/V system (see page 10).
Connecting a VCR Follow these instructions to connect your TV and VCR to the DIRECTV Receiver. Connect the satellite antenna RG-6 coaxial cable to the DIRECTV Receiver’s SATELLITE IN jack (refer to figures on page 2). 1. Depending on your VCR, select the appropriate connection to the DIRECTV receiver: If your VCR has A/V connectors – • Connect the DIRECTV Receiver’s AUDIO and VIDEO jacks to the VCR’s A/V IN jacks.
7. Test the VCR control feature as described below. 8. Remove the temporary mounting tape. Attach the emitter permanently with peel-and-stick backing. This will not interfere with normal VCR operation. The VCR SETUP menu provides the settings to allow the DIRECTV Receiver to communicate with your VCR.
Connecting a home entertainment system The A/V receiver must be turned on in order to send the video signal to your TV. You can integrate the DIRECTV Receiver into your entertainment system to take advantage of enhanced audio and video capability. Follow these instructions to connect your DIRECTV Receiver. • To connect the DIRECTV Receiver to your audio system, use A/V cables to connect the satellite receiver to the audio receiver’s AUDIO IN jacks.
Using the remote control 3 This chapter explains how to: • • • • 1 Use the RM-Y812 and RM-Y807 remote control functions. (see page 15) Install and replace the remote control batteries. (see page 15) Program the remote to work with your system components. (see page 16) Access interactive programming features. (see page 16) MUTING button - Mutes the volume. Press again to restore the volume. To operate your TV, you must first set up the remote control (see pages 15–16).
14 MUTING VCR 1 POWER TV SAT 11 FUNCTION 2 3 4 TV/VIDEO VCR SAT TV/VCR 2 3 4 5 6 7 8 0 DISPLAY 9 JUMP GUIDE FAVORITE 17 FAVORITE button - Changes the guide 15 18 Navigation buttons - The navigation to the next Favorite Stations. buttons move the highlight in on-screen displays. If there is no on-screen display, the up/down buttons activate the one-line guide. 16 EXIT 19 20 MENU SEARCH VOL 19 SELECT button - The SELECT button selects the highlighted item.
The MUTING, SLEEP and VOL +/buttons are set to control an audio receiver unless the Device Switch is set to “TV”. To change this setting, see Changing the remote default on page16. 1 2 3 MUTING button - Mutes the volume of the audio receiver. Press again to restore the volume. To operate your TV, move the device switch to TV or see Changing the remote default on page 16. To operate your audio receiver or TV, you must first set up the remote control (see pages 15–16).
TV/AV POWER button - Turn on and off 13 14 the TV. To turn on and off the DVD or VCR, move the device switch to DVD or VCR. To operate your TV, DVD, or VCR, you must first set up the remote control (see pages 15–16). 14 15 1 16 2 17 3 18 15 POWER button - Turn on and off the satellite receiver. 16 TV/VIDEO button - Switches between the inputs of your TV. To operate your TV you must first set up the remote control (see pages 15–16).
Remote control functions The navigation buttons are the most versatile (and most used) remote control feature. Using only the navigation buttons, you can perform virtually all on-screen functions including: • • • • Selecting a highlighted screen menu item. Moving the screen highlight (or cursor) up, down, left and right. Jumping directly to the OneLine™ Guide. Changing channels using the OneLine Guide. Use the navigation buttons to move up, down, left, or right through the on-screen displays.
Programming the remote The RM-Y807 and RM-Y812 remote controls can be programmed to operate control your other audio/video equipment. 1. Find the code(s) for the manufacturer of the device you want to operate with this remote control. You can find these codes on pages 45 and 46. 2. Press the CODE SET button. 3. Press the 0-9 buttons to input the manufacturer code. Then Press the SELECT button. The remote is set up to operate that device. 4. Test the remote control.
4 Using the menus This chapter describes: • • • • How to find the menus you need to perform common tasks (this page). How to purchase pay per view events (see 18). Using the Timer (see 19). How to set and modify preferences (see 19). The table below lists the MAIN MENU tabs, their submenus, and what they do. Menu function overview Main Menu tab Screens (see page) If you want to: Program Guide Program Guide • View and modify the program guide.
Purchasing pay per view (PPV) Select the Purchases menu tab to display lists of recently viewed and advance purchased pay per view events. You can choose PAST PURCHASES and UPCOMING PURCHASES. The event channel, title, start date and time, and cost is shown for each purchase. Thu, Aug 2 PAST PURCHASES Upcoming 5:04PM Purchase History Past Exit Return 1/12 Recently viewed event 9:00PM 102 $2.99 2/12 Previously viewed event 8:00PM 140 $29.
Setting guide preferences Highlight and SELECT the Guide Options tab from the MAIN MENU. The Options screen (shown below) allows you to customize operation to best suit your needs. Wed, Aug 1 GUIDE OPTIONS Theme Times Fav List Guide Style Fav Setup Options Ch.
To schedule or edit an The Schedule pane displays up to seven previously scheduled events at a time. event If more than seven events are already scheduled, use the navigation buttons to scroll down to view the additional events. Small arrows at the top or bottom of the list indicate that there are additional events. You can schedule events up to eleven months in advance. To schedule a program: 1. Highlight an upcoming program in the program guide and press SELECT.
Wed, Feb 20 AUDIO ADJUSTMENT Audio Video Exit Return Default Audio English Alternate Audio English Audio Balance 0,0 SRS TruSurround Off 2:15 AM Dolby Digital Factory Defaults Adjusting Audio settings Using Dolby Digital Select the Dolby Digital audio (SAT-A65A only), then use the CHANNEL audio (SAT-A65A only) (CH +/–) button to step through the audio tracks for the current program. For programs that are offered in Dolby Digital, the double-D symbol ( with the audio track title.
Adjusting audio balance To adjust the left/right audio balance, highlight and SELECT Audio Balance. Wed, Feb 20 AUDIO ADJUSTMENT Audio Video Default Audio English Alternate Audio English Audio Balance 0,0 SRS TruSurround Off Watch TV Main Menu Audio Balance Left Speaker Right Speaker Dolby Digital Done 0 0 2:15 AM Factory Defaults [ Setting left/right speaker balance Use the navigation buttons to increase or decrease the Audio Balance settings in the pop-up menu.
Using Caller ID Your DIRECTV Receiver shows you the name and telephone number (if available) of incoming telephone calls on your TV. You can also see the name, time, and telephone number of recent calls on your TV as shown in the figure below. You must subscribe to Caller ID from your local telephone company to use this feature. Highlight and SELECT the Caller ID tab from the MAIN MENU.
Use the pop-up button board to enter search words. You can highlight and SELECT the toggle icon on the default button board (see figure) to change it to a standard keyboard layout, if you desire. Highlight the desired letter using the navigation buttons. Press SELECT to enter the letter. Select OK when you are finished entering the desired search words. SEARCH SETUP Setup Result Wed, Aug 1 Entry Search forSearch words in the Program Titles and Descriptions within Guide.
• • • • Enable or disable the INPUT button on your remote control. Lock the system on a particular channel. Select English or Spanish language menus. Enable or disable Caller ID on and off.
Select menu language The Menu Language button allows you to display on-screen menus in English (default) or Spanish. Change color schemes You may select a menu color combination, or scheme, from these choices: Ocean, Storm, Foam, or Purple. Set translucency level The Translucency level of the on-screen display may be set to Solid, Heavy, Medium, or Light. Caller ID enable/disable Use the Caller ID menu button to turn the Caller ID feature on and off.
Using program guides 5 This chapter describes: • • • • Selecting a program guide style The different program guide styles (see page 27). Common program guide and menu features (see page 29). How to use the OneLine™ Guide (see page 30). How to set-up and use the Channel Mark Guide (see page 31). Personalize the program guide to show program listings that interest you. You determine how your choices appear onscreen by your guide selection.
The guide time expands to two hours when active ad highlights are unavailable. You can also turn the Picture-in-Guide feature off as shown in the figure below. Thu, Feb 17 6:00PM PROGRAM GUIDE All Channels DIRECTV Movies and Sports This Week None 6:00AM - 6:00AM (2001) At the top of every hour find out whats hot on HBO, Starz! & Showtime with DIRECTV MOVIES THIS WEEK. Followed by the teams & games to watch on DIRECTV SPORTS THIS WEEK at the bottom of the hour. Special.
Thu, Feb 21 LOGO GUIDE All Channels 1:54PM None 6:00AM - 6:00 AM (2001) At the top of every hour find out whats hot on HBO, Starz! & Showtime with DIRECTV MOVIES THIS WEEK. Followed by the teams & games to watch on DIRECTV SPORTS THIS WEEK at the bottom of the hour. Special. DIRECTV Movies and Sports This Week Logo guide with Picture-In-Guide disabled (description-only mode) To select a guide style: 1. Press the remote control MENU button. 2.
• Below the date and time, small icons indicating the status of the system or details about the currently highlighted program title may appear. These icons also appear in the Channel Banner as shown below. • The Channel Banner appears at the top of the screen whenever you use the CHANNEL (CH +/–) button to change channels. Press the remote control DISPLAY button to display the banner at any time.
Using Channel Mark The Channel Mark feature is a quick access guide to nine of your favorite channels. • While no other menus are displayed, press the SELECT button on the remote control to show the Channel Mark panel. • Use the navigation buttons to highlight the desired channel. The panel header displays the title of the program currently airing on the highlighted channel. • Press SELECT to tune to that channel.
32 Using program guides
6 Setting favorites and filters This chapter explains: • • • • • Using favorite channel lists Creating a channel list How to create a channel list (this page). How to rename a channel list (see page 34). Using Auto Set, Add All, and Del All functions (see page 34). How to use program guide Theme filters (see page 35). How to change guide times (see page 36). Channel Lists are provided to help you organize the hundreds of available channels into groupings suitable for your household.
To help you decide whether to include or exclude a certain channel, the title of the program currently airing on that channel appears at the top of the screen. 7. Scroll up or down to view channels and descriptions. Press SELECT to add channels to your list. 8. When you have added all of the channels you want to your list, use the navigation buttons to highlight and SELECT the Exit tab to resume viewing. Once you have created your lists.
Filtering the program guide Press the remote control GUIDE button while in a guide. A pop-up menu provides filtering tools and ways to access other guide styles. By combining each of these filter options, you can quickly narrow down channels to those that match your viewing interests. Using Theme Filters From the MAIN MENU, select the Guide Options tab. The CATEGORY FILTER menu appears, listing all available program category groups.
Selecting guide times Highlight the Times menu tab. The GUIDE TIMES menu shown below provides easy access to future programming information. Simply select the time you want the guide to begin. After a few seconds, the selected guide appears.
7 Using access controls This chapter explains: • How to lock and unlock the system (this page). • How to set maximum rating limits (see page 38). • Setting maximum spending and time limits (see page 39). Locks & Limits provides settings to help you control the viewing restrictions of DIRECTV® programming. When accompanied by the channel lists, these limits provide a great degree of control. The DIRECTV Receiver must be locked for the TV Timer, Rating and Spending limits to be enforced.
. PARENTAL LOCK Lock Fav Setup Ratings Limits Exit Return Wed, Jul 18 9:15 AM Enforce rating, spending, and viewing limits, and restrict access to Family list channels. Enter the 4 digit passcode to lock(unlock) your receiver. Lock LOCK SYSTEM Passcode OK Lock * * * * Cancel CONFIRM PASSCODE Passcode OK Lock * * * * Cancel Unlocking the system To remove the lock and its restrictions: 1. Highlight the Locks & Limits tab from the MAIN MENU. 2. SELECT the Unlock menu button. 3.
. RATINGS LIMITS Lock Fav Setup Ratings Limits Watch TV Main Menu Thu, Feb 7 Children Violence General Audience Block All Dialogue TV-PG Sex TV-14 Violence TV-MA Allow All Language 4:40PM Allow All Allow TV-14 Allow TV-14 Allow TV-14 Block All Allow TV-14 Movies Allow R Not Rated Allow All Highlight and SELECT the highest rating for violent program content you wish to allow. You may choose to Block All or Allow All instead of setting a specific limit.
40 Using access controls
Questions & Answers A Questions? Did we forget to tell you something? We have compiled some the most common questions and their answers here. We hope they help! Q I had a signal but now I am getting a message “Searching for satellite signal. To access related utilities, press SELECT.” What happened? A Rain clouds and snow can affect the satellite signal reception. This loss of signal is temporary. Also check for new growth on trees and bushes that could be blocking the signal.
Q I don’t see Caller ID information appear on screen when I receive a telephone call. What could be wrong? A There are several possible reasons. First, check that the satellite receiver is connected to an active telephone jack. Verify that the Caller ID feature is turned on (refer to page 26). Confirm that you subscribe to Caller ID service from your telephone company. Also check that your antenna is properly grounded as shown on page iv, as this can affect how the Caller ID feature works.
Q I picked up my telephone and it was making a hissing and squealing sound. Why? A Your digital satellite receiver was reporting any pay per view activity that may have occurred. This rarely happens and only lasts for a minute or so. Q What if my question isn’t listed here? A Contact your dealer or the Sony Satellite Information Center at 1-800-838-SONY (7669).
44 Questions & Answers
Manufacturers device control codes B The RM-Y807 and RM-Y812 remote controls are compatible with most models of the following brands: TV Codes VCR Codes ManufacturerAND Sony CodeODE NUMBER Manufacturer 101 Sony Code 301, 302, 303 Admiral (M. Ward) 102, 109, 114 Aiwa 338 ABC 112 Audio Dynamic 314, 347 Bell & Howell (M. Ward) 109, 114, 138 Bell & Howell (M.
VCR Codes (continued) AMP (Amplifier) Codes (RM-Y807 Only) ManufacturerAND CodeODE NUMBER Manufacturer Code Singer 315 Sony 501, 521 Samsung 313, 321, 322 Denon (Sharp) 516–518 Sanyo 330, 335 Harmon 519 Scott 312, 313, 321, 323–326, 335 JVC 506–508 Sharp 325, 327, 328 Kenwood 504, 505 Shintom 315 McIntosh 520 Signature 2000 (M.
Limited Warranty Digital Satellite Receivers SONY ELECTRONICS INC. (“SONY”) warrants this hardware Product against defects in material or workmanship as follows: 1. Labor: For a period of 90 days from the original date of purchase, if the Product is determined to be defective, SONY will repair or replace the Product at no charge. After this 90 day period, you must pay for all labor charges. 2.
Software License Agreement License and Restrictions Sony Electronics Inc. (“Sony”) grants User a license to Use one copy of the software which is provided to you as part of this Sony product (“Software”). "Use" means storing, loading, installing, executing or displaying the Software. User may not copy, modify the Software or disable any licensing or control features of the Software. No portion of the Software may be reproduced in any form, or by any means, without prior written permission from Sony.
Specifications Input Jacks Cable Type VHF/UHF IN 75 ohm f-type SATELLITE IN 75 ohm f-type RF REMOTE (SAT-A65A only) Supplied RF Antenna AC IN (120 V, 60 Hz) Supplied AC Power Cord Supplied Accessories Remote Control RM-Y807 (SAT-A65A) RM-Y812 (SAT-B65A) Size AA Batteries (2) Access Card Audio/Video Cable S-Video Cable Output Jacks SAT-A65A Cable Type VHF (SAT)/UHF OUT 75 ohm f-type VCR CONTROL Supplied VCR Controller LOW SPEED DATA RJ-11 DIGITAL AUDIO OUT (OPTICAL) Optical Rectangular
50
Index A E A/V receiver, connecting 10 Access card, new 24 Advance select 19 Aligning the antenna 4 Alternate audio 21 Antenna alignment values 4 cable, connecting 2 pointing 4 terrestrial 7 Audio balance 21 balance control 22 Azimuth angle, determining 4 Edit preselected program 20 Elevation angle, determining 4 English language menus 26 Entertainment system, connecting 10 B Balance, audio 22 Batteries, installiing 15 Brightness, video 22 Button board, change layout 24 C Caller ID, disable 26 Can’t Tap
Restore factory settings 26 T S Tabs, menu 29 Tag boxes 33 Telephone connection 3 Testing results 5, 6 satellite signal 5 Toggle icon 24 Translucency setting 26 Transponder signal strength 5 testing 5 TV connection types 3 Saturation, video 22 Scanning remote control codes 11 Schedule programs 19 Search entries 23 Search for words 23 SELECT control 15 Selecting a menu item 15 Signal indication 5 Spanish language menus 26 Surround sound, Dolby 10 S-Video connection 3 System menu functions 24 System Setup
Contact Sony with questions about your Digital Satellite Receiver: 1-800-838-SONY (7669) Printed in U.S.A. Contact DIRECTV with questions about service or programming: 1-800-DIRECTV (347-3288) www.DIRECTV.com www.sony.