DVD & MP3 RDS RECEIVER MODEL NO: ZE-200DVD OPERATION MANUAL ZE-200DVD Manual E+D_c.indd 1 26.05.
CONTENTS Before You Start DVD Player Setup General Functions......................................... 4 Precautions ................................................... 5 Care of Discs ................................................. 6 Region Number.............................................. 6 What the Marks on DVDs Indicate ............... 6 Disc Organization........................................... 7 Theft Protection ............................................. 8 What is What ■ Head Unit ........
INHALT Vor der Montage DVD Player Einstellungen Generelle Funktionen .................................. 32 Vorsichtsmassnahmen ................................ 33 Aufbewahrung von Disks ............................. 34 Ländercode .................................................. 34 DVD Labels & Bezeichnungen .................... 34 Disk Organisation......................................... 35 Diebstahlschutz ........................................... 36 Bedienungselemente ■ Head Unit ..................
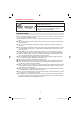
BEFORE YOU START Dolby Digital & ProLogic 5.1 channel surround setup — installation diagram of speakers Specifications for reproduction of Dolby Digital 5.1 sources (DVD discs) The sound system in a car - for best reproduction of 5.1 Dolby Digital encoded discs – requests the following speaker systems to be installed: e 2 front speakers e 2 rear surround speakers e a center channel speaker and e a subwoofer.
BEFORE YOU START DTS is a registered trademark of Digital Theater System, Inc. . Manufactured under license from Dolby Laboratories. Dolby, Pro Logic and the double-D symbol are trademarks of Dolby Laboratories PRECAUTIONS ■ Do not directly expose the headunit or parts of it to rain or moisture, in order to prevent the risk of fire and electric shock. ■ Do not place the monitor in the direct viewing range of the driver to avoid traffic accidents. ■ The product contains a Class 1 laser source.
BEFORE YOU START CARE OF DISCS How to hold disc Do not touch the disc on the information side with your fingers. Do not scratch the disc. Do not bend the disc. When not in use, put away the disc. Do not use irregular and deformed discs. Do not leave the disc in following places: Direct sunlight Near car heaters Dirt, dust and humid areas Seats and dashboards Disc cleaning Use a dry and soft cloth and always wipe from the center of the disc outwards.
BEFORE YOU START DISC ORGANIZATION DVD Discs On DVD-Video discs, the contents are divided chapters. With video material, a single file/ track (movie etc.) usually corresponds to a single title, containing different scenes that correspond to separate chapters. With karaoke discs, one song normally corresponds to one title. However, some discs are not structured like this, so bear this in mind when trying to use the search function.
BEFORE YOU START THEFT PROTECTION The front panel can be detached from the head unit and stored in the protective case provided. When you turn off the ignition, the panel will automatically slide down for a period of 25 sec. so you can take it off. This function can be turned off in the SETUP mode. 1. Removing the front panel ■ Press the OPEN/EJECT button on the head unit or turn off the front panel. ■ Grip the middle part of panel and pull it gently outward.
BEFORE YOU START WHAT IS WHAT? HEAD UNIT 1. POWER/MUTE button ■ Press to turn on the unit when in standby state; Press to mute the volume at power on state. ■ Press and hold over 2 sec, to turn it off. 2. VOLUME ADJUSTMENT/SELECT/LOCAL button ■ Rotate to adjust the volume. ■ Press to select sound effect setup, e.g.: Bass, Treble, Balance, Fader, Loudness, Sound Effects. ■ Press and hold over 2 sec, to switch between LOCAL/DISTANCE while the tuner is playing as a source. 3.
BEFORE YOU START 6. AUDIO button ■ When playing a DVD disc, press this button to select the audio language; when playing a VCD / MP3 disc, press it to select the audio sound channel. 7. SUBTITLE button ■ When playing a DVD disc, press this to select a title language. 8. RESUME button ■ Press the STOP button when playing a disc, later on you can press the RESUME button, and the player returns to the initial break(stop) point and start playing from this position. 6.
BEFORE YOU START 14. REMOTE SENSOR 15. RESET ■ Press the reset switch with a sharp tipped tool (needle, ball pen etc). All adjustments made will be erased and over-written by the factory default. 16. MODE button ■ Press to select the desired source 17. 1 button ■ Press for preset tuning. 18. 2 button ■ Press for preset tuning. 17. 1/DISC-buttons ■ Press for preset tuning and previous disc search when using a CDC player. 18.
BEFORE YOU START REMOTE CONTROL ■ The operation and functions of the keys on the remote are identical with the front panel – see descriptions under headunit in the previous chapter. ■ For the other additional keys refer to the chapter “DVD operation”. Use and care of the remote control Installing the battery Slide out the battery tray on the back of the remote control and insert the battery with the plus (+) and minus (-) poles pointing in the proper directions.
BASIC OPERATION POWER ON/OFF ■ Press the [POWER/MUTE] button on the front panel to turn the unit on ■ Press the [POWER/MUTE] button on the front panel for more than 2 sec to turn the unit off MUTE CONTROL ■ When the unit is turned on, press the [POWER/MUTE] button on the front panel to mute the sound; press this button once more to exit MUTE mode.
BASIC OPERATION Setup item Range Clock mode 12H/24H Default 12H Panel detachable ON/OFF OFF Beep ON/OFF ON Clock display ON/OFF ON Light in ON/OFF ON LCD flash mode 0~14 14 LCD contrast 0~7 2 Note: ■ If there is no operation within 5 sec or the [DISP] button has been pressed for a little longer once more, the unit will exit the system setup mode.
TUNER OPERATION SELECT TUNER FUNCTION Press the [MODE] button and select RADIO mode, then the headunit will switch over to the tuner. SELECT BAND Press the [BAND] button to select the band in the following sequence: FM1 FM2 FM3 AM1 AM2 FM1 SEARCH STATION Auto-search Station ■ Press the [ ] button to auto-search a radio station with increasing frequency. Repeat this step until the radio station you are looking for is found. ■ Press the [ ] button to auto-search a radio station with decreasing frequency.
TUNER OPERATION AF (Alternative Frequency) ■ When the received signal of a given radio station becomes too weak for clear reception, the AF function enables the tuner to switch over to the same station that s broadcasted on another frequency that transmits the same program, but can be received with a stronger signal level and reproduced in higher quality. EON (Enhanced Other Networks) ■ This function is to improve the traffic announcement function of RDS tuners.
TUNER OPERATION Switch to PTY state ■ Press the DIGIT button, then enter PTY mode. Now all the listening program type will be displayed on the LCD display. If no program type identification can be received, the LCD screen will display “NO PTY”. Program type selection button or the button to select the preferred program ■ When PTY is on, press the type as follows: After selecting PTY, press the BAND button to start the auto search for radio stations.
DVD PLAYER OPERATION BEFORE OPERATION ■ Before laser disc operation, make sure the TFT monitor has been properly connected to this headunit. ■ The audio output mode depends on the type of laser disc and keep in mind that different discs can have different output modes. Carefully read the description of disc before operation. Release/Open Front Panel ■ Press the [ ] button to slide the front panel down. Please see the sketch below.
DVD PLAYER OPERATION 2-CHANNEL ~ 5.1-CHANNEL SETUP ■ When the unit is set to 2-channel mode, pressing the [4/2-6CH] button for a longer period of time will set the mode to 5.1 channel. This will be indicated on the LCD display with “FULL 6CH”. Note: ■ The volume of 2-CH and 5.1-CH modes is controlled and stored independently. Before you switch to 5.
DVD PLAYER OPERATION SELECT SUBTITLE LANGUAGE ---ONLY DVD ■ When the disc is playing, the subtitle language will be chosen according the initial preset of the preferred subtitle language. To change this, press the [SUBTITLE] button on the remote control to switch among the disc-supported languages. If the disc only supports one subtitle, the function won’t work. If no setting is chosen within 5 sec, the language description will disappear.
DVD PLAYER SETUP SET SPEAKER ■ Insert DVD disc and start playback. ■ Press the [SETUP] button on the remote control or the button on the front panel to enter the setup menu. ■ Select e SPEAKER SETUP e and press [ENTER] to confirm. ■ Set Center and Surround speakers ON or OFF according to your installation. ■ Set the delay time of Center and Surround speakers. ■ Exit Speaker Setup Menu. ■ Use the direction buttons to select [MAIN PAGE] and press [ENTER] to exit speaker setting menu.
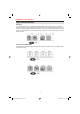
DVD PLAYER SETUP SET TV ASPECT ■ Select [GENERAL SETUP] and then press [ENTER] to enter General Setup. ■ Select [TV DISPLAY], there are 3 options to choose from (see drawing below). Select the correct option and press [ENTER] to confirm. Set OSD Language ■ Select [GENERAL SETUP]; and then press [ENTER] to enter General Setup. ■ Select [OSD LANG] to select OSD Language including English and Chinese in this system, and then press [ENTER] to confirm.
DVD PLAYER SETUP Set Audio Language ■ Most DVD’s support different audio languages. Select default audio language [AUDIO] under section [PREFERENCE SETUP] in the main menu and then confirm with pressing [ENTER]. If the disc that is played does support the selected language, playback will automatically begin with the desired (pre-selected) audio language. ■ During playback, press the [AUDIO] button on the remote control to directly switch among the languages present on the DVD disc.
DVD PLAYER SETUP SET PARENTAL LOCK & PASSWORD ■ Some DVDs let you use the parental lock function to restrict viewing of violent and adult oriented scenes by children. You can set the parental lock level in eight different steps as desired. ■ Select [PREFENCES SETUP], select [PARENTAL], select a suitable level and press [ENTER] to confirm. This operation requests you to input a password. The default password is 3308. For modifications of the password, refer to the next paragraph.
CD CHANGER OPERATION / AUX OPERATION MODE SWITCH ■ Press the [MODE] button to switch from RADIO e DVD e CDC e AUX e RADIO ■ When no disc is inserted to the headunit, it will directly switch to CDC mode. If a CDchanger is not connected to the headunit, you won’t be able to select CDC mode.
INSTALLATION & CONNECTION INSTALLATION NOTES ■ If possible, get this unit installed by a qualified dealer/installer. ■ Before mounting this unit to the dashboard, properly connect all wires and check if the unit and all peripheral devices work as intended. ■ Use only the mounting hardware supplied with the set contents to ensure proper installation. The use of unauthorized parts can cause malfunctions and/or damage.
INSTALLATION & CONNECTION INSTALLATION PROCEDURE Unit Installation If your vehicle has a 1-DIN cutout in the dashboard, you can mount this DVD headunit directly without any further modifications. ■ Disconnect the power wire from the negative (-) battery terminal before you start any wiring work. ■ Insert the metal mounting bracket into the dashboard and bend the mounting tabs outwards with a screwdriver. ■ Connect mounting bolt with a proper spanner.
INSTALLATION & CONNECTION CONNECTION OF AV AND POWER WIRES Auto-Antenna Cable Note: Connected to auto-antenna relay control terminal (Max 300mA, 12C DC) 28 ZE-200DVD Manual E+D_c.indd 28 26.05.
INSTALLATION & CONNECTION SPEAKER CONNECTION Left+ Left- Right+ Right- Front Speaker White White/Black Gray Gray/Black Rear Speaker Green Green/Black Violet Violet/Black Note: Do only use groundless speaker systems (TWO wires for each speaker!). Input power of used speakers must be over 45W, or damage may result. Speaker impedance: 4Ω Speakers with an impedance too big or too small may affect output power and/or damage the unit or the speakers.
INSTALLATION & CONNECTION OUTPUT POWER AMPLIFIER CONNECTION: ■ Connect an external power amplifier correctly according to the following connection diagram. Incorrect connection will cause incorrect soundstage and also may cause damage to the speakers. Note: In tuner, AUX or DVD stereo mode, the 5.1-CH output is analog. In 6-CH DVD mode, there is Dolby 5.1-CH output. FUSE ■ The inline fuse is rated 10A. If it needs to be replaced, please only use a identical fuse with identical rating and specs.
INSTALLATION & CONNECTION The disc is dirty. Playback is not possible. Clean disc. The loaded disc is a type this unit cannot play. A video system disc not compatible with this unit is loaded. No sounds are heard. The volume level does not rise. Cables are not connected correctly. There is no picture. The monitor or video line-out is not connected right. Check what type the disc is. Change to a disc compatible to your video system. Connect the cables correctly. Press [mute] button twice.
VOR DER MONTAGE Klangfeld von Dolby Surround 5.1 Systemen — und die Lautsprecherplazierung Spezifikationen vom Dolby Digital 5.1 System (DVD Disks) Ein DVD taugliches Dolby Digital Car-Hifi Setup besteht aus einem Paar Frontlautsprechern, einem Center-Kanal Lautsprecher, zwei Rücklautsprechern, einem Subwoofer System – und den für die Bildwiedergabe nötigen Komponenten wie TFT Monitor und DVD Head Unit.
VOR DER MONTAGE DTS ist ein eingetragenes Warenzeichen von Digital Theater System, Inc. Hergestellt unter Lizenz von Dolby Laboratories. Dolby, Pro Logic und das Doppel-D Symbol sind eingetragene Warenzeichen von Dolby Laboratories. ZU BEACHTEN WARNUNG! ■ Vermeiden Sie es, dieses Gerät übermässiger Feuchtigkeit oder gar Regen auszusetzen. Ein elektrischer Schlag, oder auch ein Brand könnten dadurch resultieren.
VOR DER MONTAGE PFLEGE VON CD’S/DVD’S ■ Berühren Sie niemals die Datenseite der Disks. Fingerabdrücke lassen die Fehlerkorrektur unnötig arbeiten. ■ Versuchen Sie Kratzer auf der Datenseite der Disk zu vermeiden. ■ Biegen Sie die Disks nicht, es könnten Risse entstehen! ■ Verstauen Sie die Disks in einem geeigneten Disk-Etui, wenn nicht in Gebrauch. ■ Verwenden Sie niemals verformte oder sonst augenscheinlich beschädigte Disks.
VOR DER MONTAGE STRUKTURELLER AUFBAU VON DVD DISKS Der Inhalt von DVD-Disks ist in Kapitel unterteilt, währendem andere Video-Formate wie VCD und SVCD mit Tracks arbeiten, die oft den gesamten Film beinhalten. Auf Karaoke CD’s sind oft die einzelnen Songs als Einzeltrack abgespeichert. Dies gilt es zu beachten, wenn die Suchfunktion sinnvoll genutzt werden soll. Suchfunktion sinnvoll genutzt werden soll. Video-CD und MP3-CD Auf MP3-CD’s und auch Video-CD’s ist der Inhalt in Tracks aufgeteilt.
VOR DER MONTAGE DIEBSTAHLSCHUTZ IHRES GERÄTES Das Frontpanel kann vom Gerät entfernt werden. Ein mitgeliefertes Plastiketui ermöglicht die Aufbewahrung des Bedienteils, wenn es abgenommen wurde. Wenn Sie die Zündung von Ihrem Fahrzeug ausschalten fährt der Motorschlitten das Bedienteil runter – und Sie haben 25 Sekunden Zeit um das Panel zu entfernen. Diese Funktion kann im Setup-Menü abgeschaltet werden. 1.
VOR DER MONTAGE BEDIENUNGELEMENTE HEAD UNIT 1. POWER/MUTE ■ Drücken Sie diese Taste um das Gerät in seinen Standby Betrieb zu bringen. Wenn das Gerät eingeschaltet ist, bewirkt das Drücken auf diese Taste die Aktivierung der MutingFunktion (Stummschaltung). ■ Durch drücken der Taste für mehr als 2 Sek. wird das Gerät ausgeschaltet. 2. VOLUME DREHKNOPF/BESTÄTIGUNG/LOCAL ■ Drehen dieses Knopfes bewirkt eine Veränderung der Lautstärke.
VOR DER MONTAGE 6. AUDIO ■ Drücken Sie diese Raste um die Tonspur-Sprache während der Wiedergabe eine DVD auszuwählen. Bei der Wiedergabe einer VCD MP3 Disk kann durch drücken dieser Taste die Audio Tonspur gewählt werden. 7. SUBTITLE ■ Drücken dieser Taste während der DVD Wiedergabe ermöglicht die Auswahl der vorhandenen Untertitel-Sprachen. 8. RESUME ■ Drücken Sie die Taste STOP bei der Wiedergabe einer Disk und dann die Taste Resume.
VOR DER MONTAGE 13. 5643 ■ Drücken Sie die Richtungspfeil Tasten um den Cursor zu bewegen. ■ Drücken der Taste 6 für mehr als 2 Sekunden bringt das Gerät in das Displaywinkel Setup. Erneutes drücken dieser Taste bewirkt eine Änderung des Winkels vom Bedienpanel. ■ Im DVD Wiedergabe Modus gelangen Sie durch das Drücken der Taste 5 für mehr als 2 Sekunden in das Setup Menü. 14. REMOTE SENSOR 15.
VOR DER MONTAGE FERNBEDIENUNG ■ Die Tastenbelegung und Beschriftung entspricht dem Bedienteil – Beschreibung der Funktionen siehe vorangehendes Kapitel. ■ Einige Tasten die in der Beschreibung nicht erläutert werden sind im Kapitel DVD Wiedergabe beschrieben. Gebrauch und Pflege der Fernbedienung Batterie einsetzen Ziehen Sie das kleine Batteriefach auf der Rückseite der Fernbedienung zurück. Setzen Sie nun die Batterie ein und achten Sie auf die richtige Polung.
GRUNDFUNKTIONEN POWER ON/OFF ■ Drücken Sie die Taste [POWER/MUTE] um das Gerät einzuschalten ■ Drücken Sie die Taste [POWER/MUTE] etwas länger, um das Gerät auszuschalten MUTE ■ Wenn das Gerät eingeschaltet ist, drücken Sie die Taste [POWER/MUTE] um den Tonausgang des Gerätes stummzuschalten. Wenn Sie diese Taste erneut drücken, verlassen Sie den Stummschaltungs (MUTE) Mode.
GRUNDFUNKTIONEN Auswahl Default Modus Zeitanzeige 12H/24H 12H Bedienteil abnehmbar ON/OFF OFF Beep ON/OFF ON Zeitanzeige ON/OFF ON Beleuchtung ON/OFF ON LCD Blink-Modus 0~14 14 LCD Kontras 0~7 2 Anmerkung: ■ Wenn während 5 Sekunden keine Eingabe erfolgt, oder Sie nicht nochmals Taste [DISP] drücken, beendet das Gerät den Setup-Mode.
TUNER-BEDIENUNG ANWÄHLEN VOM TUNER Drücken Sie die Taste [MODE] und wählen Sie “RADIO” aus, um den eingebauten RDS Tuner zu aktivieren. AUSWAHL VOM FREQUENZBAND Drücken Sie die Taste [BAND] um sich durch die nachfolgenden Radiostations-Bänder durchzuwählen (FM = UKW Band): FM1 FM2 FM3 AM1 AM2 FM1 SENDERSUCHE Automatischer Sendersuchlauf ■ Drücken Sie die Taste [ ] um den Stationssuchmodus zu einer höher gelegenen Frequenz zu starten.
TUNER-BEDIENUNG RDS (RADIO DATA SYSTEM) FUNKTIONEN Während des Empfangs eines UKW Senders werden mittels „Radio Data System“ zusätzliche Informationen übertragen, welche die RDS Funktionen des Tuners unterstützen.
TUNER-BEDIENUNG Traffic Program Suche oder um einen TA ■ Wenn die TA Funktion aktiviert ist, drücken Sie die Tasten unterstützenden Sender zu suchen. ■ Wenn TA ausgeschaltet ist, aktivieren Sie die TA Funktion – der Tuner sucht nun einen entsprechenden Sender der die TA Durchsagen unterstützt. Umschalten auf PTY ■ Drücken Sie die Taste {DIGIT} um die PTY Funktion zu aktivieren (Anzeige von Programm-Typ). Die Sender werden nun mit ihrer PTY Kennung am LCD-Display angezeigt.
TUNER-BEDIENUNG SUCHEN VON SENDERN MIT PTY KENNUNG ■ Drücken Sie eine beliebige Taste von 1 bis 6, das gegenwärtige Programm wird mit PTY Kennung für 5 Sekunden auf dem Display angezeigt. ■ Drücken Sie die Taste Band und der Tuner sucht nun einmal quer durchs UKW Band und wenn die PTY Einstellung verlassen wird, wird das gefundene Programm wiedergegeben.
DVD PLAYER BEDIENUNG VOR INBETRIEBNAHME ■ Bevor Sie eine Disk ins Gerät einschieben, vergewissern Sie sich, dass das Bedienteil sauber am Gerät eingeratstet ist. ■ Die Tonwiedergabe dieses Gerätes hängt von dem Format der abgespielten Disk ab. Lesen Sie die Kapitel mit den Formatbeschreibungen aufmerksam durch, bevor Sie mit dem Abspielen von unter4shiedlichen Disks beginnen. Disk-Schacht freigeben ■ Drücken Sie die Taste [ ] um das Bedienteil nach unten zu fahren und den Disk-Einzug freizugeben.
DVD PLAYER BEDIENUNG 2-KANAL ~ 5.1-KANAL UMSCHALTUNG ■ Wenn sich das Gerät im 2-Kanal Modus befindet, drücken Sie die Taste [4/2-6CH] und das Gerät wechselt auf 5.1 Ausgabe. Dies wird auf dem LCD Display mit „FULL 6CH“ angezeigt. Anmerkung: ■ Die Wiedergabelautstärke vom 2-Kanal und dem 5.1-Kanal Modus werden separat verwaltet und abgespeichert.
DVD PLAYER BEDIENUNG AUSWAHL VON KAPITEL/TRACK ODER SPIELZEIT ■ Drücken Sie die Taste [GOTO] auf der Fernbedienung um entweder die Spielzeit (für CD/ VCD) oder die das gewünschte Kapitel (DVD) auszuwählen. ■ Drücken Sie eine der Richtungspfeil Tasten, um eine Auswahl zu treffen, und geben Sie anschliessend entweder die Kaptitelnummer oder die Spielzeit ein, um zur gewünschten Stelle zu gelangen.
DVD PLAYER EINSTELLUNGEN LAUTSPRECHERSETUP ■ Laden Sie eine DVD und starten Sie die Wiedergabe. ■ Drücken Sie die Taste [SETUP] auf der Fernbedienung, oder die Taste an der Vorderseite des Gerätes, im ins Setup Menü zu gelangen. ■ Wählen Sie Speaker Setup e SPEAKER SETUP e und drücken Sie die Taste [ENTER] um die Auswahl zu bestätigen. ■ Stellen Sie den Center-Lautsprecher und die hinteren Surround Lautsprecher auf ON oder OFF – je nach dem ob diese vorhanden sind.
DVD PLAYER EINSTELLUNGEN EINSTELLUNG BILDFORMAT ■ Wählen Sie [GENERAL SETUP] aus und bestätigen Sie diese Auswahl drücken der [ENTER] Taste. ■ Wählen Sie [TV DISPLAY], es gibt in diesem Menü drei Positionen zu Auswahl (siehe Grafik unten). Wählen Sie WIDE wenn Sie einen 16:9 Monitor betrieben wollen, oder eine der anderen Varianten (Pan&Scan oder Letterbox). Drücken Sie [ENTER] zur Bestätigung Ihrer Wahl.
DVD PLAYER EINSTELLUNGEN Einstellung der Sprache für die Tonspur ■ Die meisten DVD Disks beinhalten mehrere Tonspuren in unterschiedlichen Sprachen. Sie können – wenn es die verwendeten DVD’s zulassen – Ihre Wunsch Sprache für die Tonspur vorwählen. Gehen Sie hierzu auf die Auswahl [AUDIO] im Menü [PREFERENCE SETUP] und bestätigen Sie die gewünschte Default Sprache der Tonspur durch Drücken der Taste [ENTER].
DVD PLAYER EINSTELLUNGEN Einstellung vom Monitor Typ (PAL/NTSC) ■ Einstellung Video-System in [TV TPYE] in den Optionen von [PREFRENCE SETUP]. ■ Drei mögliche Typen sind wählbar, (siehe Grafik unten). ■ Wählen Sie den Monitor Typ entsprechend dem verwendeten Monitor aus – oder testen Sie welche Einstellung ein stabiles Bild auf dem Monitor ergibt – und bestätigen Sie mit drücken der Taste[ENTER].
DVD PLAYER EINSTELLUNGEN EINSTELLUNG VON PARENTAL LOCK & PASSWORT ■ Einige DVD lassen es zu, dass Sie über die Parental Lock Funktion die Wiedergabe von DVD die Gewaltszenen oder sonstiges nicht für Kinder geeignetes Material einschränken können. Die Einschränkung kann in verschiedenen Stufen erfolgen, muss aber von der DVD unterstützt werden. ■ Wählen Sie [PREFENCES SETUP], dann [PARENTAL] und wählen Sie nun den gewünschten Level des Schutzes.
CD CHANGER OPERATION / AUX OPERATION BETRIEBSMODUS ■ Drücken Sie die Taste [MODE] um die möglichen Quellen wie folgt anzuwählen RADIO e DVD e CDC e AUX e RADIO ■ Wenn keine Disk im Einzeleinzug des Gerätes geladen ist, können Sie direkt CDC (Multi CD-Wechsler) anwählen. Wenn kein Wechsler angeschlossen ist, kann die die Funktion CDC nicht angewählt werden. PAUSE UND WIEDERGABE ■ Wenn eine Disk gerade spielt, drücken Sie die Taste [PAUSE] um die Wiedergabe zu pausieren.
INSTALLATION & ANSCHLUSS INSTALLATION NOTES ■ Wenn immer möglich, lassen Sie dieses Gerät durch den qualifizierten Fachhandel montieren. ■ Zur Not kann das Gerät auch durch eine Vertrags-Werkstätte Ihrer Fahrzeugmarke installiert werden. ■ Bevor das Gerät fest im Montagerahmen eingerastet wird, sollte vorab die korrekte Funktion getestet werden.
INSTALLATION & ANSCHLUSS INSTALLATION DES GERÄTES Wenn Ihr Fahrzeug über einen 1-DIN Geräteschacht verfügt, können Sie dieses DVD Headunit ohne weitere Anpassungen direkt in den vorhandenen DIN-Schacht montieren. ■ Schieben Sie die Montagerahmen aus Blech vollständig in den Schacht ein. Durch umbiegen der Blechlaschen am Rahmen, lässt sich dieser fest im Schacht verankern. ■ Montieren Sie den Stehbolzen hinten am Gerät, falls erwünscht.
INSTALLATION & ANSCHLUSS VERBINDUNGSKABEL & ANSCHLÜSSE Batterie (12V Dauerstrom) Anschluss an den Dauerstrom des Fahrzeuges (+12V Batterie). ACC (Zündung) Anschluss an die Zündung des Fahrzeuges (+12V DC) Ground (Masse) Anschluss an einen sauberen Massepunkt des Fahrzeuges. Auto-Antenne Anschluss an das Antennenrelais,(Schaltstrom max. 300mA, 12C DC) 58 ZE-200DVD Manual E+D_c.indd 58 26.05.
INSTALLATION & ANSCHLUSS ANSCHLUSSBELEGUNG LAUTSPRECHER Left+ Left- Right+ Right- Front Speaker White White/Black Gray Gray/Black Rear Speaker Green Green/Black Violet Violet/Black Anmerkung: ■ Die Lautsprecher-Ausgänge dürfen nur an Lautsprecher angeschlossen werden, die über eine separate Masseführung verfügen. ■ Die Belastbarkeit der angeschlossenen Lautsprecher sollte 45W oder mehr betragen.
INSTALLATION & ANSCHLUSS ANSCHLUSS EINES EXTERNEN VERSTÄRKERS ■ Bitte schliessen Sie einen externen Verstärker gemäss dem untenstehenden Diagramm an. Nicht richtig zugeordnete Cinch-Verbindungen ergeben einen schlechten Klang mit falscher Bühnenabbildung und können im schlimmsten Fall zur Zerstörung der angeschlossenen LS-Systeme führen. Anmerkung: Beachten Sie: Bei der Wiedergabe von Tuner / AUX-Signalen und auch der Wiedergabe von DVD’s mit 2-Kanal stereo Information erfolgt die Ausgabe als analoges 5.
INSTALLATION & ANSCHLUSS Das Gerät lässt sich mit der Fernbedienung nicht steuern. Die Gerät funktioniert nicht korrekt wenn die entsprechende Taste auf der Fernbedienung gedrückt wird. Keine Wiedergabe möglich. Die Batterie ist leer. Legen Sie eine neue Batterie in die Fernbedienung ein. Gewisse Disks unterstützen manche Optionen nicht. Probieren Sie eine andere Disk. Die Disk ist verschmutzt. Reinigen Sie die Disk. Die Disk hat ein Format, welches von diesem Gerät nicht unterstützt wird.
INSTALLATION & CONNECTION Keine Untertitel werden angezeigt. Die Disk unterstützt keine Untertitel. Untertitel können nicht angezeigt werden, wenn sie nicht auf der Disk gespeichert wurden. Die Disk wird nicht in der Sprache und dem Untertitel wiedergegeben, wie es im SET – UP eingestellt wurde. Die Disk unterstützt die Sprache nicht, die Sie im SET – UP ausgewählt haben. Es ist nicht möglich die Disk in einer Sprache wiederzugeben die nicht darauf gespeichert ist.
WARRANTY / GARANTIE 2 YEARS LIMITED WARRANTY Dear customer Thank you for purchasing this ZENEC product. It is advisable to keep the original packing material for any future transporting of the product. Should your ZENEC product require warranty service, please return it to the retailer from whom it was purchased or the distributor in your country. This ZENEC product is warranted against defective materials or workmanship for a period of TWO years from date of purchase at retail.
ZENEC Model: ZE-200DVD Serial Number:........................................................................................................................................ Date of Purchase: ................................................................................................................................... Your name: ............................................................................................................................................. Your address: ....................