DIAGNOSTIC SERVICE MANUAL ROOF TOP AC/HP SYSTEMS TROUBLESHOOTING MECHANICAL CONTROL COMFORT CONTROL ANALOG CONTROL USA SERVICE OFFICE Dometic Corporation 2320 Industrial Parkway Elkhart, IN 46516 574-294-2511 CANADA Dometic Distribution 46 Zatonski Unit 3 Brantford, Ontario CANADA N3T 5L8 519-720-9578 Form No. 3311071.000 08/07 ©2007 Dometic Corporation LaGrange, IN 46761 3311071.
Safety Instructions Foreword This service manual is the result of the dedication of The Dometic Corporation Technical staff and its engineers in giving service people the necessary instruction for making accurate analyses of certain conditions. Provided is a diagnostic chart leading a qualified mechanic into the service manual pages to locate and solve symptoms which may occur.
CONTENTS PAGE NO. Diagnostic Flow Chart ............................................................. 4 Section 1 Operation 1.1 1.2 1.3 Section 2 Mechanical Controls.................................................................................. 9 Analog Controls......................................................................................... 9 Comfort Control Center........................................................................... 10 AC Power Requirements 2.1 2.2 2.3 2.
CONTENTS PAGE NO. Section 6 Configuration...................................................................................................... 29 Section 7 Thermostat Location.......................................................................................... 30 Section 8 Other 8.1 8.2 8.3 8.4 8.5 8.6 8.7 8.8 Section 9 Ambient Temperature.............................................................................. 31 Heat Gain..................................................................
SYMPTOM CAUSE PAGE # Mechanical Control Operation AC Voltage Breaker Changeover Thermostat Selector Switch Wiring 09 13 13 17 16 33 Analog Control Operation Ambient Temperature AC Voltage DC Voltage Breaker Changeover Thermostat Analog Thermostat Analog Power Module Wiring 09 31 13 16 13 17 17 19 33 Comfort Control Configuration Operation Ambient Temperature AC Voltage DC Voltage Breaker Cable Assembly Ambient Sensor Remote Temperature Sensor Comfort Control Power Module 29 10 31 13 16 13 19 25 2
SYMPTOM CAUSE PAGE # Analog Control AC Voltage Start Device Start Capacitor Run Capacitor Overload Compressor 13 21 22 22 23 23 Comfort Control AC Voltage Start Device Start Capacitor Run Capacitor Overload Compressor 13 21 22 22 23 23 Mechanical Control Operation AC Voltage Start Device Start Capacitor Run Capacitor Mechanical Thermostat Short Cycle Air Flow Obstruction Overload Compressor 09 13 21 22 22 16 40 26 23 23 Analog Control AC Voltage Start Device Start Capacitor Run Capacitor Thermo
SYMPTOM CAUSE PAGE # Analog Control Wiring Run Capacitor Motor Analog Thermostat/Cable Analog Power Module 33 22 23 17 19 Comfort Control Wiring Run Capacitor Motor Comfort Control Power Module 33 22 23 20 Mechanical Controls Selector Switch Wiring Motor 16 33 23 Analog Control Wiring Motor Analog Thermostat/Cable Analog Power Module 33 23 17 19 Comfort Control Wiring Motor Comfort Control Power Module 33 23 20 Mechanical Control Operation Ambient Temperature Air Flow Mechanical Thermosta
SYMPTOM CAUSE PAGE # Mechanical Control Mechanical Thermostat Change Over Thermostat Wiring Reversing Valve 16 17 33 26 Analog Control Analog Thermostat Change Over Thermostat Wiring Reversing Valve 17 17 33 26 Comfort Control Ambient Temperature Sensor Configuration Wiring Reversing Valve 25 29 33 26 Mechanical Controls Air Flow Heat Gain/Loss Mechanical Thermostat 26/29 31 16 Analog Control Air Flow Heat Gain/Loss Analog Thermostat Thermostat Location 26 31 17 30 Comfort Control Air Flo
SECTION 1 AFTER SHUTTING THE AIR CONDITIONER DOWN WITH EITHER SELECTOR SWITCH OR THERMOSTAT, WAIT AT LEAST TWO (2) MINUTES BEFORE RESTARTING. THIS ALLOWS THE REFRIGERANT PRESSURE TO EQUALIZE AND COMPRESSOR TO START EASILY. FAILURE TO FOLLOW THIS INSTRUCTION MAY CAUSE CIRCUIT BREAKERS OR FUSES TO OPEN. Operating Instructions The operating instructions can change from one model number to another.
• Auto Position: Air Conditioner fan runs whenever cooling is required and stops whenever cooling is not required. (I.E.: Temperature set point reached) • ON Position: The fan will run continuously. The compressor will turn ON and OFF to maintain set temperature. D. Set the System Switch to cool position (located at the left side of the thermostat). The air conditioner compressor will now come on when cooling is required and cycle off when the temperature level selected is reached.
An incandescent light will illuminate the LCD area when a selector button is pushed for easy reading at all times. ion ZONE 2. You can select the desired temperature and fan speeds for each zone independently, thereby keeping your bedroom cooler than the front portion of the vehicle. To determine the number of established zones in your vehicle, depress the ZONE push-button. ZONE 1 will be the first ZONE to appear in the LCD readout.
5. If your vehicle contains more than one ZONE, depress the ZONE push-button to select ZONE 2, and repeat procedures from Step 1. Repeat entire procedure for each additional zone. compressor only no fan, this is the DEFROST cycle. During the defrost cycle the hot refrigerant is sent to the outside coil to melt the frost and ice. This also will build heat in the refrigerant.
Important: COMFORT CONTROL CENTER SPECIAL CONTROL FEATURES A. Auto Fan: When AUTO FAN is selected, the fan speed will be determined by the mode you are in. 1. Cool Mode: In the COOL mode, which is the air conditioning mode, the fan will automatically select the speed depending upon the difference between the temperature SETPOINT and the room temperature. When that difference is: 8° or more The fan will operate on HIGH 4° to 8° The fan will operate on MED 4° or below The fan will operate on LOW 2.
TYPICAL AIR CONDITIONER WIRING DIAGRAM TYPICAL AIR BOX WIRING 115 VAC FIELD WIRING 60 HZ 1 PH FACTORY WIRING USE COPPER LINE SPLICE TYPICAL CCC CONTROL BOARD WIRING CONDUCTORS * -NOT USED ON SOME MODELS ** -HEATPUMP MODELS ONLY ONLY FIELD WIRING OPTIONAL WIRING FACTORY WIRING LINE SPLICE USE COPPER CONDUCTORS ONLY WHT BLK ELEC CONN FROM A/C TO OPTIONAL ELEC HEAT 3 WHT 2 WHT 1 ROTARY SWITCH 2 BLK 1 L1 3 YEL 2 H 4 RED 4 C 5 TO OPT ELEC HEAT GRN/YEL THERMOSTAT WHT BLU BLK
Wiring Diagrams Wiring Diagram for 3107541.009 Cool & Furnace Wiring Diagram for 3107541.017 Cool, Furnace & Heat Strip Wiring Diagram for 3107546.
2.4 Field Wiring C. The switch should be checked with an Ohmmeter to determine if continuity exists. The chart shows the correct terminals to check. Example: Switch is in high cool position the Ohmmeter shows continuity between L1, C and 1. If the unit’s compressor or fan fails to operate, chances are it is not receiving proper power. Be sure the power cord is plugged in and fuses or breakers are OK. Wires at the roof top unit are tight.
F. 4.4 Analog Thermostats Immersing the sensing bulb in ice water should cause the points to open. Failure to open or break continuity indicates it is defective and should be replaced. The heat/cool thermostat is very similar to the cooling only thermostat except it contains two sets of contacts. When the cooling contacts make connection, the heating contacts break connection.
Analog Thermostat Testing If nothing operates on the unit, turn the System Switch to “OFF”, FAN Auto/On Switch to “AUTO”, and FAN HIGH/ LOW Switch to “LO”. Remove the Analog Thermostat cover and verify the following voltage readings: Verify 12 VDC into upper control board and fuse is good first. Check for voltage between the GND terminal and: 1. FAN terminal for voltage ranging from 8.38 to 17.31 VDC 2. HI FAN terminal for voltage ranging from 8.38 to 17.31 VDC 3. FUR terminal for voltage ranging from 8.
If a telephone extension cable is used it will not light up the thermostat. Dometic does not provide the cable for the Comfort Control system. The cable is provided at time of install. A cable tester available 3107127.007. To check DC voltage at the thermostat , remove from mounting bracket. At the back side of the thermostat above the RJ-11-6C4P jack are four solder points where DC input can be checked.
Roof Top Heat Pump When the thermostat calls for that function and the Circuit is completed the light will illuminate. This is an energized circuit. Shock can occur if not tested properly. Testing is to be done by a qualified service technician. 3 6 2 5 4 To verify circuits are being completed by the Analog control board/box, you would first disconnect the 6-pin plug connector from the Analog Control Box.
GREEN/YELLOW YELLOW WHITE BLACK RED BLUE If the compressor is not coming on disconnect the yellow wires, cold control, remote temperature sensor and wait 2 minutes and try again. Heat Pump Power Module The way the Comfort Control knows it is a heat pump it looks for ohms resistance in the red two pin connector at the main power board. If there is nothing in the red connector the system will operate in the heat mode when the compressor comes on.
4.10 Capacitors Duo-Therm Air Conditioners and Heat Pumps use three different capacitors: 1) compressor run capacitor 2) compressor start capacitor and 3) fan/blower capacitor. On some units the compressor run and fan/blower capacitor are in the same case. This is an energized circuit. Shock can occur if not tested properly. Testing is to be done by a qualified service technician. 4.10.1 Run Capacitor The run capacitor should be checked with a capacitor tester.
Use an ohmmeter to check for continuity through the overload device. If no continuity is found and the compressor is hot, allow 15 to 20 minutes for the compressor to cool. If a repeat of the test shows the overload to be open, it is defective and requires replacement. Note on some 15,000 BTU units the overload may be an internal component and non replaceable. and return to 15,000 Ohms. Reversing the lead will show the same results.
4.15 Comfort Control Temperature Sensors 4.13 Ducted Heat Strip The comfort control uses three types of remote temperature sensors. 1. Remote room sensor used when multiple zones are used. 2. Cold (FREEZE) Control sensor used to stop the inside coil from freezing. 3. Ambient sensor used on Heat Pumps to tell the control system it is a heat pump and communi cate the outside temperature. Note: On all thermistor type sensors when testing it is imperative to check each wire to chassis ground.
4.15.3 Ambient Sensor 4.15.2 Cold (Freeze) Control Red Two Pin Plug The ambient sensor is the outside air temperature sensor and used on Comfort Control heat pumps only. This device allows the heat pump to operate down to approximately 32° F. To check the ambient sensor, first measure the outside temperature near the sensor. Unplug the sensor (red plug) from the AC power module board. Using an ohmmeter, check the ohms through the ambient sensor on the wire side of the plug.
4.16 Reversing Valve Heat Pump Frame all sides of 14-1/4″ x 14-1/4″ (±1/8") opening Base Pan The reversing valve is the heart of a heat pump. It changes the direction of the refrigerant flow through the coils, and changes the system from cooling to heating. DuoTherm roof top heat pumps have the solenoid energized in the cool mode. One method of checking the reversing valve is to feel the refrigerant line at the top of the inside coil. In the COOL mode, this line will be cool to the touch.
The best framing job is not going to stop frost from occurring if the cold air discharge is allowed to enter into the return air portion of the 14-1/4″ x 14-1/4″ (±1/8″) opening. Duo-Therm’s return air kits are designed to be installed tightly to the bottom of the base pan and ceiling template. Insulation supplied in the kit not only stops condensation from forming on the divider plate, but prohibits air leaking around it as well.
BEND IN DUCT & OR KINKS FLASHLIGHT DUCT RAFTER CEILING JOIST MIRROR REGISTER PIPE WIRE OR BUNDLE REGISTER DUCT SIZE & REQUIREMENTS FOR 310500 & 3105935 RETURN AIR COVER REGISTER REQUIRED REGISTER REQUIRED SHORT DUCT RUN MINIMUM 1/3 TOTAL DUCT LENGTH TOTAL OUTLET AIR AREA MINIMUM 21.0 SQ. INCH DUCTS. MIN. MAX DEPTH 1-1/2″ 2-1/2″ WIDTH 7.0″ 10.0″ TOTAL LENGTH 15.0″ 40.0″ REGISTERS 4 MIN.- 8 MAX (PER UNIT) 14 SQ.
Up to this point we have mainly covered the discharge side; however, restrictions of the return air can result in frost buildup. The Duo-Therm air conditioner requires a minimum of 40 square inches of FREE AREA. The FREE AREA – is the opening that remains in a grill or louvered panel after the restrictions are taken away. For example, an opening of 10 x 20 inches has 200 square inches. When this opening is covered with a grill that is 67 percent open, the FREE AREA is (200 x 0.67), 134 square inches.
SECTION 7 Proper Thermostat Location THE THERMOSTAT LOCATION IS VERY IMPORTANT FOR BALANCED TEMPERATURE CONTROL IN A RV. Today’s interior design of the RV has become both cosmetically more appealing and more efficient in its use of storage space. These improvements have generated complex interior space requirements which, in turn, have caused many RV’s to become a maze for heating and air conditioning circulation.
cooking etc. Other factors to be taken into consideration as possible heat gain causes are the size of the air conditioner relative to the size of the coach; the “R” factor of insulation; and the size and placement of window. Starting the air conditioner early in the morning and giving it a “head start” on the expected high outdoor ambient will greatly improve its ability to maintain the desired indoor temperature.
Leakage occurs only when the unit is running during high humidity conditions (80% relative humidity or higher). During high humidity conditions the evaporator coil will remove large quantities of water at a fast rate. The unit is designed to handle the increased water production. Unit is installed on greater than 15° slope. Units are designed to be installed on flat surfaces or on a slope of up to 15°. Note: The closer to 15 degrees of front-to-back slant, the more likely water will overflow the drain pan.
8.5 Temperature Differential Across Coil Specification An air conditioners primary job is to remove moisture from the air and secondary job is to cool the air. As the moisture is removed the degree drop will increase. The average degree drop across the coil should be approximately 18° to 20°. This is at lab conditions (50% relative humidity, 80 degrees inside, 95° outside at unit and exactly 120 VAC). Degree drop will vary depending on the humidity.
Typical Wiring 59146.XXX COMPRESSOR GRN/YEL R * O.L. PASSED DIELECTRIC REVERSING VALVE C MOTOR S BLK BLK 6 PIN CONN WHT BRN YEL WHT FAN RED C HERM BLU 1 BLK 2 YEL 3 RED 4 WHT 5 RED WHT RUN CAP RED START CAP * 6 GRN/YEL PTCR SPLICE CAP WHT COMP STARTER IN-LINE CONNECTOR 2 C/O T-STAT 3 NOT USED ON SOME MODELS * 1 3106605.029 Typical Wiring 59136.XXX COMPRESSOR MOTOR GRN/YEL R S * O.L.
Typical Wiring 59516.XXX 5791X.XXX Typical Wiring 60031X.
Typical Wiring 630035.XXX COMPRESSOR C MOTOR GRN/YEL R O.L. REVERSING VALVE S BLK BLK 9 PIN CONN BLU BRN BLU 1 BLK BLK 2 YEL 3 RED RED 4 WHT 5 YEL 6 WHT WHT YEL FAN WHT C WHT HERM 7 RED 8 WHT RUN CAP 9 MOTOR STARTER RED PASSED DIELECTRIC START CAP 2 AMBIENT SWITCH 3 1 RED GRN/YEL IN-LINE CONNECTOR 3308032.032 Typical Wiring 630515.XXX and 630516.
Typical Wiring 620515.XXX and 620525.XXX PASSED DIELECTRIC FACTORY WIRING SPLICE CAP FIELD WIRING REMOTE SENSOR CABLE FREEZE CONTROL WHITE P4 P5 BLK POWER MODULE BLK FUSE C WHT WHT YEL YEL BLU BLU BLK RED LOAD SHED FURNACE FURNACE 12V 12V + START CAP INDICATORS IF USED K1 NO WHT NOT USED ON SOME MODELS BLK GRN/YEL T1 115 VAC GRN/YEL T2 BLK 3106682.
6206XX.XXX RED WHT BLK BLW GRY T6 T5 T9 T10 COMPRESSOR BLK BLK T2 T1 FAN MOTOR BLW 3 1 RED K4 NO GRY YEL COM WHT ELEMENT T8 T7 NOT AVAILABLE ON SOME MODELS TO FURNACE FAN C WHT HERM WHT WHT WHT J1 BLK HEAT ACCESSORY RUN CAP RED START CAP J2 MOTOR STARTER RED BLU G/Y BLK SOLAR OR DIRTY FILTER INDICATOR IF USED C K3 COM OL S R G/Y BRN WHT NO LIMIT SWITCH FREEZE CONTROL BLK IN LINE COUPLERS PASSED DIELECTRIC RJ-11 - + LINE SPLICE TO 115 VAC 1O 60 Hz.
Wiring Diagrams Analog Systems Wiring Diagram for 3107541.009 Cool & Furnace Wiring Diagram for 3107541.017 Cool, Furnace & Heat Strip Wiring Diagram for 3107546.
Air Box Field Wiring 3107211.XXX Air Box Field Wiring 3107206.
Section 9 Quick Tips 9.1 Mechanical Control No Compressor. Turn power off and check in the following order. 1. T-stat test . Continuity 2. Selector Switch test. Continuity 3. Overload & Compressor test. Green plus Tan = Low Fan 9.2 Comfort Control No Compressor and / or Fan. First select high speed fan, not auto fan mode on the tstat. If the fan runs a temperature sensor could be the problem.
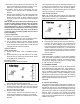
PRINCIPLES OF HEAT PUMP OPERATION HEAT PUMP COOLING AND HEATING MODES: COOLING MODE Cooling Mode: Heat is removed from the inside air and released to the outside air. INSIDE COIL (EVAPORATOR) Heating Mode: Heat is removed from the outside air and released to the inside air. DEFINITION: A heat pump is one base unit which can operate in two modes, heating or cooling. The travel or flow of the refrigerant is reversed depending on which cycle you choose to operate, the heating cycle or the cooling cycle.