with Dual Element Browner Microwave Oven DAEWOO Safety Information . . . . . . . . .2–6 Operating Instructions Browning Features . . . . . . . .16, 17 Convenience Features . . . . .14, 15 Grilling Features . . . . . . . . .18, 19 Microwave Terms . . . . . . . . . . . .22 Other Features . . . . . . . . . . .20, 21 Oven Features . . . . . . . . . . . . .7, 8 Power Levels . . . . . . . . . . . . . . . .9 Timed Features . . . . . . . . . .10–13 Care and Cleaning . . . . . . . . .23 Troubleshooting Tips . .
Troubleshooting Tips Operating Instructions Safety Instructions IMPORTANT SAFETY INSTRUCTIONS. READ ALL INSTRUCTIONS BEFORE USING. WARNING! For your safety, the information in this manual must be followed to minimize the risk of fire or explosion, electric shock, or to prevent property damage, personal injury, or loss of life.
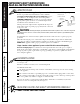
Safety Instructions WARNING! ARCING If you see arcing, press CLEAR/OFF and correct the problem. Arcing is the microwave term for sparks in the oven. Arcing is caused by: ■ Metal, such as twist-ties, poultry pins or goldrimmed dishes, in the microwave. ■ Metal or foil touching the side of the oven. ■ Recycled paper towels containing small metal pieces being used in the microwave. ■ Foil not molded to food (upturned edges act like antennas).
Safety Instructions IMPORTANT SAFETY INSTRUCTIONS. READ ALL INSTRUCTIONS BEFORE USING. WARNING! MICROWAVE-SAFE COOKWARE Make sure to use suitable cookware during microwave cooking. Most glass casseroles, cooking dishes, measuring cups, custard cups, pottery or china dinnerware which does not have metallic trim or glaze with a metallic sheen can be used. Some cookware is labeled “suitable for microwaving.” ■ Place food or microwavable container directly on the glass turntable to cook your food.
■ Use the black metal tray when browning or grilling. Use the tray in the same way you would use a shallow baking pan or baking tray. Place food, oven-safe cookware or the browner rack directly on the black metal tray when cooking. ■ Use of the glass turntable when browning or grilling will result in inferior cooking performance. ■ Do not cover the black metal tray with metal foil. This will cause arcing in the oven. ■ The oven and door will get hot when browning or grilling.
Safety Instructions IMPORTANT SAFETY INSTRUCTIONS. READ ALL INSTRUCTIONS BEFORE USING. ADAPTER PLUGS Usage situations where appliance’s power cord will be disconnected infrequently. Because of potential safety hazards under certain conditions, we strongly recommend against the use of an adapter plug.
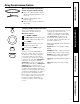
About the features of your oven. Safety Instructions Throughout this manual, features and appearance may vary from your model. 1000 Watts Operating Instructions Features of the Oven Removable Turntable Support The turntable support must be in place when using the oven. When entering cooking time using the dial, time will add or subtract in 15-second increments up to 6 minutes. For cooking times of 6–15 minutes, time will add or subtract in 30-second increments.
You can microwave by time, or with the convenience features, or cook using the browning and grilling features. Selector Dial—Turn to make selections and press to enter. Operating Instructions Safety Instructions About the features of your oven.
Using the microwave features. Safety Instructions Make sure the turntable support and glass turntable are in place when microwaving. ■ Place food or microwavable container directly on the glass turntable to cook your food. ■ Center the glass turntable on the turntable support. ■ Make sure that cookware is suitable for microwaving. Changing the Microwave Power Level 1 2 Press MICRO or EXPRESS. For Micro Cook, turn the dial to set the cook time and press the dial to enter. Press POWER.
Safety Instructions About the timed microwave features. Micro Cook Allows you to microwave for any time up to 99 minutes. High power level (10) is automatically set, but you may change it for more flexibility. Operating Instructions Make sure the turntable support and glass turntable are in place when microwaving. 1 2 Press MICRO. 3 Change the power level if you don’t want full power. (Press POWER; turn the dial to set the power level and press the dial to enter.
Safety Instructions Cooking Guide for Micro Cook NOTE: Use High power level (10) unless otherwise noted. Vegetable Amount Time Comments Asparagus (fresh spears) 1 lb. In 11⁄2-qt. casserole, place 1/4 cup water. (frozen spears) 10-oz. package 6 to 9 min., Med-High (7) 5 to 7 min. Beans (fresh green) (frozen green) (frozen lima) 1 lb. cut in half 10-oz. package 10-oz. package 9 to 11 min. 6 to 8 min. 6 to 8 min. In 11⁄2-qt. casserole, place 1/2 cup water. In 1-qt.
Safety Instructions About the timed microwave features. Time Defrost Allows you to defrost for a selected length of time. See the Defrosting Guide for suggested times. (Auto Defrost explained in the About the convenience microwave features section.) Operating Instructions Make sure the turntable support and glass turntable are in place when microwaving. Press DEFROST. 1 2 Turn the dial to TIME and press the dial to enter. 3 Turn the dial to enter defrosting time and press the dial to enter.
Safety Instructions Defrosting Guide Food Time Comments Breads, Cakes Bread, buns or rolls (1 piece) Sweet rolls (approx. 12 oz.) 1 min. 3 to 5 min. Rearrange after half the time. Fish and Seafood Fillets, frozen (1 lb.) Shellfish, small pieces (1 lb.) 6 to 8 min. 5 to 7 min. Place block in casserole. Turn over and break up after half the time. Fruit Plastic pouch—1 or 2 (10-oz. package) Ground meat (1 lb.) Roast: beef, lamb, veal, pork Steaks, chops and cutlets 2 to 5 min. 2 to 5 min.
Popcorn Make sure the turntable support and glass turntable are in place when microwaving. To use the Popcorn feature: Use only with prepackaged microwave popcorn weighing 3.0 to 3.5 ounces. 1 Follow package instructions, using Micro Cook if the package is less than 3.0 ounces or larger than 3.5 ounces. Place the package of popcorn in the center of the microwave. 2 3 Press POPCORN. 4 Press the dial or START to begin cooking. Turn the dial to select 3.5 or 3.0 ounce package of popcorn.
Use Auto Defrost for meat, poultry and fish weighing up to 6.0 pounds. Use Time Defrost for most other frozen foods. Auto Defrost automatically sets the defrosting times and power levels to give even defrosting results for meats, poultry and fish. Make sure the turntable support and glass turntable are in place when microwaving. Press DEFROST. Turn the dial to AUTO and press the dial to enter. 3 Using the Conversion Guide below, turn the dial to enter food weight and press the dial to enter.
Safety Instructions Using the browning features. Make sure the turntable support and black metal tray are in place when browning. The browning features use a combination of microwaves and heat from the top and bottom elements to cook food evenly throughout while browning on top. Some foods cook best when using the browner rack. CAUTION: When using the browning features, remember that the oven, door and dishes will be very hot! Operating Instructions ■ Cookware will become hot.
Make sure the turntable support and black metal tray are in place when browning. The Manual browning features allow you to adjust the amount of microwave and heater power used for browning. 5 Change the microwave power level if you don’t want full power. (Press POWER; turn the dial to set the power level and press the dial to enter.) 6 Press the dial or START to begin cooking. Press BROWN. Turn the dial to MANUAL and press the dial to enter.
Safety Instructions Using the grilling features. Make sure the turntable support and black metal tray are in place when grilling. The grilling features use direct heat from the top and bottom elements to cook fresh and frozen foods. CAUTION: When using the grilling features, remember that the oven, door and dishes will be very hot! ■ Cookware will become hot. Oven mitts will be needed to handle the cookware.
Make sure the turntable support and black metal tray are in place when grilling. 4 Turn the dial to enter cook time and press the dial to enter. The Manual grilling features allow you to choose which heating elements are used when grilling and set the cooking time. 5 Press the dial or START to begin cooking. 1 2 Press GRILL. GRILL 1 uses the top heating element only for browning on top. Turn the dial to MANUAL and press the dial to enter.
Safety Instructions About the other features. Cooking Complete Reminder To remind you that you have food in the oven, the oven will display FOOD IS READY and beep once a minute until you either open the oven door or press CLEAR/OFF. Clock Operating Instructions Press to enter the time of day. Press OPTIONS. 1 2 Turn the dial to CLOCK and press the dial to enter. 3 Turn the dial to enter the hour and press the dial to enter. 4 Turn the dial to enter the minutes and press the dial to enter.
Safety Instructions Beeper On/Off The button beep can be turned on or off. 1 2 Press OPTIONS. 3 Turn the dial to select ON or OFF and press the dial to enter. Turn the dial to BEEPER and press the dial to enter. NOTE: The MUTE indicator will be lit when the button beep is turned OFF. Operating Instructions Display On/Off To turn the clock display on or off: 1 2 Press OPTIONS. 3 Turn the dial to select ON or OFF and press the dial to enter.
Term Definition Arcing Arcing is the microwave term for sparks in the oven. Arcing is caused by: ■ metal or foil touching the side of the oven. ■ foil that is not molded to food (upturned edges act like antennas). ■ metal such as twist-ties, poultry pins, gold-rimmed dishes. ■ recycled paper towels containing small metal pieces. Covering Covers hold in moisture, allow for more even heating and reduce cooking time. Venting plastic wrap or covering with wax paper allows excess steam to escape.
Care and cleaning of the microwave oven. Safety Instructions Helpful Hints An occasional thorough wiping with a solution of baking soda and water keeps the inside fresh. Unplug the cord before cleaning any part of this oven. How to Clean the Inside Walls, Floor, Inside Window, Heating Elements, Metal and Plastic Parts on the Door Operating Instructions Some spatters can be removed with a paper towel, others may require a damp cloth.
Safety Instructions Troubleshooting tips. Problem Possible Causes What To Do Oven will not start A fuse in your home may be blown or the circuit breaker tripped. • Replace fuse or reset circuit breaker. Power surge. • Unplug the microwave oven, then plug it back in. Plug not fully inserted into wall outlet. • Make sure the 3-prong plug on the oven is fully inserted into wall outlet. Door not securely closed. • Open the door and close securely. Door not securely closed.