DA1S-GN1DAA-AN¿ 2007.11.
DA1S-GN1DAA-AN¿ 2007.11.15 4:34 PM ˘ ` 1 mac001 1200DPI 100LPI PRODUCT INFORMATION IMPORTANT SAFETY INSTRUCTION CAUTION RISK OF ELECTRIC SHOCK DO NOT OPEN CAUTION: TO REDUCE THE RISK OF ELECTRIC SHOCK, DO NOT REMOVE COVER (OR BACK). NO USER-SERVICEABLE PARTS INSIDE. REFER SERVICING TO QUALIFIED SERVICE PERSONNEL.
DA1S-GN1DAA-AN¿ 2007.11.15 4:34 PM ˘ ` 2 mac001 1200DPI 100LPI IMPORTANT SAFETY INSTRUCTION 1 Read these instructions. 2 Keep these instructions. 3 Heed all warnings. 4 Follow all instructions. 5 Do not use this apparatus near water. 6 Clean only with dry cloth. 7 Do not block any ventilation openings. Install in accordance with the manufacturer’s instructions.
DA1S-GN1DAA-AN¿ 2007.11.15 4:34 PM ˘ ` 3 mac001 1200DPI 100LPI PRODUCT INFORMATION CONTENTS 1. PRODUCT INFORMATION Important Safeguards ................................ 1 Contents ................................................... 3 Read Carefully Before Using ..................... 4 Identification of Controls .......................... 5 Remote Control ........................................ 6 2. INSTALLATION Connecting to a TV .................................... 8 4.
DA1S-GN1DAA-AN¿ 2007.11.15 4:34 PM ˘ ` 4 mac001 1200DPI 100LPI READ CAREFULLY BEFORE USING Please read carefully before using this unit. Maintenance Placement and handling • The picture and sound of a nearby TV, VCR, or radio may be distorted. In this case, position the unit away from the TV, VCR, or radio. • Do not use volatile liquids, such as insecticide spray, near the unit. Do not leave rubber or plastic products in contact with the unit for a long period of time.
DA1S-GN1DAA-AN¿ 2007.11.15 4:34 PM ˘ ` 5 mac001 1200DPI 100LPI PRODUCT INFORMATION IDENTIFICATION OF CONTROLS Front Panel DAC-100 Power indicator Remote sensor Power indicator Remote sensor DAC-300 Channel +/Power button Channel +/Remote sensor Power indicator DAC-200 Power button Rear Panel Connection to Antenna Connection to TV A/V Output Jack Power Adaptor Connect to wall outlet.
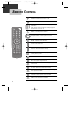
DA1S-GN1DAA-AN¿ 2007.11.15 4:34 PM ˘ ` 6 mac001 1200DPI 100LPI REMOTE CONTROL POWER POWER : Switches the receiver on or off.
DA1S-GN1DAA-AN¿ 2007.11.
DA1S-GN1DAA-AN¿ 2007.11.15 4:34 PM ˘ ` 8 mac001 1200DPI 100LPI CONNECTING TO A TV ■ The default RF Output channel is Ch 4. And you can change it to Ch 3. See “Output Channel” on page 18. Various methods of connecting your TV Outside Antenna or Wall Antenna Outlet Rear Panel of TV Rear Panel of Converter Box Method 2 Method 1 Method 1 Unplug the RF cable from the “ANT.IN” Jack on the rear panel of the TV. Plug this cable into the “RF IN” jack on the rear panel of the Converter Box.
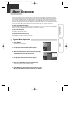
DA1S-GN1DAA-AN¿ 2007.11.15 4:34 PM ˘ ` 9 mac001 1200DPI 100LPI MENU OVERVIEW In this menu system, there are several ways to customize the menu settings provided. Most menus consist of three levels to set up the options, but some require greater depth for the variety of settings. If you press the [MENU] button, only the first and second level of the menu system will appear on the TV screen. The third level can be displayed by pressing [ENTER].
DA1S-GN1DAA-AN¿ 2007.11.15 4:34 PM ˘ ` 10 mac001 1200DPI 100LPI CHANNEL MENU OPTIONS Channel Scan Automatically finds all channels available through the ‘RF IN’ source. The unit stores all the active channels found, on the channel list. Inactive or weak channels may not appear on the list. In that case, add missing channels manually with the Manual Scan menu. The channel list created here can be seen in the Channel Edit menu.
DA1S-GN1DAA-AN¿ 2007.11.15 4:34 PM ˘ ` 11 mac001 1200DPI 100LPI CHANNEL MENU OPTIONS Channel Add Automatically adds new channels available through the antenna input (RF IN) except memorized channels already in the channel list. CHANNEL √ Channel Scan Channel Add OPTION Channel Edit LOCK Manual Scan √ 1 Press [MENU] to display the on-screen menu. 2 Select the SETUP menu using […†] then press [ENTER] or [√] to move to the second level. Selection (RIGHT or ENTER) leads you to the Channel Add.
2007.11.15 4:34 PM ˘ ` 12 mac001 1200DPI 100LPI CHANNEL MENU OPTIONS Manual Scan This feature manually adds or deletes channels. 1 Press [MENU] to display the on-screen menu. 2 Select the SETUP menu using […†] then press [ENTER] or [√] to move to the second level. 3 Select the “Manual Scan” using […†] then press [ENTER] or [√] . Manual Add menu appears. CHANNEL √ Channel Scan Channel Add OPTION Channel Edit LOCK Manual Scan 2 DTV 2-1 Signal Bad Move Prev.
DA1S-GN1DAA-AN¿ 2007.11.15 4:34 PM ˘ ` 13 mac001 1200DPI 100LPI OPTION MENU FEATURES Clock Enables the user to set up the clock information. Normally, your clock is set using signals transmitted by DTV stations. Choosing your time zone sets the current time automatically. CHANNEL √ Clock Aspect Ratio OPTION √ Language LOCK √ Audio Language Caption Select DCC View Sleep Mode Output Channel Move System Info Prev. 1 Press [MENU] to display the on-screen menu.
DA1S-GN1DAA-AN¿ 2007.11.15 4:34 PM ˘ ` 14 mac001 1200DPI 100LPI OPTION MENU FEATURES Aspect Ratio Selects the screen format. To view a picture with a wide (16:9) aspect ratio, you can choose Set By Program, Letter Box, Cropped, or Squeezed. 1 Press [MENU] to display the on-screen menu. 2 Select the OPTION menu using […†] then press [ENTER] or [√] to move to the second level. CHANNEL OPTION √ LOCK 3 Use […†] to select the Aspect Ratio option. 4 Press [√] or [ENTER] to move to the third level.
DA1S-GN1DAA-AN¿ 2007.11.15 4:34 PM ˘ ` 15 mac001 1200DPI 100LPI OPTION MENU FEATURES Menu Language Select a language for the menus to appear in. 1 Press [MENU] to display the on-screen menu. 2 Select the OPTION menu using […†] then press [ENTER] or [√] to move to the second level. 3 Select the Language option using […†]. CHANNEL 4 Press [√] or [ENTER] to move to the third level. OPTION √ LOCK 5 Select the desired language using […†] then press [ENTER] to confirm your selection.
DA1S-GN1DAA-AN¿ 2007.11.15 4:34 PM ˘ ` 16 mac001 1200DPI 100LPI OPTION MENU FEATURES Audio Language Digital channels sometimes provide multiple audio tracks, often in a different language. You can set a default audio language with the Audio Language menu. 1 Press [MENU] to display the on-screen menu. 2 Select the OPTION menu using […†] then press [ENTER] or [√] to move to the second level. 3 Select the Audio Language option using […†]. CHANNEL 4 Press [√] or [ENTER] to move to the third level.
DA1S-GN1DAA-AN¿ 2007.11.15 4:34 PM ˘ ` 17 mac001 1200DPI 100LPI OPTION MENU FEATURES Captions Select 1 Press [MENU] to display the on-screen menu. 2 Select the OPTION menu using […†] then press [ENTER] or [√] to move to the second level. 3 Select the Caption Select option using […†]. CHANNEL OPTION √ LOCK Move Prev.
DA1S-GN1DAA-AN¿ 2007.11.15 4:34 PM ˘ ` 18 mac001 1200DPI 100LPI OPTION MENU FEATURES DCC (DTV Captions) Selects a default Caption language. Off DTV Caption is not displayed. Custom Set DTV Captions by user Standard Set DTV Captions by program Notes • DTV Caption (Standard EIA /CEA 708) will appear only if provided by the broadcaster. • If DTV and Analog Captions are received simultaneously, you can only select DTV Caption.
DA1S-GN1DAA-AN¿ 2007.11.15 4:34 PM ˘ ` 19 mac001 1200DPI 100LPI OPTION MENU FEATURES DCC View 1 Press [MENU] to display the on-screen menu. 2 Select the OPTION menu using […†] then press [ENTER] or [√] to move to the second level. 3 Select the DCC View option using […†]. CHANNEL OPTION √ LOCK Move Prev.
DA1S-GN1DAA-AN¿ 2007.11.15 4:34 PM ˘ ` 20 mac001 1200DPI 100LPI OPTION MENU FEATURES Edge Type Selects the edge type for captions. None: The text has no edge. Uniform: The text has a uniform edge. Raised: The text is raised. Depressed: The text is depressed. Left Shadow: The text has a left-shadow edge. Right Shadow: The text has a right-shadow edge. Sleep Mode Use this option to change the Converter Box’s sleep mode time. The default is 4 hours. 1 Press [MENU] to display the on-screen menu.
DA1S-GN1DAA-AN¿ 2007.11.15 4:34 PM ˘ ` 21 mac001 1200DPI 100LPI OPTION MENU FEATURES Output Channel Use this option to change the Converter Box’s output channel. The default is channel 4. CHANNEL OPTION √ 1 Press [MENU] to display the on-screen menu. 2 Select the OPTION menu using […†] then press [ENTER] or [√] to move to the second level. LOCK Move Prev. Clock Aspect Ratio Language Audio Language Caption Select DCC View Sleep Mode Output Channel System Info √ ✔ Ch. 4 Ch.
DA1S-GN1DAA-AN¿ 2007.11.15 4:34 PM ˘ ` 22 mac001 1200DPI 100LPI LOCK MENU OPTIONS Lock System Allows you to set up specific channels and ratings through blocking schemes. Also allows you to activate or disable all of the lock schemes previously set up. A password is required to gain access to the LOCK menus. If the Lock System is set to Off, the Channel and Program Ratings are not functional. 1 Press [MENU] to display the on-screen menu.
DA1S-GN1DAA-AN¿ 2007.11.15 4:34 PM ˘ ` 23 mac001 1200DPI 100LPI LOCK MENU OPTIONS Block Channel Blocks any channel that you do not want to view or that you do not want your children to watch. If you tune in a blocked channel, a black screen with a pop-up box will appear. Block Ch can override Channel Edit menu settings (see page 20). CHANNEL OPTION LOCK 1 Press [MENU] to display the on-screen menu. 2 Select the LOCK menu using […†] then press [ENTER] or [√] to move to the second level.
DA1S-GN1DAA-AN¿ 2007.11.15 4:34 PM ˘ ` 24 mac001 1200DPI 100LPI LOCK MENU OPTIONS TV Rating-Children Prevents children from watching certain children’s TV programs according to the ratings limit set. This rating applies only to TV programs for children. Unless you block TV programs intended for mature audiences in the TV Rating – General menu, your children could view those programs. 1 Press [MENU] to display the on-screen menu.
DA1S-GN1DAA-AN¿ 2007.11.15 4:34 PM ˘ ` 25 mac001 1200DPI 100LPI LOCK MENU OPTIONS 7 Press [MENU] to return to the previous menu or press [EXIT] on the Remote Control to return to TV viewing. TV Rating-General Blocks TV programs that you or your family may not wish to watch, based on the rating scheme set. 1 Press [MENU] to display the on-screen menu. 2 Select the LOCK menu using […†] then press [ENTER] or [√] to move to the second level. CHANNEL OPTION LOCK Move Prev.
DA1S-GN1DAA-AN¿ 2007.11.15 4:34 PM ˘ ` 26 mac001 1200DPI 100LPI LOCK MENU OPTIONS Most parents would find this program suitable for all ages. Although this rating does not signify a program designed specifically for children, most parents may let younger children watch this program unattended. It contains little or no violence, no strong language and little or no sexual dialogue or situations. TV-PG : Parental Guidance Suggested.
DA1S-GN1DAA-AN¿ 2007.11.15 4:34 PM ˘ ` 27 mac001 1200DPI 100LPI LOCK MENU OPTIONS Movie Rating Blocks movies according to the movie ratings restrictions so children cannot view certain movies. You can set the ratings to block out all the movies with ratings above a specified level. Keep in mind that the movie ratings apply only to movies shown on TV, not TV programs such as soap operas. 1 Press [MENU] to display the on-screen menu.
DA1S-GN1DAA-AN¿ 2007.11.15 4:34 PM ˘ ` 28 mac001 1200DPI 100LPI LOCK MENU OPTIONS content will initially require at least a PG-13 rating. In effect, the PG-13 cautions parents with more stringency than usual to give special attention to this film before they allow their 12-year olds and younger to see it. PG-13 places larger responsibilities on parents for their children’s movie viewing. The rating system is not a surrogate parent, nor should it be.
DA1S-GN1DAA-AN¿ 2007.11.15 4:34 PM ˘ ` 29 mac001 1200DPI 100LPI LOCK MENU OPTIONS Downloadable RRT You can block TV program with downloadable region rating table. 1 Press [MENU] to display the on-screen menu. 2 Select the LOCK menu using […†] then press [ENTER] or [√] to move to the second level. If you have not entered a password yet; Key-in the “0000” password using the numbered buttons to create a personal 4-digit security password.
DA1S-GN1DAA-AN¿ 2007.11.15 4:34 PM ˘ ` 30 mac001 1200DPI 100LPI INFORMATION DISPLAYS Channel Banner Display The Channel Banner appears whenever you tune to a new channel or press the [ENTER] button on the Remote Control while viewing a program. DWE 1004 CH BLOCKED a b c d 1 Press [ENTER] while watching a program. • a. b. c. d. The Channel Banner appears on the TV screen (Channel number, audio, station name, and current time). The Channel Banner can be seen displayed on the TV screen for a moment.
DA1S-GN1DAA-AN¿ 2007.11.15 4:34 PM ˘ ` 31 mac001 1200DPI 100LPI INFORMATION DISPLAYS Program Information Display The Program Information Display appears if you press the [INFO] button on the Remote Control while viewing a program. c b h d a g DWE 3803 e f i 1 Press [INFO] while watching a program. 2 Press [INFO] or [EXIT] while the Program Information is displayed. The Program Information disappears from the TV screen.
DA1S-GN1DAA-AN¿ 2007.11.15 4:34 PM ˘ ` 32 mac001 1200DPI 100LPI PROGRAM AND STATION GUIDE The Program and Station Guide contains schedule and program information for all channels. They also provide local over-the-air channels information including conventional digital channels. Use the Program and Station Guide to find programs easily and conveniently and to view schedule and descriptive program information for the channels.
DA1S-GN1DAA-AN¿ 2007.11.15 4:34 PM ˘ ` 33 mac001 1200DPI 100LPI NORMAL OPERATION Channel Selection You can select channels as described below. Number and – (dash) buttons (on the Remote Control) Use Number (0-9) and – (dash) buttons to select a channel directly. [CH +/–] buttons (on the Remote Control) or […†] (on the front panel) Use [CH +/–] on the Remote Control or […†] on the front panel to cycle the Converter Box through the channels in memory.
DA1S-GN1DAA-AN¿ 2007.11.15 4:34 PM ˘ ` 34 mac001 1200DPI 100LPI SPECIFICATION Television System Fully ATSC Compliant Channel Coverage Terrestrial : 2 ~ 69 ATSC RF input RF IN (1) RF Output 3 / 4 Channel Video Output 480i Composite Audio Output Analog Audio (L/ R) Dimension (DAC-100) 180 x 150 x 30 (mm3) Weight (DAC-100) ~290 g Power Requirements AC 120V, 60Hz Power Consumption In standby : 1.
DA1S-GN1DAA-AN¿ 2007.11.15 4:34 PM ˘ ` 35 mac001 1200DPI 100LPI LIMITED WARRANTY This limited warranty begins on the original date of purchase, and is valid only on products purchased and used in the United States.Your DAEWOO product will be repaired or replaced, at DAEWOO's option, if it proves to be defective in material or workmanship under normal use, during the warranty period set forth below.