
Instructions


14
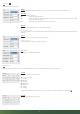
12 | TRANSFER SETTINGS TO THE CAMERA
1. Make sure the slide control (18) is on position OFF. Insert the SD card into the camera as described in chapter 08.3.
2. Switch the slide control (18) to position SETUP in order to transfer the settings to the camera. After a few seconds the message "Update Success" appears in the LCD display (10); the
settings done in U Set program are now stored successfully on your camera.
In order to check the parameters set are correct and the camera will transmit pictures/videos successfully, we recommend to follow the steps in chapter 13 "Manual picture transmission".
Afterwards you can do further settings (as e.g. set Time & Date) directly in the camera menu (read chapter 14).
13 | MANUAL PICTURE TRANSMISSION
Switch the slide control (18) to position SETUP. Now wait until the camera dialed in the mobile network then press the Menu button
SHOT/Test button photo/video (16). Press the OK
button
/Playback photo/video (17) to display the test photo/video. Press the menu button (12) and select "Send" with the menu button (15) and confi rm with OK button (17). The camera
now will start picture transmission. After successful tranmission (100%) the LCD display (10) shows the message "send successfully". The picture/video is tranmitted to the mobile phone
number(s) or email address(es).
14 | CAMERA MENU SETTINGS
NOTE The camera menu keeps you informed on settings and allows minor changes, after you have fi nished the setup on PC successfully and you transmitted the settings to your
camera.
In order to switch the menu register, press menu button
(16) or (13).
To switch a menu point within the menu register press menu button
(15) or (14). The chosen menu point is highlighted blue. Pressing OK button (17) you confi rm your selection – the active
selection is marked with a star (*).
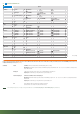
" Following you will see an overview of all menu points (CAM, PIR, NET, SYS).
CAM PIR GSM SYS