
Operating instructions


6 DR
®
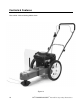
TRIMMER/MOWER
™
Assembly & Operating Instructions
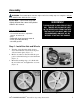
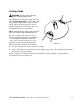
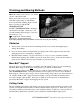
4. Insert the axle through the hole in the bushing in the side of the housing (Figure 5). Push the
axle through both axle holes in the frame (Figure 5). Be sure the axle is over the black control
cable.
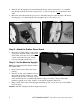
5. Mount the other wheel with the open portion of the hub facing in toward the frame. Mount the
retaining ring so it is flush with the axle and tighten the set screw (Figure 6).
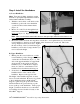
Step 2: Attach the Rubber Stone Guard
1. Mount the two black clamps on the rubber
stone guard. With the clamp on the inside
of the frame, insert the screws from the
outside of the frame facing in, add the
lock nuts and tighten them (Figure 7).
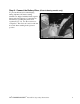
Step 3: Set the Machine Upright
Note: Be careful not to kink, twist or stretch
the control cables.
1. Remove the front end of the Styrofoam
packing.
2. Stand at one side of the machine, hold one
wheel with one hand, and the nose of the
machine with the other. Lift the front-end
of the machine up and over until the Mow-Ball
™
Support is resting on the ground and the
machine is upright (most of the weight is on the wheels during this maneuver).
3. Being careful of the cables, bring the upper handlebar up and over the front end of the machine.
Let it rest there.
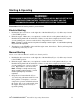
Caution: DO NOT add gas or oil to the engine at this time.
Figure 5
Figure 6
Figure 7