
Owner`s manual


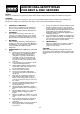

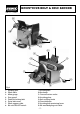

MOUNTING THE SANDER TO A
WORKBENCH (Fig.3):
The sander should be fastened securely
to a firm supporting surface such as a
workbench. If mounting to a workbench,
place the sander in a suitable position
and mark the surface through the holes
in the base ✪✌. Remove the sander and
drill the holes, align and insert the bolts
and nut securely (fixings not supplied).
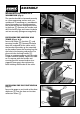
INSTALLING THE SANDING DISC
TABLE (Figs.4 & 5):
Locate the table ✫✌, bracket ✬✌ and
securing handle ✭✌. Remove the bolts
from the underside of the table and fit
the bracket. Now offer up the assembly
to the sander. Insert the locating lug into
the hole in the housing and secure it in
place with the locking handle ✭✌.
Using an engineers square (for example
Draper Stock No.34065), adjust the table
so it is square with the sander and
running parallel across the disc face
(approx. 2mm gap), then tighten the
bolts holding the bracket to the table.
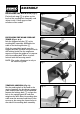
INSTALLING THE DUST DEFLECTOR
(Fig.6):
Locate the pegs on each side of the dust
deflector ✮✌into the slots on the dust
collection cover ✯✌.
ASSEMBLY
- 8 -
Fig.3
Fig.4
Fig.5
Fig.6
✮✌
✯✌
✪✌
✫✌
✬✌
✭✌
2mm