
Instruction Manual

- 73 -
U s e r M a n u a l D r e a m b o x D M 8 0 0 H D P V R
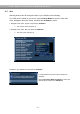
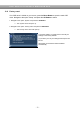
Use the Navigation-Buttons and the Numeric-Keypad to change the values.
Use DHCP:
If enabled your Dreambox will get its IP from a DHCP server. If you are using a router to access the
internet you usually have a DHCP server. Disable this option to set a static IP address.
IP Address:
Enter the IP address here.
Netmask:
Enter the subnet mask (Usually 255.255.255.0).
Gateway:
Enter the router’s IP address here, if the Dreambox is connected to the Internet over a router.
Nameserver:
Enter the DNS-Server’s IP address here. DNS is used to translate a Domain name to an IP address.
Normally, if the Type is set to LAN, there is no need for a DNS entry. If the Dreambox is connected to
the Internet over a router, enter the router’s IP address here.
Activate the network:
Press the OK-Button to save the setting and activate the network.
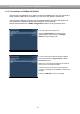
Nameserver Setup
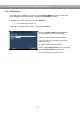
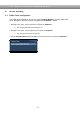
If no OSD menu is visible on your screen, press the Menu-Button to open the main OSD
menu. Navigate to the option “Setup” and press the OK-Button to select
.
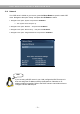
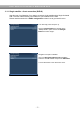
1. Navigate to the option “System” and press the OK-Button.
¾ The “System” menu will open up.
2. Navigate to the option “Network…” and press the OK-Button.
3. Navigate to the option “Nameserver setup…” and press the OK-Button.
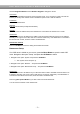
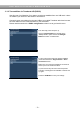
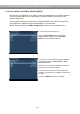
Nameserver:
Enter the DNS-Server’s IP address of your LAN here. DNS is used to translate a Domain name to an
IP address. Normally, if the Type is set to LAN, there is no need for a DNS entry. If the Dreambox is
connected to the Internet over a router, enter the router’s IP address here.
Press the green Options-Button if you want to add a seconds nameserver.
You can enter a maximum of two nameservers.