
User manual


6.0 APPENDIX
30 R699761 - DreamScaler 4 User Manual
6.5 Source Calibration
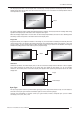
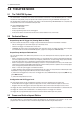
Test Patterns Used: Half Black/White
H-Clr7 Bars75
H-Clr7 Bars100
H-Clr8 Bars75
H-Clt8 Bars100
To get the best performance out of each of your sources you should individually calibrate each input specifically to
the connected source. In this section, all picture control adjustments are made using the DreamScaler 4’s picture
controls. Keep in mind that if you replace a source with a new component you will also want to recalibrate the input.
To calibrate each source correctly you will need the source to output a reference test pattern similar to what is built
in to the DreamScaler 4. For sources like DVD, D-VHS this content is commonly available in their test patterns
menu. But for a source like HD satellite or cable, these test patterns are played on channels like HDNet at off hours.
Use these test patterns and modify the Input Picture Controls (Brightness, Contrast, Saturation and Hue) together
with the half test patterns to obtain a proper match for each source.
6.6 Troubleshooting
My DreamScaler 4 shows an error message.
If the DreamScaler 4 does not boot correctly, you may get an error message. Performing a hard reset of the
DreamScaler 4 should clear any memory errors and reboot the unit to its factory default. If you still get an error
message after performing a hard reset, contact our distributor for service.
•Perform a hard reset of the DreamScaler 4 unit using the remote control as follows:
1) Press the Configuration button on the remote until the Front Panel Display (FPD) reads ‘Configuration / Factory
Default’.
2) Press Enter. The FPD indicates ‘No’
3) Press the up arrow. The FPD indicates ‘Yes’
4) Press Enter. The DreamScaler 4 reboots to its factory default
•Perform a hard reset of the DreamScaler 4 unit using the buttons on the front panel as follows:
1) Unplug the power supply from the DreamScaler 4 unit
2) Press Menu and Exit buttons simultaneously while plugging the power back in.
3) The DreamScaler 4 will take about 15-20 seconds to perform the hard reset.
The picture has horizontal lines with the Output set to 1080p60 (or 720p60)
The Output Format 1080p60 is defined by SMPTE 274M standard to match a Video Output at 60 frames per second
(or 59.94Hz, depending on your display). Using the Output Format 1080p60 with a Video Signal at 50Hz can lead to
a wrong decoding by your display.
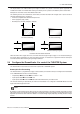
To obtain a clear picture, do as follow:
• Change the output frame rate to 50 Hz-locked then change the output format to 1080p50
Output Setup
⇒⇒
⇒⇒
Frame Rate ⇒⇒
⇒⇒
50 Hz ⇒⇒
⇒⇒
50 Hz lock or Unlock ⇒⇒
⇒⇒
50.00
Output Setup
⇒⇒
⇒⇒
Format ⇒⇒
⇒⇒
1080p50
The Output Signal sent to your display would have a frame rate of 50Hz, using the 1080p50 Output Format.
or
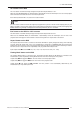
• Change the Frame rate from 50Hz to 60 Hz:
Output Setup
⇒⇒
⇒⇒
Frame Rate ⇒⇒
⇒⇒
50Hz ⇒⇒
⇒⇒
Unlock ⇒⇒
⇒⇒
59.94 by using the Up button.
The Output Signal sent to your display would have a 59.94Hz frame rate, using the 1080p60 Output Format.
The picture is green when I use the analog output of the DreamScaler 4.
A green picture usually means that a component video signal is being sent to the RGBHV input of a display. Follow
the instructions earlier in the user guide to setup your DreamScaler 4 to work with a display with RGBHV inputs