
Operation Manual
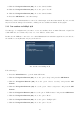
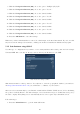

4. With the Navigation-Buttons (NH) choose the option “Tuner configuration” and press the OK-
Button.
5. With the Navigation-Buttons (NH) choose the option “DVB-S2 Tuner” and press the OK-Button.
6. With the Navigation-Buttons (NH) choose the option “Configuration”.
7. With the Navigation-Buttons (JI) choose the option “Extended”.
8. With the Navigation-Buttons (NH) choose the option “Satellite”.
9. With the Navigation-Buttons (JI) choose the desired Satellite.
10. With the Navigation-Buttons (NH) choose the option “LNB”.
11. Press the Navigation-Button (I).
12. With the Navigation-Buttons (NH) choose the option “DiSEqC-Modus”.
13. With the Navigation-Buttons (JI) choose the option “1.2”.
14. With the Navigation-Buttons (NH) choose the option “Use usals for this sat”.
15. With the Navigation-Buttons (JI) choose the option “No”.
16. With the Navigation-Buttons (NH) choose the option “Stored position”.
17. Enter position of the selected satellite which is saved in the positioner by using the Numeric Keypad.
Refer to the instruction manual of your positioner for the number of the saved position.
18. Press the OK-Button to save this settings.
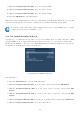
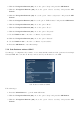
7.1.7 Tuner B setup
The same setup possibilities that applied for Tuner A also apply for Tuner B. There are some additional
configuration options, as described as follows
Equal to socket A Use this setting if Tuner B should use the same settings as Tuner A.
Nothing connected Use this option if no cable is attached to Tuner B.
Secondary cable from motorized LNB Use this option if you are using a positioner with a Twin- or Quad
LNB and have 2 cables from the LNB connected to the LNB1 and LNB2 in. Tuner A controls the
positioner and using Tuner B you can continue watching TV on the same satellite while recording. All
others are grayed out.
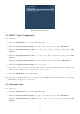
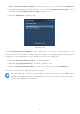
7.2 DVB-C Tuner configuration
Follow this steps:
1. Press the Menu-Button to open the main OSD menu.
2. With the Navigation-Buttons (NH) choose the option “Setup” and press the OK-Button.
62