
Owner Manual


©2018 DreamLine. All Rights Reserved
UNIDOOR Single Shower Door manual Ver 2 Rev 6.1 03/2018
14
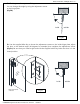
Never set the glass down directly onto a tile or concrete
floor. Always use a piece of wood or cardboard and leave
the corner pads and protective shims on the glass until it
becomes necessary to remove them. This will protect the
bottom edge and corners from damage which could lead
to breakage.
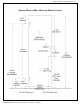
Single Shower Door Assembly and Installation
NOTE: The following shower door installation instructions should be used as a general
guide and prerequisite to the installation of the UNIDOOR, UNIDOOR-LS, UNIDOOR LUX
and UNIDOOR PLUS models. Before you begin the installation, please check your finished
opening size. Specific size information can be found on DreamLine.com
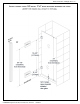
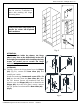
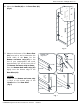
1. Attach the Hinges (05) to the Door Glass (01). Use one hinge
gasket per side. Attach the hinges centered in the notches and
square with the edge of the door glass. Fully tighten the hinge
bolts. (Fig 1)
ATTENTION:
For Styles E, I, J & L that have return panels:
Please check the model dimensions for proper placement of the Door Glass (01) so that the
door glass will align correctly with the return panel glass.
Fig. 1
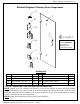
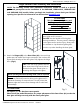
ATTENTION:
This door is extremely heavy and
the hinges on this door must be
installed into studs or to
preinstalled 2×6 wood
reinforcement behind the wall.
inside
outside
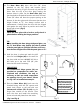
NOTE: DO NOT attach the handle to the
door glass until instructed.
DO NOT use the handle to lift the glass
during installation. This may result in damage
to the glass and/or serious injury. Always use
an assistant or a professional grade glass
suction cup when handling the door glass.
TIP: Clean the hinge gaskets and the
glass around the hinge notch with an
ammonia free glass cleaner prior to
attaching the hinges to the glass.