User Manual of Digital Set Top Box DREAMSAT F210 Please read this User Manual carefully to ensure proper use of this product and keep this manual for future reference
Important Safety Instructions: 1) Read these instructions, follow all instructions and heed all warnings, also keep these instructions. 2) The apparatus shall not be exposed to dripping or splashing and that no objects filled with liquids, such as vase, shall be placed on the apparatus. 3) Turn off the power when you do not use this unit, pull out the plug from outlet if this apparatus during lighting storms or when unused for long periods of time.
The symbol indicates that dangerous voltages constituting a risk of electric shock are present within this unit. The symbol indicates that there are important operating and maintenance instructions in the literature accompanying this unit. This symbol indicates that this product incorporates double insulation between hazardous mains voltage and user accessible parts. When servicing use only identical replacement parts.
Content Important Safety Instructions:.......................................................................................................1 Front and Rear Panel ....................................................................................................................4 Remote Control...............................................................................................................................5 Installing the Batteries ..............................................................
Front and Rear Panel Front Panel 1. 1.Power 2. LED display window: Indicates channel number and time (optional) 3. REMOTE CONTROL SENSOR: Receive the signal from the remote control. 4/5. ∧/∨: Navigate through the Menu and change Channel. 6.7. </>: Navigate through the Menu and adjust the volume. 8. OK: Select the highlighted item 9.MENU: Press this button to run menu on screen 2. Rear Panel 1. LNB IN: Connect to satellite antenna.
2. 3. 4 5 6 7 8 9 R: Connect to TV set R audio input terminal Spare port TV: To TV set input terminal. RS232: For software upgrading. L: Conned to TV set L audio input terminal VIDEO: Conned to TV set Video input terminal. AC IN: Power Supply 100V to 250V. ON/OFF: Turn on/off the main power supply.
1 .POWER- :Switch the receiver on / standby mode 2. MUTE - : Turn the sound on/off. 3.0-9(Numeric Button): Select a channel or setting. 4. Back 5. 9PIC:Show 9 channels in the screen at the same time. 6.MENU: Press this button to run menu on screen and call command box. . 7..OK: Select the highlighted item. 8. volume+/9.FAV Selects favorite channel list or current channel list in the view mode. In Edit Channel mode’s“Add favorite”menu it changes the right window’s channel list. 10.
Using the Remote Control To use the Remote Control, point it towards the front of the Digital Set Top Box. The Remote Control has a range of up to 7 meter from the Set Top Box at an angle of up to 60 degree. Noted: The Remote Control will not operate if its path is blocked. Sunlight or very bright light will decrease the sensitivity of the remote Control. Connection Caution: Make sure to the voltage specification of the wall outlet is the same rating with the receiver.
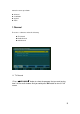
Note: When connecting the receiver to other equipment, e.g., TV, VCR and amplifier, make sure to refer to relevant user manual for instruction. Also, make sure you disconnect all the equipments from the power before connecting. Main Menu Press MENU button to bring up the Main Menu that includes 4 submenus.
move the cursor up or down . ◆ ◆ ◆ ◆ Channel Installation System Tools 1 Channel There are 3 submenus under this directory: TV Channel Radio Channel Add Channel 1.1 TV Channel 1.Press ▲UP/DOWN▼ ▼ button to select the program that you want to play, view it in the small window. And you could press OK button to view it in full screen.
9. Select the program you want to Delete and press Numeric Button 1 to mark this program with the deletion mark. You can cancel this mark by pressing Numeric Button 1 again. 10. Select the program you want to Move and press Numeric Button 2 to mark this program with the move mark. Press ▲UP/DOWN▼ button to move the cursor to the position where you want to locate. 11. Select the preferred program and press Numeric Button 3 to pop up the favorite group list.
Name (A-Z): The ascending order, omitting the $character, the number is ahead, then the capital letter , last the lowercase. Name (Z-A): The opposite order of the above Name (A-Z). Free/$(Scramble): All FTA programs are listed ahead, while all scrambled programs are listed last. 15. Select the program you want to Lock and press Numeric Button 8 to mark this with the lock mark. You can cancel this mark by pressing Numeric Button 8 again. 1.2 Radio Channel The same operation as 1.1 TV Channel List. 1.
2. Installation There are 7 submenus under this directory: Auto Scan Add Satellite Edit Satellite Delete Satellite NIT Search Satellite Search PID Satellite 2.1Auto Scan ●Satellite: Press ◄LEFT/RIGHT► button to select a satellite in circle. Or press OK button to pop up the drop-down list, then select the desired satellite in the list. ●Press ◄LEFT/RIGHT► button to select Free/ Free TV/Free Radio /All and then press OK button to search. ●Edit Satellite: please refer to the same option as 2.
2.2 Add Satellite ●Satellite: Press OK button to pop up the Satellite Rename window, press ◄LEFT/RIGHT► and ▲UP/DOWN▼ ▼ button to select the alphanumeric characters from the window. Press EXIT button to delete and Press MENU to exit. ●LNB Type: Press ◄LEFT/RIGHT► button to select Standard/Universal/User. ●Freq1: Press ◄LEFT/RIGHT► button to select. ●Freq 2: Press ◄LEFT/RIGHT► button to select .
2.3 Edit Satellite Please refer to the similar operation as 2.2 Add Satellite 2.4 Delete Satellite Press ◄LEFT/RIGHT► button to move the cursor up or down and select. Press ▲ UP/DOWN▼ ▼ button to turn the page. Press OK button to delete. Press MENU/EXIT button to exit. 2.5 NIT Search Please refer to the same option as 1.3 Add Channel.
2.6 Satellite Search Please refer to the similar option as 1.3 Add Channel. 2.7 PID Satellite Please refer to the similar option as 1.3 Add Channel. 3. System There are 5 submenus under this directory: Language TV System Auto Shut Down OSD Setting Parent Lock Press ▲UP/DOWN button to move the cursor up or down, while press ◄LEFT/RIGHT► button to change the setting and the setting will take effect immediately.
3.1Language Press ◄LEFT/RIGHT► button to select the language in circle 3.2 TV System Press ◄LEFT/RIGHT► button to select among Auto, PAL or NTSC 3.3 Auto Shut Down Press Numeric button(0-9) to input the time. Press OK button to save and MENU or EXIT button to exit. 3.4 OSD Setting Menu Color: Press ◄LEFT/RIGHT► button to select among style 1,….,style 5. Transparence: Press ◄LEFT/RIGHT► button to select among 0%,…,80%. 3.5 Parental Lock The default password is 0000. 1. Menu Lock: Select Off or On.
4.
4.1 Information Show the satellite’s information of current program. 4.2 Satellite Guide Press Numeric (0-9) button to input the Longitude and Latitude.
4.3 Default Value If you select OK, all the parameters of this receiver will reset to the default value. Note: please use this function carefully. 4.4 Software Upgrade Press ◄LEFT/RIGHT► button to select the upgrade type and mode.
Troubleshooting Problem No picture Screen shows “ No Signal” No sound from Speaker Potential Reasons Power isn’t connected The power switch is not on Connect the power Switch on the power Not connect DVB cable Incorrect setting Plug in the DVB cable Set up correct parameter No or incorrect connection with audio cable Mute the sound Connect the audio cable correctly Switch on the correct Volume control Try another sound track Incorrect sound track Only sound ,no Image on the screen Remote control is
Technical Specifications: Item Sub Item Parameter Tuner Input Frequency RF Input level IF Bandwidth Modulation 950-2150MHz -65~-25dBm 7MHz,8MHz QPSK, Video Decoder Format MPEG 2 MP@ML.HL Audio Decoder Format Audio output MPEG-1(layer1&2) Digital audio: RCA-L/R Power Voltage Power 100-240V~50 / 60Hz Max 30W This symbol on the product or in the instructions means that your electronic equipment should be disposed at the end of life separately from your Household waste.