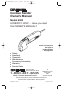
DM 2610919361 9/03 9/5/03 8:33 AM Page 1 Contour Sander Owner’s Manual Model 6000 HONESTLY NOW … Have you read this OWNER’S MANUAL? Parlez-vous français? Voir page 12 ¿Habla español? Vea página 23 • • • • • • • Safety Assembly Operation Maintenance Accessory Information Warranty Service Parts P.O. Box 1468 Racine, Wisconsin 53401 1-800-437-3635 http://www.dremel.
DM 2610919361 9/03 9/5/03 8:33 AM Page 2 Power Tool Safety Rules ! WARNING Read and understand all instructions. Failure to follow all instructions listed below, may result in electric shock, fire and/or serious personal injury. SAVE THESE INSTRUCTIONS Damaged cords increase the risk of electric shock. Work Area Keep your work area clean and well lit. Cluttered benches and dark areas invite accidents. When operating a power tool outside, use an outdoor extension cord marked "W-A" or "W.
DM 2610919361 9/03 9/5/03 8:33 AM Page 3 Do not force tool. Use the correct tool for your application. The correct tool will do the job better and safer at the rate for which it is designed. other condition that may affect the tools operation. If damaged, have the tool serviced before using. Many accidents are caused by poorly maintained tools. Develop a periodic maintenance schedule for your tool. Do not use tool if switch does not turn it “ON” or “OFF”.
DM 2610919361 9/03 9/5/03 8:33 AM Page 4 Some dust created by • Arsenic and chromium from chemicallytreated lumber. ! WARNING power sanding, sawing, grinding, drilling, and other construction activities contains chemicals known to cause cancer, birth defects or other reproductive harm. Some examples of these chemicals are: Your risk from these exposures varies, depending on how often you do this type of work.
DM 2610919361 9/03 9/5/03 8:33 AM Page 5 Symbols IMPORTANT: Some of the following symbols may be used on your tool. Please study them and learn their meaning. Proper interpretation of these symbols will allow you to operate the tool better and safer.
DM 2610919361 9/03 9/5/03 8:33 AM Page 6 Functional Description and Specifications Disconnect the plug from the power source before making any ! WARNING assembly, adjustments or changing accessories. Such preventive safety measures reduce the risk of starting the tool accidentally. Contour Sander FIG.
DM 2610919361 9/03 9/5/03 8:33 AM Page 7 Operating Instructions ON/OFF AND VARIABLE SPEED SWITCHES Your Sander is equipped with a variable speed switch and a separate on/off switch. The speed can be controlled from minimum to maximum speed by moving the switch lever to desired setting. TO TURN TOOL “ON”: Slide switch to the “ON”position (I) on symbol. TO TURN TOOL “OFF” Slide switch to the “OFF” position (0) off symbol. TO INCREASE SPEED: Move variable speed control lever toward the + sign.
DM 2610919361 9/03 9/5/03 8:33 AM Page 8 Operating Instructions (cont.) Hint: make sure the small grip dimples have firmly secured the sandpaper surface. 5. Press holder firmly back up into place until the contour "snaps" in place. To remove contour, rotate lever to release and lower the clamp holder. You are now ready to install another contour shape or detail pad. When using sanding tubes, rotate them regularly to maximize all surfaces for longer, more efficient use.
DM 2610919361 9/03 9/5/03 8:33 AM Page 9 SELECTING ABRASIVES The following suggestions may be used as a general guide for abrasive selection, but the best results will be obtained by sanding a test sample of the workpiece first. Grit Coarse 80 grit Medium 120 grit Extra fine 220 grit Application For rough wood, metal sanding, rust, paint, or old material removal. For general wood or metal sanding. For final sanding of bare wood, smoothing old paint, or preparing a finished surface for recoating.
DM 2610919361 9/03 9/5/03 8:33 AM Page 10 After replacing brushes the tool should be run at no-load; place on a clean surface and run freely for 5 minutes before loading (or using) the tool. This will allow the brushes to “seat” properly and will give you more hours of life from each set of brushes. This will also extend the total life of your tool since the commutator surface will “wear” longer. TOOL LUBRICATION Your Dremel tool has been properly lubricated and is ready to use.
DM 2610919361 9/03 9/5/03 8:33 AM Page 11 Dremel Limited Warranty Your Dremel product is warranted against defective material or workmanship for a period of two years from date of purchase. In the event of a failure of a product to conform to this written warranty, please take the following action: 1. DO NOT return your product to the place of purchase. 2. Carefully package the product by itself, with no other items, and return it, freight prepaid, along with: A.