600A019PE.qxp_Go 4/6/18 12:22 PM Page 1 IMPORTANT: Read Before Using IMPORTANT : Lire avant usage IMPORTANTE: Leer antes de usar Operating/Safety Instructions Consignes de fonctionnement/sécurité Instrucciones de funcionamiento y seguridad GO P.O.
1600A019PE.qxp_Go 4/6/18 12:22 PM Page 2 Safety Symbols The definitions below describe the level of severity for each signal word. Please read the manual and pay attention to these symbols. ! This is the safety alert symbol. It is used to alert you to potential personal injury hazards. Obey all safety messages that follow this symbol to avoid possible injury or death. DANGER indicates a hazardous situation which, if not avoided, will result in death or serious injury.
1600A019PE.qxp_Go 4/6/18 12:22 PM Page 3 Maintain power tools. Check for misalignment or binding of moving parts, breakage of parts and any other condition that may affect the power tool’s operation. If damaged, have the power tool repaired before use. Many accidents are caused by poorly maintained power tools. Use personal protective equipment. Always wear eye protection.
1600A019PE.qxp_Go 4/6/18 12:22 PM Page 4 Safety Rules for Cordless Screwdrivers Hold power tool by insulated gripping surfaces, when performing an operation where the fastener may contact hidden wiring. Fasteners contacting a "live" wire may make exposed metal parts of the power tool "live" and could give the operator an electric shock. Use clamps or another practical way to secure and support the workpiece to a stable platform.
1600A019PE.qxp_Go 4/6/18 12:22 PM Page 5 rather than the cord. Do not operate charger with damaged cord or plug; have them replaced immediately. Damaged plug or cord may result in electric shock or fire. Do not disassemble charger or operate the charger if it has received a sharp blow, been dropped or otherwise damaged in anyway. Incorrect reassembly or damage may result in electric shock or fire. Before each use, check the battery charger, cable and plug.
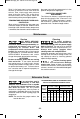
1600A019PE.qxp_Go 4/6/18 12:22 PM Page 6 Symbols IMPORTANT: Some of the following symbols may be used on your tool. Please study them and learn their meaning. Proper interpretation of these symbols will allow you to operate the tool better and safer. Symbol Designation / Explanation V Volts (voltage) A Amperes (current) Hz Hertz (frequency, cycles per second) ⌀ Diameter (size of drill bits, grinding wheels, etc.) n0 No load speed (rotational speed at no load) .../min 0 1, 2, 3, ...
1600A019PE.qxp_Go 4/6/18 12:22 PM Page 7 Functional Description and Specifications Battery tools are always in an operative condition. Be aware of the possible hazards. SAVE THESE INSTRUCTIONS Dremel GO Lithium-ion Cordless Screwdriver Fig. 1 7 4 5 3 2 1 6 10 8 9 Cordless Driver Model number . . . . . . . . .GO Voltage rating . . . . . . . . .3.6V / 4V Max No load speed (n0) . . . . .360/min Bit holder . . . . . . . . . . . . .1/4" Hex shank Max. screw diameter . . .
1600A019PE.qxp_Go 4/6/18 12:22 PM Page 8 Charging the Tool c. Check USB terminals for dirt. Clean with cotton swab and alcohol if necessary. d. Check to see if USB cable is properly connected to the tool and the power adapter. e. If you still do not get proper charging, send tool and power adapter to your Dremel Service Center. Note: Use of power adapters or battery packs not sold by Dremel may void the warranty.
1600A019PE.qxp_Go 4/6/18 12:22 PM Page 9 Operating Instructions INSERTING BITS Your tool is equipped with a bit holder 1. Simply push a bit 10 into the bit holder 1 as far as it will go (Fig. 1). Fig. 3 C DIRECTION OF ROTATION To prevent damage to the tool, do not use the direction of rotation switch while the power tool is in operation. Clockwise rotation: To drive screws in, slide the direction of rotation switch 2 down or forward to position A (Fig. 2).
1600A019PE.qxp_Go 4/6/18 12:22 PM Page 10 Third, if a flat head screw is used, countersink the hole to make the screw flush with the surface. Then, simply apply even pressure when driving the screw. The screw shank clearance hole in the first piece allows the screw head to pull the pieces tightly together. TEMPERATURE DEPENDENT OVERLOAD PROTECTION When using as intended for, the power tool cannot be subject to overload.
1600A019PE.qxp_Go 4/6/18 12:22 PM Page 11 Dremel™ Limited Warranty Your Dremel product is warranted against defective material or workmanship for a period of two years from date of purchase. In the event of a failure of a product to conform to this written warranty, please take the following action: 1. DO NOT return your product to the place of purchase. 2. Carefully package the product by itself, with no other items, and return it, freight prepaid, along with: A.
1600A019PE.qxp_Go 4/6/18 12:22 PM Page 12 Symboles relatifs à la sécurité Les définitions ci-dessous décrivent le niveau de gravité pour chaque terme signalant un danger. Veuillez lire le mode d’emploi et lire la signification de ces symboles. ! C’est le symbole d’alerte relatif à la sécurité. Il est utilisé pour vous avertir de l’existence possible d’un danger de lésion corporelle.
1600A019PE.qxp_Go 4/6/18 12:22 PM Page 13 d’outils électroportatifs quand vous êtes fatigué ou sous l’emprise de drogues, d’alcool ou de médicaments. Quand on utilise des outils électroportatifs, il suffit d’un moment d’inattention pour causer des blessures corporelles graves. Utilisez des équipements de sécurité personnelle. Portez toujours une protection oculaire.
1600A019PE.qxp_Go 4/6/18 12:22 PM Page 14 Consignes de sécurité pour tournevis sans fil Tenez l’outil électroportatif par ses surfaces de préhension isolées lorsque vous effectuez une opération à l’occasion de laquelle l’outil de fixation risque d’entrer en contact avec un fil caché. Tout contact d’un outil de fixation avec un fil sous tension risque de mettre aussi sous tension les parties métalliques exposées de l’outil électroportatif, ce qui pourrait causer un choc électrique pour l’opérateur.
1600A019PE.qxp_Go 4/6/18 12:22 PM Page 15 la fiche est endommagé ; faites-les remplacer immédiatement. Une fiche ou un cordon endommagé pourrait causer un choc électrique ou un incendie. avec de l'eau pendant au moins 10 minutes et consultez un médecin. Ne démontez pas le chargeur et ne l’utilisez pas s’il a reçu un impact violent, s’il est tombé ou s’il a été endommagé par ailleurs d’une quelconque autre façon.
00A019PE.qxp_Go 4/6/18 12:22 PM Page 16 Symboles IMPORTANT : Certains des symboles suivants peuvent être utilisés sur votre outil. Veuillez les étudier et apprendre leur signification. Une interprétation appropriée de ces symboles vous permettra d'utiliser l'outil de façon plus efficace et plus sûre. Symbole Désignation / Explication V Volts (voltage) A Ampéres (courant) Hz Hertz (fréquence, cycles par seconde) ⌀ Diamétre (taille des mèches de perceuse, meules, etc.
1600A019PE.qxp_Go 4/6/18 12:22 PM Page 17 Description fonctionnelle et spécifications Les outils à piles sont toujours en état de marche. Soyez conscient des dangers éventuels. CONSERVEZ CES INSTRUCTIONS Tournevis sans fil Dremel GO à bloc-piles lithium-ion Fig. 1 7 4 5 3 2 1 6 10 8 9 Tournevis sans fil Numéro de modèle . . . . . . . . . .GO Tension nominale . . . . . . . . . . .3,6V / 4V Max Vitesse à vide (n0) . . . . . . . . . .360/min Porte-embout . . . . . . . . . . . . . .
1600A019PE.qxp_Go 4/6/18 12:22 PM Page 18 Charge de l’outil CHARGE DE L’OUTIL Votre Dremel GO n’est pas livré complètement chargé à l’usine. N’oubliez pas de charger l’outil avant sa première utilisation. - Insérez le câble USB 8 dans le port USB de l’adaptateur de courant 9 (Fig. 1). - Branchez l’adaptateur de courant 9 dans une prise de courant standard. - Ouvrez le cache du port du micro USB 6 et branchez la fiche du micro USB dans le port du Micro USB 5.
1600A019PE.qxp_Go 4/6/18 12:22 PM Page 19 Charge de l’outil instructions, il risque de causer des perturbations nuisibles aux communications radio. Cependant, il n'est pas possible de garantir qu'aucune perturbation ne résultera d'une installation particulière.
1600A019PE.qxp_Go 4/6/18 12:22 PM Page 20 Consignes de fonctionnement FIXATION À L'AIDE DE VIS La procédure illustrée à la Fig. 4 vous permettra de fixer des matériaux ensemble à l'aide de votre tournevis sans fil sans dévêtir, fendre ou séparer le matériau. Fixez d’abord les pièces ensemble à l’aide d’une bride, et percez le premier trou aux 2/3 du diamètre de la vis. Si le matériau est tendre, percez uniquement les 2/3 de la longueur voulue. Si le matériau est dur, percez toute la longueur.
1600A019PE.qxp_Go 4/6/18 12:22 PM Page 21 Cordons de rallonge Si un cordon de rallonge s'avère nécessaire, vous devez utiliser un cordon avec conducteurs de dimension adéquate pouvant porter le courant nécessaire à votre outil. Ceci préviendra une chute excessive de tension, une perte de courant ou une surchauffe. Les outils mis à la terre doivent utiliser des cordons de rallonge trifilaires pourvus de fiches à trois broches ainsi que des prises à trois broches.
1600A019PE.qxp_Go 4/6/18 12:22 PM Page 22 Símbolos de seguridad Las definiciones que aparecen a continuación describen el nivel de gravedad de cada palabra de señal de seguridad. Por favor, lea el manual y preste atención a estos símbolos. Éste es el símbolo de alerta de seguridad. Se utiliza para alertarle a usted de posibles peligros de lesiones corporales. Obedezca todos los mensajes de seguridad que sigan a este símbolo para evitar posibles lesiones o muerte.
1600A019PE.qxp_Go 4/6/18 12:22 PM Page 23 seguridad antideslizante, casco o protección de oídos, utilizado para las condiciones apropiadas, reducirá las lesiones corporales. Evite el arranque accidental. Asegúrese de que el interruptor esté en la posición de apagado antes de conectar la herramienta a la fuente de energía y / o al paquete de batería, levantar la herramienta o transportarla.
1600A019PE.qxp_Go 4/6/18 12:22 PM Page 24 Normas de seguridad para atornilladores inalámbricos Sujete las herramientas mecánicas por las superficies de agarre aisladas cuando realice una operación en la que las herramientas de corte puedan entrar en contacto con cables ocultos. El contacto con un cable que tenga corriente también puede hacer que las partes metálicas al descubierto de la herramienta lleven corriente y hacer que el operador sufra una sacudida eléctrica.
1600A019PE.qxp_Go 4/6/18 12:22 PM Page 25 Desconecte el cargador jalando el enchufe en lugar de jalando el cable de alimentación. No utilice el cargador con el cable de alimentación o el enchufe dañado; haga que reemplacen el cable o el enchufe de inmediato. Un enchufe o un cable de alimentación dañado puede causar descargas eléctricas o incendio. No desensamble el cargador ni lo utilice si ha recibido un golpe fuerte, se ha caído o se ha dañado de alguna otra manera.
1600A019PE.qxp_Go 4/6/18 12:22 PM Page 26 Símbolos IMPORTANTE: Es posible que algunos de los símbolos siguientes se usen en su herramienta. Por favor, estúdielos y aprenda su significado. La interpretación adecuada de estos símbolos le permitirá utilizar la herramienta mejor y con más seguridad.
1600A019PE.qxp_Go 4/6/18 12:22 PM Page 27 Descripción funcional y especificaciones Las herramientas accionadas por baterías se encuentran siempre en condiciones de funcionamiento. Conozca los posibles peligros. GUARDE ESTAS INSTRUCCIONES Atornillador inalámbrico con batería de iones de litio Dremel GO Fig. 1 7 4 5 3 2 1 6 10 8 9 Atornillador inalámbrico Número de modelo . . . . . . . . .GO Tensión nominal . . . . . . . . . . .3,6V / 4V Max Velocidad sin carga (n0) . . . . .360/min Portabroca . . .
1600A019PE.qxp_Go 4/6/18 12:22 PM Page 28 Procedimiento de carga de la herramienta PROCEDIMIENTO DE CARGA DE LA HERRAMIENTA La Dremel GO no viene completamente cargada de la fábrica. Asegúrese de cargar la herramienta antes de su uso inicial. - Inserte el cable USB 8 en el puerto USB del adaptador de alimentación 9 (Fig. 1). - Enchufe el adaptador de alimentación 9 en un tomacorriente estándar. - Abra la cubierta del puerto micro USB 6 e inserte el enchufe micro USB en el puerto micro USB 5.
1600A019PE.qxp_Go 4/6/18 12:22 PM Page 29 Procedimiento de carga de la herramienta con las instrucciones, puede causar interferencia perjudicial para las radiocomunicaciones. Sin embargo, no hay garantía de que no vaya a ocurrir interferencia en una instalación específica.
1600A019PE.qxp_Go 4/6/18 12:22 PM Page 30 Instrucciones de funcionamiento SUJECION CON TORNILLOS El procedimiento mostrado en la fig. 4 le permitirá sujetar unos materiales a otros atornillándolos con el atornillador inalámbrico sin desforrar, rajar ni separar el material. Primero, fije las piezas una a otra y taladre el primer agujero con 2/3 del diámetro del tornillo. Si el material es blando, taladre únicamente 2/3 de la longitud adecuada. Si es duro, taladre la longitud completa.
1600A019PE.qxp_Go 4/6/18 12:22 PM Page 31 Mantenimiento Servicio Limpieza NO HAY PIEZAS EN EL INTERIOR QUE PUEDAN SER AJUSTADAS O REPARADAS POR EL USUARIO. El mantenimiento preventivo realizado por personal no autorizado pude dar lugar a la colocación incorrecta de cables y componentes internos que podría constituir un peligro serio. Recomendamos que todo el servicio de las herramientas sea realizado en un Centro de servicio de fábrica Dremel.
1600A019PE.qxp_Go 4/6/18 12:22 PM Page 32 Garantía limitada de Dremel™ Su producto Dremel está garantizado contra defectos de material o de fabricación durante un período de dos años a partir de la fecha de compra. En caso de que un producto no se ajuste a esta garantía escrita, por favor, tome las medidas siguientes: 1. NO devuelva el producto al lugar de compra. 2. Empaquete el producto cuidadosamente y solo, sin otros artículos, y envíelo con el porte pagado junto con: A.