
User guide


Drobo 5N Getting Started Guide 9
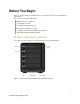
Setting Up Your Drobo 5N
Once you have unpacked your Drobo 5N from its box and ensured you meet all system and
hardware requirements, it is time to set up your Drobo device for use. This can be done in just
four easy steps!
1.
Install Drobo Dashboard.
2.
Install an mSATA SSD (optional).
2.
Insert the drives.
3.
Connect the cables and turn on the power.
4.
Set the administrator username and password.
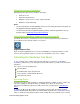
Installing Drobo Dashboard
Drobo Dashboard is the software companion to your Drobo 5N, enabling you to easily set up and
manage your Drobo device. Immediately following installation, you can choose to set Drobo
Dashboard to automatically install version updates, which we highly recommend.
Drobo software and firmware updates can also be installed from
www.drobo.com/support/updates.
Note: You need to have administrator rights on the computer on which you install Drobo
Dashboard, and also have access to the Internet.
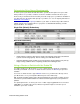
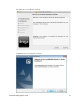
1. Navigate to
www.drobo.com/start and click on the latest Drobo Dashboard for your Drobo
product to run and install it.
Note: The first time you install Drobo Dashboard, you will be asked to select a language from
the drop-down list. Please do this.
The Drobo Dashboard Installer (or Installation Wizard) opens, preparing to install.