
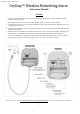
Instruction Manual


A. How to test the transmitter and receiver
(The transmitter and receiver have been set on the same channel before delivery. They are ready for use. No pairing is required.)
1. Remove insulation tag from the transmitter, if any, before use.
3. Make sure the power switch of the receiver is turned to “ON” position.
4. Test the transmitter by touching the sensor tip (metal prong) with a wet finger. Press the "Reset" button to stop the receiver from
sounding.
regarding channel selection.)
B. How to adjust volume level and select operation mode / sound
2. Slide the switch for operation mode inside the battery compartment for change from "sound only" to "sound and vibration"
and "vibration only".
3. There are altogether 6 sounds available: A1, A2, A3, B1, B2 & B3. To select a desired sound, choose “A” or “B”
and then “1”, “2” or “3” by sliding the sound switches.
4. Alternatively, you may turn the sound switch to “R” for random playing.
C. Way to attach the transmitter and sensor
- Lift up the clip lever
- Place the waistband of the underpants into
the mouth of the clip
- Lock the clip by pressing down the lever
( Tip: Pull down the underpants slightly for easy fixing of sensor )
Important: The sensor should be attached with the cover facing up (as shown below)
( Note: To detach the sensor from the underpants, simply lift up the tail of the cover )
2
2. Put 2AA alkaline
batteries in the receiver. Ensure the batteries are inserted with correct polarity.
(If the receiver doesn't sound, please check whether the transmitter and receiver are on the same
channel – see section E
1. Open the battery compartment door of the receiver and press "+" or "-" for volume adjustment (4 levels).
1. Attach the transmitter
to the underpants by following the steps set out below:
2. Attach the sensor
to the outside of the underpants in the following manner: