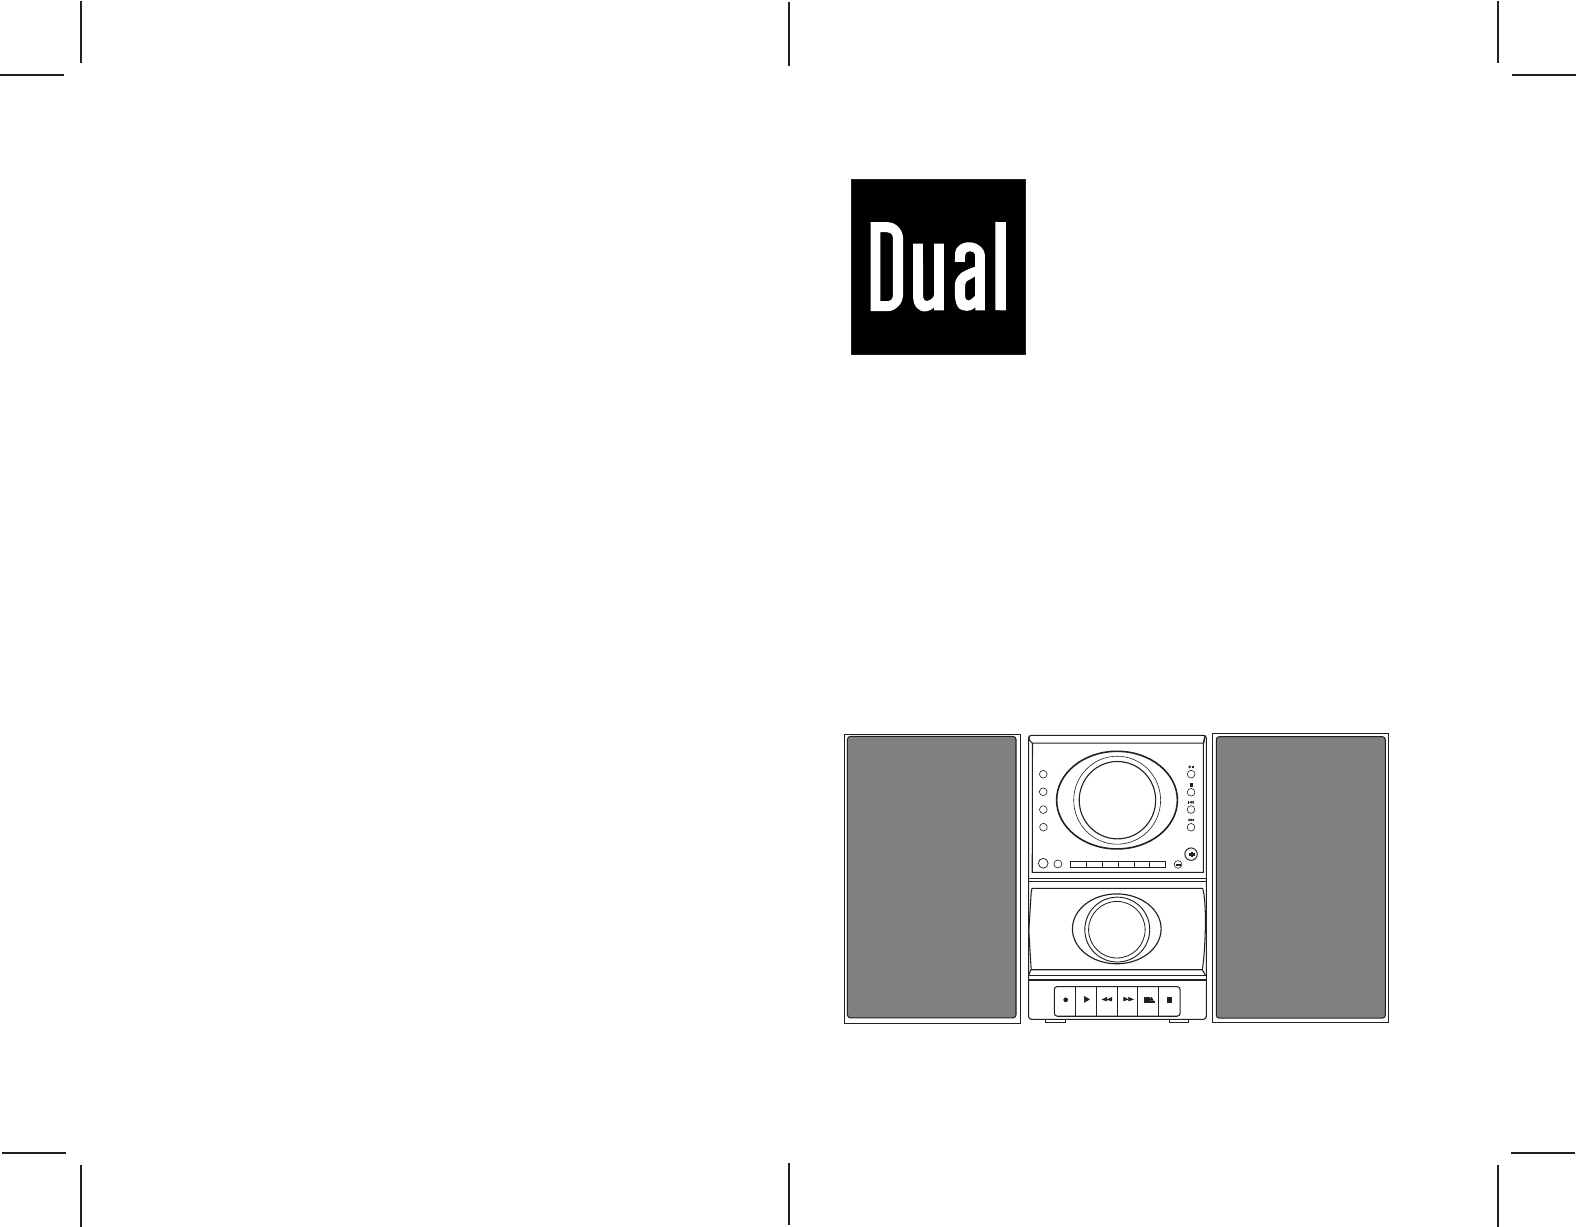
Job : 7286-002 (ML 100) DUAL German Size : 125 ( w ) x 190 ( h ) mm Date : 30 Dec 2003 ML 100 MICRO CD MUSIK SYSTEM MIT RDS Gebrauchsanweisung DISPLAY PRESET EQ TAPE TUNER POWER STANDBY IR SLEEP MICRO COMPONENT CD SYSTEM TIMER C-ADJ M-UP MEMORY REPEAT VOLUME INTRO RANDOM STEREO CASSETTE DECK AUTO STOP MECHANISM
Lautsprecher anschließen 12 11 10 9 Die roten Lautsprecherkabel müssen mit den roten Buchsen der Anlage und die schwarzen Kabel mit den schwarzen Buchsen verbunden werden. Jeder Lautsprecher hat ein schwarzes und ein rotes Kabel (jeweils für das positive und das negative Signal). Die oberen beiden Buchsen sind für den linken Lautsprecher, die unteren beiden für den rechten.
Fernbedienung BETRIEBSANLEITUNG CD POWER POWER – Schaltet das Gerät ein bzw. aus. SOURCE – Wählt die Signalquelle aus (Tuner, Kassette, CD). MUTE x – Schaltet den Ton aus. TIMER – Schaltet den Timer ein oder aus. SNOOZE – Aktiviert den Schlummermodus bei eingeschaltetem Timer (nur für Fernbedienung). SLEEP – Legt die automatische Abschaltzeit fest (60ÊMin, 30ÊMin, Aus). INTRO – Spielt das Intro der CD ab. DISPLAY – Zeigt Uhrzeit und Timereinstellung an. C.
RADIO Kassette 1. Schalten Sie die Anlage mit der Taste POWER / STAND BY ein. 2. Drücken Sie auf die Taste TUNER, um das Radio auszuwählen. 3. Drücken Sie erneut auf die Taste TUNER, um das Frequenzband (UKW/MW) auszuwählen. 4. Wählen Sie den gewünschten Sender mit der Taste bzw. aus. 5. Stellen Sie mit der Taste VOLUME + bzw. VOLUME - die gewünschte Lautstärke ein.
Kopfhörer anschließen Stecken Sie den Anschluss des Kopfhörers in die Buchse PHONES, und stellen Sie die gewünschte Lautstärke ein. Die Lautsprecher werden automatisch abgeschaltet. Klangbildeinstellung Mit der Taste PRESET EQ können Sie nacheinander die Klangeinstellungen CLASS, ROCK, POP und FLAT auswählen. Uhrzeit einstellen Im Standby-Modus zeigt die Anlage die Zeiteinstellung „0:00“ an. Gehen Sie folgendermaßen vor, um die Uhrzeit einzustellen: 1. Halten Sie die Taste C-ADJ MEMORY gedrückt.
Wichtige Hinweise zu Batterien • Wenn Sie die Fernbedienung länger als einen Monat nicht verwenden, sollten Sie die Batterien herausnehmen. • Entsorgen Sie undichte Batterien sofort, da die austretende Flüssigkeit zu Hautverbrennungen oder anderen Gesundheitsschäden führen kann. Entsorgen Sie die Batterien entsprechend den nationalen Vorschriften und Gesetzen.
Job : 7286-001(1930109.
12 11 10 9 Connecting the Speakers SLEEP TIMER C-ADJ M-UP MEMORY REPEAT 8 7 INTRO RANDOM When connecting the speakers, match the red wires to the red jacks and the black wires 19 to the black jack. Each speaker has a black and a red jack, one for positive and one for 1 13 negative. The top two jacks are for the left speaker, while the bottom two jacks are for the right speaker.
OPERATION INSTRUCTIONS CD OPERATION Remote Operation POWER - Turns the unit on/off. SOURCE - Selects Tuner, Tape and CD mode. POWER MUTE x - Mutes volume. TIMER - Enables or disables timer. SNOOZE - Enters snooze mode when timer is on. (only for remote) SLEEP - Selects sleep time of 60 min, 30 min and off. INTRO - Selects lntro play in CD mode. DISPLAY - Shows clock time and timer on time. C.ADJ/MEMORY - Enters program and clock setting mode; confirms your settings.
RADIO OPERATION 1. 2. 3. 4. 5. CASSETTE TAPE OPERATION Press the POWER STAND BY button to power on. Press the TUNER button to select the RADIO mode. Press the TUNER button again to select band ( FM / AM ). Tune in a station with the ( or ) button. Adjust the VOLUME + or VOLUME - button to control the sound. PLAYBACK : DISPLAY Note : PRESET EQ 1. To improve reception the FM antenna wire should be extended in FM mode, or rotate the unit in AM mode. 2.
Listening through headphones Insert the headphone plug into the PHONE jack and adjust the volume. The sound from the speakers will be cut off. To protect recordings on one or both sides of a tape, remove the corresponding tab. If you later want to record on the tape, affix a piece of adhesive tape over the hole. Side A Protection Side B Protection A Sound Effect Setting B Press the PRESET EQ button to select CLASS, ROCK, POP, FLAT in turn.
Important Battery Information • Remove the batteries to avoid leakage if you do not use your remote control for more than one month. • Discard leaky batteries immediately as leaking batteries may cause skin burns or other personal injuries. Dispose of batteries in the proper manner, according to provincial and local regulations.