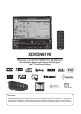
XDVDN8190 INSTALLATION/OWNER’S MANUAL DVD Multimedia Receiver with Internal GPS Navigation and 7” Touch Screen Display TOUCH Safety Notes: The DVD video display of the in-dash unit will not operate while the vehicle is moving. This is a safety feature to prevent driver distraction. In-dash DVD video functions will only operate when vehicle is in Park and the parking brake is engaged. It is illegal in most states for the driver to view video while the vehicle is in motion.
Copyright Notes This product incorporates copyright protection technology that is protected by method claims of certain U.S. patents and other intellectual property rights owned by Macrovision Corporation and other rights owners. Use of this copyright protection technology must be authorized by Macrovision Corporation, and is intended for home and other limited viewing uses only unless otherwise authorized by Macrovision Corporation. Reverse engineering or disassembly is prohibited.
XDVDN8190 PREPARATION Table of Contents Page Warning Statement . . . . . . . . . . . . . . . . . . . . . . . . . . . . . . . . . . . . . . . . . . . . . Safety Information/Precautions . . . . . . . . . . . . . . . . . . . . . . . . . . . . . . . . . . . Preparation/Mounting/Wiring . . . . . . . . . . . . . . . . . . . . . . . . . . . . . . . . . . . . . Remote Control Overview . . . . . . . . . . . . . . . . . . . . . . . . . . . . . . . . . . . . . Control Locations - Monitor Closed . . . . . . . . . .
XDVDN8190 PREPARATION WARNING Upon installation of this Monitor/DVD player (“unit”) into a vehicle, the driver of the vehicle must not operate this unit by watching videos or playing video games while driving. Failure to follow this instruction could lead to driver distraction which could result in serious injury or death to the vehicle’s occupants or persons outside the vehicle and/or property damage.
XDVDN8190 OPERATION Safety Information Please read all instructions carefully before attempting to install or operate. Due to its technical nature, it is highly recommended that your DUAL XDVDN8190 is installed by a professional installer or an authorized dealer. This product is only for use in vehicles with 12VDC negative ground only. Safety Notes: The DVD video display of the in-dash unit will not operate while the vehicle is moving. This is a safety feature to prevent driver distraction.
XDVDN8190 INSTALLATION Preparation Please read entire manual before installation. Before You Start • Disconnect negative battery terminal. Consult a qualified technician for instructions. • Avoid installing the unit where it would be subject to high temperatures, such as from direct sunlight, or where it would be subject to dust, dirt or excessive vibration. Getting Started • Slide the unit out of the mounting sleeve. • Install mounting sleeve into opening, bending tabs to secure.
XDVDN8190 INSTALLATION Expanded Wiring Diagram - Inputs/Outputs GPS Antenna Installation Determine a suitable location for mounting the GPS antenna. For optimum reception, the antenna should be mounted in the center of the vehicle roof with a minimum of 6” from any window. The antenna can also be mounted to the rear trunk lid at least 4” from the rear window. Do not install the antenna in a location where it may obstruct the field of view to the skyline such as on the front dashboard or rear deck tray.
XDVDN8190 INSTALLATION Wiring Diagram - Optional A/V Connections Wiring Notes: Subwoofer output The SUBWOOFER audio output (Blue RCA) is active in all audio modes and must be connected to an external amplifier. Center output The CENTER audio output (Gray RCA) is only active in DVD 5.1 (6-channel) audio modes and must be connected to an external amplifier. Rear view camera A rear view camera (not included) can be used with the CAMERA input. Need help? Call our Technical Service Hotline, 1-866-382-5476.
XDVDN8190 OPERATION IR Remote Preparation To first use the IR Remote control, you must first pull the battery insulation tape out Notes: • Remove the battery if the remote will not be used for a month or longer • Remove and dispose of battery properly To insert or replace the battery: Remove the battery holder Remove the battery from the battery holder Install the new battery Make sure to keep the (+) side up Insert the battery holder • CAUTION!!! Do not store battery with metallic objects or mater
XDVDN8190 OPERATION Control Locations - Monitor Closed 1 2 4 3 5 6 7 8 18 9 17 16 15 1 Band 2 Auto Store/Preset Scan 3 Secondary LCD 4 Disc-In Indicator 5 Display 6 Open/Close Monitor 7 Eject 8 Rotary Encoder/Enter 9 Reset Secondary LCD Information 14 13 12 11 10 10 SD Card Slot 11 Bluetooth Hands-Free Microphone 12 Play/Pause/Scan 13 Channel/Chapter/Track Up/Fast Forward 14 Channel/Chapter/Track Down/Fast Reverse 15 Mute 1 16 Mode/Rear-Zone Audio On/Off 17 Infrared Sen
XDVDN8190 OPERATION Control Functions - Monitor Closed Band AS/PS (Auto Store/Preset Scan) Secondary LCD Display Press BAND to increment from FM1, FM2, FM3, AM ] FM1. Press AS/PS momentarily to start station PRESET SCAN function, Press AS/PS for 2 seconds to start AUTO STORE station preset function in current BAND. Additional LCD for system information while monitor is closed.
XDVDN8190 OPERATION Control Functions - Monitor Closed Mute Press MUTE to silence audio output. "MUTE" will appear in the display. Press MUTE again to restore audio at previous volume level. Mode Press MODE to select between the unit’s available modes, including Tuner, DVD (which includes CD and MP3/WMA playback), iPod, Camera, SD, Navigation and Auxiliary inputs. Each time the MODE button is pressed the next mode is chosen. Modes of operation are indicated on the OSD.
XDVDN8190 OPERATION Control Locations and Functions - Monitor Open 1 2 3 7 Band AS/PS (Auto Store/Preset Scan) 6 4 1 Band 2 AS/PS 3 Navigation 4 Close Monitor 5 Info/Picture 6 Screen Angle Up 7 Screen Angle Down 5 Press BAND to increment from FM1, FM2, FM3, AM ] FM1. Press AS/PS momentarily to start station PRESET SCAN function, Press AS/PS for 2 seconds to start AUTO STORE station preset function in current BAND.
XDVDN8190 OPERATION Control Locations - Remote 1 2 3 4 5 6 7 8 9 10 11 12 13 14 15 16 17 18 19 20 21 22 23 24 25 26 27 28 29 30 31 32 34 35 36 38 39 40 33 37 1 Mode 16 Info 31 Root 2 Mute 17 Search 32 Repeat 3 Open/Close 18 Key #0 33 Chapter/Track/Seek Tune Down 4 Power 19 Band/Stop 34 Chapter/Track/Seek Tune Up 5 Key #1 20 Audio Select 35 Fast Reverse/Manual Tune Down 6 Key #2 21 Escape 36 Fast Forward/Manual Tune Up 7 Key #3 22 4-Way - Up
XDVDN8190 OPERATION Control Functions - Remote Mode Press once to incrementally select desired source. Mute Press once to MUTE audio; press again to return audio. Open/Close Power Keys 0-9 Volume Up Volume Down Info Search Band/Stop Audio Select Escape 4-Way-Up/Down/Left/Right Menu Picture OK Repeat A-B Press once to open monitor; press again to close the monitor. Press once to turn the unit on, press again to turn unit off. Direct access chapter/track/preset station for current BAND. Increase VOLUME.
XDVDN8190 OPERATION General Operation Power On/Off Press PWR to turn the unit on. Hold for 3 seconds to turn the unit off. Mute Press MUTE to silence the audio; Press MUTE again to cancel. Mode Press MODE to select between Tuner, Disc, iPod, Bluetooth, Camera, SD, Navigation and Auxiliary inputs. Modes of operation are indicated in the OSD (On Screen Display). iPod, and SD card (optional) must be connected/inserted to appear in the MODE selection string.
XDVDN8190 OPERATION General Operation INFO/PIC Monitor Brightness CVBS Screen Controls Press INFO momentarily to display DVD disc information. Press and hold PIC for 3 seconds to change monitor BRIGHTNESS. Turn volume knob Q or P to adjust to desired level (0 minimum/20 maximum; 10 is default). While in iPod Video playback, Aux or Camera mode: Press and hold PIC for 3 seconds to access PICTURE MENU.
XDVDN8190 OPERATION General Operation - Main Menu Main Menu Access There are two methods to access the MAIN menu: • • Press MENU button on the remote control. Touch the upper left corner of the touch screen. 1 2 3 4 5 6 16 15 7 L 14 13 12 5 11 Touch Access Buttons 1) 2) 3) 4) 5) 6) 7) 8) 9) 10) 11) 12) 13) 14) 15) 16) Rapid Dial Rotary Encoder 17 10 9 8 Touch to access AM/FM TUNER mode.
XDVDN8190 OPERATION GENERAL Setup - Menu L General Setup Menu • • • Press GENERAL icon to access the GENERAL setup mode. Select desired parameter you wish to change. Page will return back to previous screen after 15 seconds of inactivity or by pressing the RETURN button.
XDVDN8190 OPERATION GENERAL Setup - Menu L General Setup Menu • • • • L Press GENERAL icon to access the GENERAL setup mode. Press PAGE icon in the lower right corner. Select desired parameter you wish to change. Page will return back to previous screen after 15 seconds of inactivity or by pressing the RETURN button.
XDVDN8190 OPERATION GENERAL Setup - Adjusting Radio Frequency Adjusting Radio Frequency L 1 Step 1 Touch top left corner of screen. L 2 Step 2 Touch GENERAL icon. L 3 Step 3 Touch USA. L L 5 4 Step 4 Touch the setting for your region. Step 5 Touch RETURN to exit.
XDVDN8190 OPERATION GENERAL Setup - Adjusting the Clock 12Hr Clock Mode L 1 Step 1 1) Touch top left corner of screen. L 2 Step 2 2) Touch GENERAL icon. L 3 Step 3 3) Touch 00:00 area in the CLOCK row. L 7 Steps 4-8 24Hr Clock Mode 21 L L L 8 5 6 4) Keypad will appear. 5) Enter HOURS, touch OK. 6) Enter MINUTES, touch OK. 7) Touch AM or PM to set. 8) Touch RETURN to exit. For 24Hr format, select 24Hr from CLOCK MODE, then follow steps 1-8.
XDVDN8190 OPERATION GENERAL Setup - Setting the Anti-theft code Default Anti-theft password is 0000 and is turned off. To turn this feature on, follow the steps below. CAUTION!! This will lock your unit from operating if battery power is disconnected for more than 5 minutes. Step 1 & 2 L 1 L 2 1) Touch top left corner of screen. 2) Touch GENERAL icon.
XDVDN8190 OPERATION SCREEN Setup - Menu Screen Setup Menu • • • L Press SCREEN icon to access the SCREEN setup mode. Select desired parameter you wish to change. Page will return back to previous screen after 15 seconds of inactivity or by pressing the RETURN button.
XDVDN8190 OPERATION SCREEN Setup - Setting TFT Brightness This will set the default setting for the TFT display brightness. This can also be set by pressing the INFO button on the front TFT panel. L 1 Step 1 1) Touch top left corner of screen. Step 2 2) Touch SCREEN icon. L 2 L 3 Step 3 3) Touch [-] to reduce brightness. LL 5 4 Step 4 4) Touch [+] to increase brightness. 0 - 20 is possible Default = 10 Step 5 5) Touch RETURN to exit.
XDVDN8190 OPERATION SCREEN Setup - Setting TFT Angle Set for best viewing angle for your vehicle Step 1 L 1 1) Touch top left corner of screen. L 2 Step 2 2) Touch SCREEN icon. L 3 Step 3 3) Touch a number displayed in SCREEN TILT row. L 5 L 4 Step 4 4) Touch desired angle for best viewing angle. 1 - 6 is possible Default = 4 Step 5 25 5) Touch RETURN to exit.
XDVDN8190 OPERATION SCREEN Setup - Touch Screen Calibration Upon initial installation or occasionally, the touch screen may have to be calibrated. Follow these steps as described. Step 1 L 1 1) Touch top left corner of screen. L 2 Step 2 2) Touch SCREEN icon. LL 3 Step 3 & 4 3) Touch No in TS Calibration row. 4) Then touch Yes. L 5 Step 5 & 6 4 Notes: For proper calibration you must touch each pointer for 2 seconds.
XDVDN8190 OPERATION ASP Config - Audio Settings Notes: Bass Freq Treble Freq Sub Filter These settings affect the quality of the audio in "Downmix" mode only and are primarily for use by a professional installer. For the casual user, it is recommended to only adjust the general sound quality by using the Audio Setup Menu, which is accessed by pressing the SEL button on the remote or momentarily pressing the left side rotary. Sets the bass center frequency for optimal bass effect.
XDVDN8190 OPERATION ASP Config - Audio Settings L Notes: FM/AM Gain The Gain settings allow you to customize the relative volume of the various modes to compensate for volume differences between the sources. The range is adjustable between -7 to +7, with 0 being the reference point (default level). Adjusts the relative volume in AM/FM Tuner mode. DVD Gain Adjusts the relative volume in DVD/CD/MP3/WMA mode. iPod Gain Adjusts the relative volume in iPod mode.
XDVDN8190 OPERATION AM/FM Tuner Operation - OSD Overview 1 2 3 4 5 19 18 6 7 17 16 15 14 Tuner Mode 29 13 12 11 10 9 8 From the main menu, touch TUNER icon on the screen to select AM/FM Tuner mode. 1 Current Source Indicator Displays source currently playing. 2 Preset Number Indicator Shows what preset has been selected. 3 Stereo Indicator Shows that the frequency selected is received in stereo. 4 Preset Number List Display Shows the preset list by preset number.
XDVDN8190 OPERATION AM/ FM Tuner Operation - OSD Overview 9 Tune Frequency - Up Touching this icon will tune the radio to a higher frequency by one frequency step. Touch and hold for continuous tuning up. (This function can also be performed by pressing the corresponding key on the front panel or remote control.) 10 Tune Frequency - Down Touching this icon will tune the radio to a lower frequency by one frequency step. Touch and hold for continuous tuning down.
XDVDN8190 OPERATION AM/FM Tuner Operation AM/FM Tuner Mode From the main menu, touch TUNER icon to select AM/FM Tuner mode. From the remote control or the front panel: Press MODE until TUNER is displayed on the screen. Band on the screen repeatedly until the desired band is displayed, FM-1, Touch FM-2, FM-3, or AM. Press the BAND button to switch between bands, FM-1, FM-2, FM-3, AM. From the remote control: Press the BAND button.
XDVDN8190 OPERATION AM/ FM Tuner Operation Direct Preset Tuning To select a desired station from the preset station list, touch any of the displayed station frequencies from the list. Use Rapid Dial by turning the right rotary clockwise or counter-clockwise, and pressing in select the highlighted channel. Use the up and down arrows on screen to scroll through the presets. Once highlighted, simply touch the screen at the appropriate preset. From the remote control: Press or to scroll through the presets.
XDVDN8190 OPERATION WARNING Upon installation of this Monitor/DVD player (“unit”) into a vehicle, the driver of the vehicle must not operate this unit by watching videos or playing video games while driving. Failure to follow this instruction could lead to driver distraction which could result in serious injury or death to the vehicle’s occupants or persons outside the vehicle and/or property damage.
XDVDN8190 OPERATION DVD Operation - Parking Brake Initialization SAFETY WARNING CAUTION !!! IT'S UNLAWFUL TO OPERATE A VEHICLE WHILE VIDEO IS DISPLAY IN THE DRIVERS VIEWING AREA ENGAGE EMERGENCY BRAKE TO ENJOY VIDEO Front Monitor Video Initialization • The video display of the in-dash unit will not operate while the vehicle is moving. This is a safety feature to prevent driver distraction. In-dash video functions will only operate when vehicle is in Park and the PARKING BRAKE is engaged.
XDVDN8190 OPERATION DVD Operation - Region Management DVD Region Management Some DVD discs can be played only in certain playback modes according to the intentions of the software. As the XDVDN8190 plays discs according to their intentions, some functions may not work as intended. Please be sure to read the instructions provided with each disc. This player has been designed to play back DVD software that has been encoded for specific region areas.
XDVDN8190 OPERATION DVD Operation - Inserting a Disc DVD Loading Slot Eject button Insert CD/DVD with label facing upwards Inserting a Disc With the label facing up, insert a standard size disc into the slot. The disc will automatically begin playback. Other sub-menus may have to be pressed to access the DVD movie/music content. Read the directions of your specific DVD disc for other features.
XDVDN8190 OPERATION DVD Operation - Touch Screen Controls Hidden Touch Screen area while in TUNER mode There are several hidden TOUCH SCREEN areas as outlined below: "A" area can be used in any mode to access MAIN menu.
XDVDN8190 OPERATION DVD Operation - Touch Screen Controls Using the hidden Touch Screen Controls A - Displays MAIN menu B - Displays DVD disc information C - Selects PREVIOUS chapter D - Select NEXT chapter E - Displays the full DVD transport controls F - GOTO search menu L L AREA A Access MAIN Menu Note: A DVD disc must be inserted to access these functions and features.
XDVDN8190 OPERATION DVD Operation - Touch Screen Controls 1 Using the hidden Touch Screen Controls 2 Touch AREA E 3 DVD Mode 39 4 5 6 7 8 9 From the main menu, touch the DISC icon on the screen to select DVD mode. 1 Title Menu Jumps to the DVD Title menu. 2 Sub-Title Mode Activates sub-titles and cycles between multiple sub-title languages. 3 Play/Pause Touch the 4 Stop 5 Fast Reverse Touch the icon to fast reverse at 2x speed.
XDVDN8190 OPERATION DVD Operation - Searching a DVD Searching a DVD L Searching by Time, Title or Chapter Touch Area F to bring up the Search Window. The Search Window allows a search for a specific time, title or chapter. Search by TIME example To search for a specific time, touch the --:--:-- area and an on-screen keyboard will pop up. Use the keyboard to enter a time and touch OK. (For example, to skip to 1 hour, 12 minutes and 19 seconds into the DVD, touch: 1 1 2 1 9 OK.
XDVDN8190 OPERATION DVD Operation Playback Control Touch Area E to bring up the on-screen buttons. to fast forward or to fast reverse. Touch Each subsequent press of the button will change the speed from normal to 2x to 4x to 8x to 20x and back to 1x. From the front panel: to fast forward. Press and hold to fast reverse. Press and hold From the remote control: to fast forward. Press to fast reverse. Press Repeat Mode icon to repeat either a chapter or title.
XDVDN8190 OPERATION DVD Operation Sub-Titles Touch the SUB.T icon to activate Sub-Title mode and select a sub-title language. Each touch will cycle the mode from off to language 1, language 2, etc., and back to off. From the remote control: Press the SUB-T button to control Sub-Title mode. Notes: • Not all DVD's have sub-titles and when they do, some will only have 1 language. Therefore this function may be disabled or limited. • The Sub-Title Mode can only be changed while the DVD is playing.
XDVDN8190 OPERATION DVD Setup Menu - Language LANGUAGE Setup Menu Note: A DVD disc must be inserted to access these functions and features. With the unit in DVD mode, press AREA A (top left screen) to display the MAIN menu. Press DVD Setup to access the DVD setup menu. L L Press the LANGUAGE icon to select LANGUAGE setup page. Disc Subtitle Press to select desired disc subtitle language.
XDVDN8190 OPERATION DVD Setup Menu - Audio Audio Setup Menu Note: A DVD disc must be inserted to access these functions and features. With the unit in DVD mode, press AREA A (top left screen) to display the MAIN menu. Press DVD Setup to access the DVD setup menu. L L Press the AUDIO icon to select from the following menus: Pink Noise Press to activate pink noise generator for the desired channel. The pink noise generator is used to set the relative speaker levels for multi-channel playback.
XDVDN8190 OPERATION DVD Setup Menu - Audio Center Control Press to select desired center channel time delay. The distance is defined in milliseconds. 5ms 4ms 3ms 2ms 1ms 0ms = DEFAULT L Rear Control Press to select desired rear channel time delay. The distance is defined in milliseconds. 15ms 12ms 9ms 6ms 3ms 0ms = DEFAULT L Down Sampling Select On to activate audio down sampling. The DVD audio output will be downsampled to 48kHz. The original sampling frequency is preserved when Off is selected.
XDVDN8190 OPERATION DVD Setup Menu - Video Video Setup Menu Note: A DVD disc must be inserted to access these functions and features. With the unit in DVD mode, press AREA A (top left screen) to display the MAIN menu. Press DVD Setup to access the DVD setup menu. L L Press the VIDEO icon to select from the following menus: TV Shape Press to select desired TV shape. 4:3 16:9 = DEFAULT NORMAL - 4:3 L L WIDE - 16:9 Angle Mark Select On to activate angle mark.
XDVDN8190 OPERATION DVD Setup Menu - Speaker Speaker Setup Menu Note: A DVD disc must be inserted to access these functions and features. With the unit in DVD mode, press AREA A (top left screen) to display the MAIN menu. Press DVD Setup to access the DVD setup menu. L L Press SPEAKER icon to select from the following menus: Speaker Mode Select desired speaker output mode. Full 6CH DownMix = DEFAULT L *Front Speaker Size L Select size of front speaker.
XDVDN8190 OPERATION DVD Setup Menu - Speaker *Surround Speaker Size Note: A DVD disc must be inserted to access these functions and features. *Subwoofer Speaker Select size of surround speaker. Large = DEFAULT Small None L Select Present if a subwoofer is included in your system. Present None = DEFAULT L *Center Speaker Size Press to select size of center speaker.
XDVDN8190 OPERATION DVD Setup Menu - Rating Rating Setup Menu Note: A DVD disc must be inserted to access these functions and features. With the unit in DVD mode, press AREA A (top left screen) to display the MAIN menu. Press DVD Setup to access the DVD setup menu. L L Press the RATING icon to select from the following menus: Enable Parental Lock Password Press ---- to enter a password. L Setting Parental Lock Password Rating Setting L 1. Enter a 4-digit code 2. Write the code down 3.
XDVDN8190 OPERATION CD Operation - OSD Overview 1 2 3 4 20 5 6 19 18 7 8 17 16 15 CD Mode 14 13 12 11 10 9 From the main menu, touch the DISC icon on the screen to select CD mode. 1 Current Source Indicator Displays Source Currently Playing 2 Track Number Indicator Displays current track number and total number of tracks on the disc. 3 Disc Title Indicator Displays current disc title when available.
XDVDN8190 OPERATION CD Operation - OSD Overview 51 7 Scroll bar Allows scrolling of track list. 8 Direct Select Keyboard icon to display a numeric keyboard. Enter desired Touch the track number and touch OK to select it. 9 Track Scan Touch the SCAN icon to listen to 10 seconds of each track in order. This icon will remain highlighted until touched to disable. 10 Fast Forward Touch the icon to fast forward at 2x speed.
XDVDN8190 OPERATION CD Operation Playing CD-DA discs After inserting a CD disc, files will play in numerical order in the directory. L Selecting by Keypad Touch to display keypad. Enter desired track number and press OK. L Selecting by Direct Track Access Touch desired track for DIRECT TRACK access. L L Previous/Next Page Touch to view UP/DOWN pages of available tracks.
XDVDN8190 OPERATION CD Operation Page Up/Down The Page Up and Page Down on-screen buttons can be used to see the rest of the tracks on the CD. Use the Direct Select method to play a desired track. From the remote control: Press to display the next page. Press to display the previous page. Track Select From the front panel: to skip to the next track. Press to skip to the previous track. Press From the remote control: to skip to the next track. Press to skip to the previous track.
XDVDN8190 OPERATION CD Operation Shuffle Mode Touch the icon to shuffle all of the tracks on the CD. The icon will be icon is illuminated, illuminated while Shuffle Mode is active. When the touching it a second time will disable Shuffle Mode. Notes: The shuffled order of the songs is fixed, therefore the Track Select operations will continue to operate properly within the shuffled order.
XDVDN8190 OPERATION MP3/WMA Operation - OSD Overview 1 2 3 4 5 6 23 7 8 22 9 21 10 20 19 18 MP3/WMA Mode 55 17 15 16 14 13 12 11 From the main menu, touch the DISC icon on the screen to select MP3/WMA mode. 1 Current Source Indicator Displays source currently playing. 2 Song Number Indicator Displays current song number and total number of songs on the disc. 3 Master Song Number List Shows the number of the song relative to the entire disc.
XDVDN8190 OPERATION MP3/WMA Operation - OSD Overview 9 Scroll bar Allows scrolling of song list. 10 Direct Select Keyboard icon to display a numeric keyboard. Enter desired Touch the song number and touch OK to select it. 11 Fast Forward icon to fast forward at 2x speed. Touch Each touch changes speed from 2x to 4x to 8x to 20x then to 1x play. 12 Next Folder Touch the icon to select the next available folder.
XDVDN8190 OPERATION MP3/WMA Operation Page Up/Down From the remote control: Press to display the next page. Press to display the previous page. Note: Continued operation of the Page Up and Page Down buttons will display the next and previous pages, respectively once the songs in the current page have all been displayed.
XDVDN8190 OPERATION MP3/WMA Operation Song Control You can use the Fast Forward on-screen button to speed up the playback of a song. Each subsequent press of the button will change the speed from normal to 2x to 4x to 8x to 20x and back to 1x. From the front panel: to fast forward. Press and hold to fast reverse. Press and hold From the remote control: to fast forward. Press to fast reverse. Press Note: Song control only works for MP3 type files and there is no audio output while song control is active.
XDVDN8190 OPERATION SD Card Operation 1 2 3 4 5 6 22 7 21 9 8 20 10 19 18 SD Mode 59 17 15 16 14 13 12 11 From the main menu, touch the SD icon on the screen. 1 Current Source Indicator Displays source currently playing. 2 Song Number Indicator Displays current song number and total number of songs on the SD card. 3 Master Song Number List Shows the number of the song relative to the entire SD card.
XDVDN8190 OPERATION 9 Scroll bar Allows scrolling of song list. 10 Direct Select Keyboard icon to display a numeric keyboard. Enter desired Touch the song number and touch OK to select it. 11 Fast Forward icon to fast forward at 2x speed. Touch the Each touch changes speed from 2x to 4x to 8x to 20x then to 1x play. 12 Next Folder Touch the icon to select the next available folder. 13 Previous Folder Touch the icon to select the previous available folder.
XDVDN8190 OPERATION SD Card Operation Page Up/Down From the remote control: Press to display the next page. Press to display the previous page. Note: Continued operation of the Page Up and Page Down buttons will display the next and previous folders, respectively once the songs in the current folder have all been displayed.
XDVDN8190 OPERATION SD Card Operation Song Control You can use the Fast Forward on-screen button to speed up the playback of a song. Each subsequent press of the button will change the speed from normal to 2x to 4x to 8x to 20x and back to 1x. From the front panel: to fast forward. Press and hold to fast reverse. Press and hold From the remote control: to fast forward. Press to fast reverse. Press Note: Song control only works for MP3 type files and there is no audio output while song control is active.
XDVDN8190 OPERATION JPEG Operation - OSD Overview 1 7 2 3 JPEG Mode 63 4 5 6 JPEG mode works a bit differently from the other modes. There is no separate JPEG mode, rather this mode is accessed within either SD mode or MP3/WMA mode. Whenever a picture is present on an SD card or CD, the unit will switch to the JPEG mode to view it. Each picture is displayed on the screen for 5 seconds, unless paused. JPEG mode will automatically exit when the next file is not a picture, or when STOP is pressed.
XDVDN8190 OPERATION JPEG Operation Play/Pause Press PLAY/PAUSE to stop the viewer on a specific picture or to resume. From the remote control: Press OK to temporarily stop and resume the viewer. Note: Unlike the music player, when the viewer is paused, moving to the next or previous picture will not automatically resume the slideshow. Next/Previous Touch Area D to skip to the next file/image. Touch Area B to skip to the previous file/image.
XDVDN8190 OPERATION Media Compatibility Media Compatibility The following types of discs/files are compatible: • CD-ROM (ISO), CD-R, CD-RW, DVD+R/RW, DVD-R/RW • CD-DA, DVD Video • MP3 data • WMA data • JPG images The following types of discs/files are not compatible: • WMA files that are protected by DRM (Digital Rights Management) • WMA lossless format • Discs recorded with Track At Once or packet writing • MP3 PRO format • MP3 playlists • WAV format • WMV format • DivX format • AVI format • MPG format •
XDVDN8190 OPERATION Media Compatibility Additional MP3/WMA Information An internal buffer provides ESP (Electronic Skip Protection) to virtually eliminate skipping. When playing a disc recorded with regular audio files (CD-DA or .WAV) and MP3/WMA files, the unit will play the MP3/WMA files only. Only MP3 files with filename extension (.mp3) can be played. Only WMA files with filename extension (.wma) can be played. Do not attempt to play discs which contain non-MP3/WMA files with the MP3/WMA extension.
XDVDN8190 OPERATION iPod Operation - OSD Overview (Optional) 1 2 3 4 5 6 7 24 8 9 10 23 22 11 12 21 20 iPod Mode 67 19 17 18 16 15 14 13 From the main menu, touch the iPod icon on the screen. 1 Current Source Indicator Displays source currently playing. 2 Song/Group Number Indicator Displays current song number and total number of songs/groups. 3 Song Number List Shows the number of the song relative to the current group.
XDVDN8190 OPERATION iPod Operation - OSD Overview (Optional) 9 Shuffle Touch the icon to shuffle the songs in the current group. 10 Group Select Mode Allows selection of songs by various groups. 11 Direct Select Keyboard Touch the 12 Return/Back Touch 13 Scan Mode Pressing this button will scan through all songs for 10 seconds. 14 Fast Forward Touch the icon to fast forward at 2x speed. 15 Rewind Touch the icon to rewind at 2x speed.
XDVDN8190 OPERATION iPod Operation (Optional) Group Select Mode The songs in the iPod are organized by groups. Touching the screen will put the unit into Group Select Mode: on the Once in Group Select Mode select one of the group types from the menu, then select an item in that group. (For example, select the Artist group and the display will change to a list of available artists. Then select an artist from this list to hear all songs from that artist.
XDVDN8190 OPERATION iPod Operation (Optional) Direct Song Entry icon to display a numeric keyboard. Select desired song Touch the number within the current group and touch OK to select it. From the remote control: Use the numeric keypad to enter the desired song number. Song Control You can use the Fast Forward and Fast Reverse on-screen buttons to play a song forwards or backwards at a higher speed. Touch the same button a second time or press Play to return to normal playback.
XDVDN8190 OPERATION iPod Operation (Optional) Playing photo or video files from iPod Notes: VIDEO/PHOTO FILES are only compatible with G5 iPod. The iPod photo/video display of the in-dash unit will not operate while the vehicle is moving. This is a safety feature to prevent driver distraction. iPod photo/video functions will only operate when vehicle is in Park and the parking brake is engaged. It is illegal in most states for the driver to view video while the vehicle is in motion.
XDVDN8190 OPERATION iPod Operation (Optional) Selecting Music By: Playlist Artist Album Genre Song L Touch desired Folder, music will begin to play after selection. Character Support Only alphanumeric characters can be displayed (ASCII type). Artist Name and Album name will only be displayed if included with the song. iPod Compatibility The following models are supported: • Third generation iPod - Version 2.3 • Fourth generation iPod - Version 3.1.1 • Fifth generation iPod - Version 1.1.
XDVDN8190 OPERATION Bluetooth® - OSD Overview (Optional) 1 2 3 4 5 11 6 10 9 8 Before using the Bluetooth Bluetooth Mode 73 7 Select the Bluetooth option in the General setup and select On to activate the Bluetooth feature. Refer to page 19 for more details. From the main menu, touch the Bluetooth icon on the screen or, press the Bluetooth icon at the top of the screen. The Bluetooth function must be turned on for the Bluetooth icon to appear at the top of the screen.
XDVDN8190 OPERATION Bluetooth® - OSD Overview (Optional) 7 Audio Transfer Button Press to transfer audio between the head unit and mobile phone. 8 End button 9 Setup Menu Icon Press to access Bluetooth setup menu. 10 Phone book Icon Press to access the phone book menu. 11 Keypad Interface Icon Press to display the keypad interface. Press to end a call in progress or to reject an incoming call.
XDVDN8190 OPERATION Bluetooth® - Setup Menu (Optional) Pairing Before you can use a mobile device with this head unit, it must be authenticated. This is also referred to as "pairing" a device. Note: Please make sure that Bluetooth is activated on your mobile device before you begin the pairing process. Refer to the owner's manual of your mobile device for more details. Step 1 Access Bluetooth setup menu and press Yes to begin the pairing process. The head unit will display "Wait Pairing..
XDVDN8190 OPERATION Bluetooth® - Operation (Optional) Phone Book Menu Incoming Call Screen Dialed Calls Press Dialed Call to retrieve the list of dialed calls from the mobile device. "Searching", then "Loading dialed phone book" will be displayed during the retrieval process followed by "The phone book is done". Touch the desired name to call. Press the page up/down buttons to navigate through the pages. Received Calls Press Received Call to retrieve the list of received calls from the mobile device.
XDVDN8190 OPERATION Navigation Navigation Mode From the main menu, touch the Navi icon on the screen. The Navigation SD card must be inserted. Note: When powering on the unit, there is a 10-12 second delay before the navigation mode can be selected.
XDVDN8190 OPERATION Navigation Navigation Main Menu Press MENU to display the Main Menu: The main menu contains six options: • Go to: Pick a destination for routing • Edit Favorites: Modify favorite destinations • Setup: Configure system features • Trip Computer: View trip statistics • Home Address: Route to home address • Office Address: Route to office address Go To The Go To option provides six choices for selecting a destination: 1. Address or Intersection 2. Previous Destination 3.
XDVDN8190 OPERATION Navigation Category Press the Category icon to scroll through and select from a list of categories. After a category is selected, the unit will return to the main Point of Interest to search the category. Select a sort menu. Enter additional criteria, or press option to display the category list in either geographical (Sort by Distance) or alphabetical (Sort by Name) order. Select the desired option, then Start Route. City Press the City icon to select a location in a specific city.
XDVDN8190 OPERATION Navigation Edit Favorites The Edit Favorites option provides six choices for storing favorite destinations: 1. Address Book 2. Home Address 3. Office Address 4. Trail Book 5. Trip Book 6. My POI Address Book Add current or previous destinations to the address book for quick access on future trips. Select Add Previous Destination to select from a list of recent destinations. Choose Add Current Location to name and save the current location.
XDVDN8190 OPERATION Navigation Setup The Setup option allows configuration of the following options: 1. Navigation Preferences 2. Display Options 3. User Input Settings 4. Location Reset 5. System Navigation Preferences Display Options User Input Settings Location Reset 81 The following navigation options can be controlled from this screen: The indicates the option is turned on.
XDVDN8190 OPERATION Navigation System This screen allows diagnosis of the GPS reception status and adjustment of the current vehicle symbol position. It also provides information on the current software and map version numbers. • GPS Diagnostics - displays the number of GPS satellites currently in view and in use, along with the GPS satellite time, latitude and longitude. • System Information - displays the version numbers for the system software and mapping.
XDVDN8190 OPERATION Navigation - A/V Overlay Menus A/V Overlay Menus Source Menu Overlay In navigation mode only, there are several audio/video information menus available along with a selectable source menu overlay. These menus display audio/video information at the top of navigation mode without the need to change sources. The source menu allows you to changes sources quickly by using the right side rotary control.
XDVDN8190 OPERATION General Operation - Rear-Zone Audio Menu Rear-Zone Audio Menu Access To access the Rear-Zone audio menu, touch the upper left corner of the touch screen, then press Rear. 1 2 3 4 10 9 8 7 6 L 5 Touch Access Buttons 1 2 3 4 5 6 7 8 9 10 Notes: Touch to enable Rear-Zone audio in CD/DVD mode (CD/DVD must be inserted). Rear-Zone audio is only available in CD/DVD mode. Touch to set Rear-Zone audio to STANDBY (Off).
XDVDN8190 WARRANTY Limited One Year Warranty This warranty gives you specific legal rights. You may also have other rights which vary from state to state. Dual Electronics Corp. warrants this product to the original purchaser to be free from defects in material and workmanship for a period of one year from the date of the original purchase. Dual Electronics Corp.
XDVDN8190 OPERATION Specifications DVD Player Frequency response: 10Hz-20kHz Channel separation @ 1kHz: >65dB D/A converter: 24 Bit FM Tuner Tuning range: 87.5MHz-107.9MHz Usable sensitivity: 8.5dBf 50dB quieting sensitivity: 10dBf Stereo separation @ 1kHz: 40dB Frequency response: 30Hz-13kHz AM Tuner Tuning range: 530kHz-1710kHz Usable sensitivity: 22uV Frequency response: 30Hz-2.2kHz SD Card Max card size: 2GB SDHC compliant: No Monitor Panel size: 7” (177.
XDVDN8190 OPERATION Troubleshooting General Problem Unit will not turn on (no power) Unit has power (but no sound) Unit blows fuse Action Yellow wire not connected or incorrect voltage Red wire not connected or incorrect voltage Check connections for proper voltage (11~16VDC) Black wire not connected Check connection to ground Fuse blown Replace fuse Speaker wires not connected Check connections at speakers One or more speaker wires touching each other or touching chassis ground Insulate all ba
XDVDN8190 OPERATION Troubleshooting Bluetooth Problem Cause Please connect There is no mobile device connected to the first appears in the head unit display Mobile device will not connect to the head unit Action Pair and or connect a mobile device to the head unit as described on page 75 Bluetooth function is not active on the head unit Activate Bluetooth function as described on page 19 Bluetooth function is not active on the mobile device Refer to the owner's manual of your mobile device A mobile
XDVDN8190 OPERATION Troubleshooting Navigation Problem Cause Action Unit displays "CAN'T There is no navigation software SD card inserted Insert the proper navigation SD card into the SD card slot FIND NAVIGATION in the SD card slot SYSTEM" No GPS signal (red icon) 89 The GPS antenna is not connected Check GPS antenna connection The GPS antenna cable is damaged Check for pinched or cut antenna cable The GPS signal is blocked (such as inside a tunnel or garage) Make sure the antenna has an unobstr
XDVDN8190 OPERATION Notes 90
Dual Electronics Corp. Toll Free: 1-866-382-5476 www.dualav.com ©2008 Dual Electronics Corp. All rights reserved.