modernmaven | Rigid Core Installation Instructions
modernmaven | Rigid Core General Information Limitations This flooring has a Solid Polymeric Core (SPC) and is designed to be installed indoors only as a “floating floor” for residential applications. The optimal operating temperature is between 40°F to 90°F (4°C to 32°C). Avoid prolonged exposure to direct sunlight or other heat sources where temperatures will exceed 90°F (32°C), as damage may occur. This product is not suitable for heavy rolling loads.
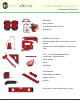
modernmaven | Rigid Core Recommended Tool List • Knee Pads • Safety Glasses • Cut-Resistant Safety Gloves • Dust Mask • HEPA-Filtered Vacuum • Oscillating Multi-Tool or Hand Saw (for door jambs) • Jigsaw with Carbide Blades(for complicated cuts) • 2 lb. (~32 oz.
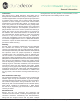
modernmaven | Rigid Core Installation Instructions 1. Substrate Preparation Flatness Check all substrates for flatness prior to installation. The maximum acceptable tolerance is < 1/8-in. gap (2 x US quarters) over 6-ft. and ≤ 1/16-in. gap (1 x US quarter) over 1-ft. Make any necessary adjustments to the substrate before installation. Dormant cracks, saw cut joints and grout lines < 1/8-in.
modernmaven | Rigid Core Installation Instructions Some subfloors and substrates, such as plywood, may be sensitive to and damaged or deformed by topical liquids, such as water, pet urine and spills. While ModernMaven Rigid Core Flooring is a waterproof product, watersensitive subfloors may require additional protection to prevent water exposure.
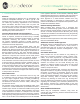
modernmaven | Rigid Core Installation Instructions mark the outside edge of the first row on the substrate (see figure 5). If needed, trim the first row (the side without the extended locking mechanism) to fit, accounting for the expansion gap. First Row (Slide) At the left corner of the starting wall, position the first tile or plank flush with the walls. Use the side and end without the extended locking mechanism against the walls.
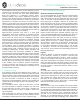
modernmaven | Rigid Core Installation Images Figure 1: Preparation - Undercut Doorjambs Figure 4: Cutting - Snap plank downward Figure 2: Layout - Stagger seams Figure 5: Installation - Mark the starting line Figure 3: Cutting - Mark, score and cut Figure 6: First Row - Place wedge spacers DuraDecor | P: (855) 700 - 5666 | customercare@duradecor.com | duradecor.com | revised on 06.23.
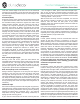
modernmaven | Rigid Core Installation Images Figure 7: First Row - Slide planks together Figure 10: End Joints - Lock piece into place Figure 8: Side Joints - Install piece at 25° angle Figure 9: Side Joints - Align joint with previous DuraDecor | P: (855) 700 - 5666 | customercare@duradecor.com | duradecor.com | revised on 06.23.