INSTALLATION MANUAL WALL MOUNTED INDOOR UNIT SPLIT-STYLE AIR CONDITIONER DRAW09F1A, DRAW12F1A, DRAW18F1A, DRAW24F1A FPO Model Number: Serial Number: Purchase Date: Installing Contractor Company Name: TIP Capture relevant information about your Durastar mini-split equipment before it is installed and write it above for future reference. 1 DURASTAR.
TABLE OF CONTENTS TABLE OF CONTENTS.............................................................................................................................. 2 INTRODUCTION........................................................................................................................................... 3 WARNINGS..................................................................................................................................................... 3 IMPORTANT SAFETY PRECAUTIONS......
INTRODUCTION To better serve you, please do the following before contacting customer service: • If you received a damaged product, immediately contact the retailer or dealer that sold you the product. • Read and follow this owner's manual carefully to help you use and maintain your air conditioner. • Read the troubleshooting section of this manual as it will help you diagnose and solve common issues. • Visit us on the web at www.durastar.com to download product guides and up-to-date information.
IMPORTANT SAFETY PRECAUTIONS Improper handling can cause serious damage or injury. Please read the following safety information in its entirety.
• • • • • • • • • • • Electrical Safety Only use the specified power cord. If the power cord is damaged, it must be replaced by the manufacturer, its service agent, or similarly qualified persons in order to avoid a hazard. Keep the power plug clean. Remove any dust or grime that accumulates on or around the plug. Dirty plugs can cause fire or electric shock. Do not pull the power cord to unplug unit. Hold the plug firmly and pull it from the outlet.
Installation Safety • • • • • • • • • • • Installation must be performed by an authorized dealer or specialist. Improper installation can cause water leakage, electrical shock, or fire. (In North America, installation must be performed in accordance with NEC and CEC requirements by authorized personnel only.) Installation must be performed according to the installation instructions. Improper installation can cause water leakage, electrical shock, or fire.
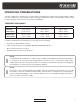
OPERATING TEMPERATURES Your air conditioner is designed to operate in the following indoor and outdoor temperatures. When your air conditioner is used outside of the following temperature ranges, certain safety features may activate and turn off the unit to protect it from damage.
ACCESSORIES INCLUDED INSTALLATION ACCESSORIES The air conditioning system comes with the following accessories.
TOOLS NEEDED The following tools are required for installation. • • • • • • • • • • • • • • • • • Phillips screwdriver Drill with 2 1/2" or 3 1/2" (indoor unit model depending) core bit Vacuum pump HVAC manifold gauge set Refrigerant leak detector Copper pipe cutter Flaring tool Burr reamer Crescent or spanner wrench Hexagonal wrench set Torque wrench Multimeter Electroprobe Level Hammer Wire strippers Wire crimper DURASTAR.
PARTS IDENTIFICATION NOTE The installation must be performed in accordance with the required local and national standards. The installation may be slightly different in different areas. 1 2 3 5 4 6 7 8 9 10 1 Wall Mounting Plate 2 Front Panel 3 Air Flow Louver 4 Air Freshness (Carbon) Filter 5 Drain Pipe 9 Remote Controller Holder 6 Signal Cable 10 Outdoor Unit Power Cable 7 Refrigerant Piping 8 Remote Controller NOTE Illustrations in this manual are for explanatory purposes.
INSTALLATION OVERVIEW - INDOOR UNIT 1 2 15cm (5.9in) 12cm (4.75in) 3 12cm (4.75in) 2.3m (90.55in) Select Installation Location 5 4 Drill Wall Hole 7 Attach Mounting Plate Determine Wall Hole Position 6 Connect Piping Connect Wiring 8 Wrap Piping and Cable Prepare Drain Pipe 9 STEP 8 Mount Indoor Unit DURASTAR.
INDOOR UNIT INSTALLATION STEP 1: SELECT INSTALLATION LOCATION Before installing the indoor unit, you must choose an appropriate location. The following standards must be met for an appropriate location for the unit: • • • • • • Good air circulation Convenient drainage Noise from the unit will not disturb other people Firm and solid - the location will not vibrate Strong enough to support the weight of the unit A location at least three feet (one meter) from all other electrical devices (e.g.
STEP 2: ATTACH MOUNTING PLATE TO WALL 1. Remove the screw that attaches the mounting plate to the back of the indoor unit. The mounting plate is the bracket on which you will mount the indoor unit. Screw 2. Secure the mounting plate to the wall with the anchors and screws provided. Make sure that mounting plate is flat against the wall, and is level. Correct orientation of mounting plate STEP 3: DRILL WALL HOLE FOR CONNECTIVE PIPING 1.
2. Using a 2 1/2" (65mm) core drill for units with a gas side connective pipe less than 5/8" (16mm), or 3 1/2" (90mm) for units with a gas side pipe greater than or equal to 5/8" (16mm), drill a hole in the wall. Make sure that the hole is drilled at a slight downward angle, so that the outdoor end of the hole is lower than the indoor end by about 3/16 - 1/4" (5mm to 7mm). This will ensure proper water drainage. Wall Outdoor 3/16-1/4” (5-7 mm) Indoor 3.
4. Position the piping to align with the wall hole. The refrigerant piping can exit the indoor unit from four different angles: left-hand side, right-hand side, left rear, or right rear. WARNING Be extremely careful not to dent or damage the piping while bending them away from the unit. Any dents in the piping will affect the unit’s performance. STEP 5: CONNECT THE DRAIN PIPE By default, the unit's drain pipe is attached to the left-hand side of unit (when you’re facing the back of the unit).
WARNING PLUG THE UNUSED DRAIN HOLE. To prevent unwanted leaks you must plug the unused drain hole with the rubber plug provided. STEP 6: CONNECT SIGNAL CABLE BEFORE PERFORMING ANY ELECTRICAL WORK, READ THESE REGULATIONS 1. All wiring must comply with local and national electrical codes and regulations, and must be installed by a licensed electrician. 2. All electrical connections must be made according to the Electrical Connection Diagram located on the panels of the indoor and outdoor units. 3.
The signal cable enables communication between the indoor and outdoor units. You must first choose the right cable size before preparing it for connection. USE THE RIGHT CABLE • Outdoor Power Cable: H07RN-F • Signal Cable: H07RN-F CABLE SIZING Use a minimum of 16 AWG for power and signal cables connected to and between the indoor and outdoor units.
STEP 7: PREPARE REFRIGERANT PIPING 1. If pre-existing refrigerant piping is already embedded in the wall, skip to Step 9. Then, begin the outdoor unit installation. Refer to the Refrigerant Piping Connections section of the outdoor unit's installation manual for detailed instructions. 2. If there is no pre-existing piping, connect the indoor unit’s refrigerant piping to the connective piping that will join the indoor and outdoor units.
4. Hook the top of the indoor unit on the upper hook of the mounting plate. 5. Check that the unit is hooked firmly on the mounting by applying slight pressure to the left- and right-hand sides of the unit. The unit should not jiggle or shift. 6. Using even pressure, push down on the bottom half of the unit. Keep pushing down until the unit snaps onto the hooks along the bottom of the mounting plate. 7.
TROUBLESHOOTING SAFETY PRECAUTIONS If ANY of the following conditions occurs, turn off your unit immediately! • The power cord is damaged or abnormally warm • You smell a burning odor • The unit emits loud or abnormal sounds • A power fuse blows or the circuit breaker frequently trips • Water or other objects fall into or out of the unit DO NOT ATTEMPT TO FIX THESE YOURSELF! CONTACT AN AUTHORIZED SERVICE PROVIDER IMMEDIATELY! COMMON ISSUES The following problems are not a malfunction and in most situations
ISSUE POSSIBLE CAUSES Both the indoor unit and outdoor unit make noises Low hissing sound during operation: This is normal and is caused by refrigerant gas flowing through both indoor and outdoor units. Low hissing sound when the system starts, has just stopped running, or is defrosting: This noise is normal and is caused by the refrigerant gas stopping or changing direction.
TROUBLESHOOTING When troubles occur, please check the following points before contacting a repair company.
PROBLEM The unit is not working Indicator lamps continue flashing or error code appears POSSIBLE CAUSES SOLUTION Power failure Wait for the power to be restored The power is turned off Turn on the power The fuse is burned out Replace the fuse Remote control batteries are dead Replace batteries The Unit’s 3-minute protection has been Wait three minutes after restarting the activated unit Timer is activated Turn timer off The unit may stop operation or continue to run safely.
DURASTAR.COM ©2021 Durastar V1.