Multi-fuel venting system.
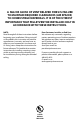
A MAJOR CAUSE OF VENT RELATED FIRES IS FAILURE TO MAINTAIN REQUIRED CLEARANCES (AIR SPACES) TO COMBUSTIBLE MATERIALS. IT IS OF THE UTMOST IMPORTANCE THAT PELLETVENT BE INSTALLED ONLY IN ACCORDANCE WITH THESE INSTRUCTIONS. NOTE: Read through all of these instructions before beginning your installation. Failure to install as described in this instruction will void the manufacturer’s warranty, and may have an effect on your homeowner’s insurance and UL listing status.
For the most up-to-date installation instructions, see www.duravent.com CONTENTS PelletVEnt Venting Systems for Pellet, Oil and Multi-fuel Stoves Clearances And Applications . . . . . . .. . . . . . . . . . . . . . . . .. . . . . . . . .. . . . . . 4 Vent Listing, Installation Notes . . . . . .. . . . . . . . .. . . . . . . . .. . . . . . . . . . . . 4 Tools And Equipment You May Need, PERMITS . . . . . . . . . . . . . . . . . . . . . 5 General Installation Instructions . . . . . . . . . . . . . . . .
CLEARANCES AND APPLICATIONS DuraVent’s PelletVent and PelletVent for Multi-Fuel is listed by Underwriters Laboratories as vent for listed oil-, pellet-, (multi-fuel) appliances. PelletVent is also listed as a masonry reliner, in which case the minimum clearance is 0” from vent to masonry, and 0” clearance from the masonry to nearby combustibles. Never fill any required clearance space with insulation or any other materials.
provided it is inside the fireplace, and the fireplace has completely sealed surroundings. 11. Do not connect B-Vent pipe with aluminum liners to pellet appliances. 12. Inspections: Using pelletized fuel does not eliminate the need for inspection and cleaning. During the heating season, inspect monthly, and clean at least once a year.
VERTICAL CAP 3 INCH MINIMUM STORM COLLAR FLASHING ATTIC INSULATION SHIELD CEILING SUPPORT FIRESTOP SPACER ATTIC INSULATION PELLET VENT PIPE PIPE ADAPTER SEE TABLE 1 FOR FRAMING REQUIREMENTS STOVE Figure 1 push together and twist to lock. C. Continue to assemble pipe as described in Step 2. 4. If the flue exit is on the back of stove, and an exterior vertical installation is desired Figure 4): A. Place the appliance according to manufacturer’s instructions. B.
desired (Figure 6): A. Place the appliance according to manufacturer’s instructions. B. Connect the Pipe Adapter to back of stove and attach sufficient pipe to penetrate Wall Thimble and extend at least 6” beyond the exterior wall. You may install the optional House Shield as shown in Figure 6. The House Shield is used to protect the exterior wall from vent discharge. Attach a Square or Round Horizontal Cap.
TEE SUPPORT BRACKET / WALL STRAP 6 INCHES MINIMUM DOUBLE TEE WITH CLEAN-OUT ADAPTER 4 FT. ROUND HORIZONTAL CAP (OPTIONAL) OPTIONAL HOUSE SHIELD Figure 4 SQUARE HORIZONTAL CAP GALVANIZED EXTERIOR 6 INCH MINIMUM Figure 6 BLACK INTERIOR Figure 5 Warning Do not install any insulation or other material inside the Wall Thimble. horizontally from or 1 ft. (305mm) above any door, window or gravity air inlet into any building. (c) Not less than 2 ft. (0.61m) from an adjacent building and not less than 7 ft.
vertically plumb, then slip the Adjustable Length up and twist lock it to the Chimney Adapter. Once all the components are firmly seated and properly aligned, carefully drill three 1/8” diameter holes through the outer sleeve only in the center of the slots located at the bottom of the Adjustable Length pipe. Do not penetrate the inner liner. Use (3) 3/8” length sheet metal screws to secure the Adjustable Length pipe. The completed installation will look like Figure 7.
C B TOP VIEW 12 INCHES TO END OF PIPE A Figure 8 Bracket to hold the Tee to the rear of the appliance is mandatory. If it is desired to mount the Tee Support to the rear of the stove, obtain approval from the manufacturer of the stove before drilling, tapping, or performing any other alterations to the appliance. 10. Connect the appliance to the coupling on the bottom of the Flex Pipe, by twisting to the locked position. Push the appliance into the fireplace to its final resting place.
PELLET VENT CAP PELLET VENT CAP TALL CONE FLASHING RIGID PELLET VENT NONHARDENING SEALANT PELLET VENT PIPE STORM COLLAR SCREW STORM COLLAR TO OUTER LINER OF PIPE WITH SHEET METAL SCREWS. THIS WILL SUPPORT SYSTEM.
NON-HARDENING SEALANT TRIM BASE TO FIT FLUE TILE USE MASONRY ANCHORS TO SECURE FLASHING TO MASONRY Figure 15 REDUCTION COLLAR OR TRIM COLLAR TEE TEE Figure 16 FILL SPACE BETWEEN PIPE AND MASONRY WITH GROUT Figure 17 12 masonry chimney has an offset. If an offset exists, then a section of Flex Pipe will be needed to accommodate the offset. B. A Tee is installed at the bottom end of the vertical pipe (Figure 16). C.
INSTALLATION IN A CATHEDRAL CEILING 1. Mark a line on the side of the Cathedral Ceiling Support Box to correspond to the line of the roof pitch, as shown in Figure 18. Allow for the Support Box to protrude below the low side of the finished ceiling a minimum of 2". 2. Position the appliance at its proper location on the floor. Pay close attention to the manufacturer’s installation instructions regarding the distances from combustibles, etc.
12” MINIMUM CATHEDRAL CEILING SUPPORT BOX LEVEL TRIM 2” BELOW FINISHED CEILING Figure 22 TRIM CLAMP Figure 23 bead of non-hardening sealant around the outside top edges of the Support Box so as to make a seal between the box and the roof. Clean out any combustible material or debris from inside the Support Box. 8. Place the Pipe Clamp, (which comes as a component of the Support Box) around the top of the hole in the bottom of the Support Box (Figure 23). 9.
exterior metal parts with high temperature, rustproof paint. This is highly recommended, particularly in areas near the ocean. 6. In case of a chimney fire, close all appliance draft openings, shut off pellet appliance and call your Fire Department. Do not use the appliance or vent until it has been inspected for possible damage. 7. DuraVent is not responsible for flue byproducts that might discolor roofs or walls.
M&G DuraVent limited lifetime Warranty M&G DuraVent, Inc. (“DuraVent”) provides this limited lifetime warranty for all of its products with the exception of Ventinox® (lifetime), and PolyPro® (ten years). Subject to the limitations set forth below, DuraVent warrants that its products will be free from defects in material or manufacturing, if properly installed, maintained and used. DuraVent products are fully warranted if installed only by a professional installer.