Leben im Bad Living bathrooms Duravit AG P.O. Box 240 Werderstr. 36 78132 Hornberg Germany Phone +49 78 33 70 0 Fax +49 78 33 70 289 info@duravit.com www.duravit.com Affix the enclosed product label with serial number in this area. Collez l‘étiquette de produit ci-jointe avec le numéro de série dans ce champ. Plak het bijgevoegde product-etiket met het serienummer in dit veld. Pegue la etiqueta de producto suministrada con el número de serie en esta casilla.
H G F E D A C B 1 2 3 4 5 6 7 8 www.sensowash.
Inhalt 1. Kurzübersicht ..................................................................... 4 1.1 Sitzeinheit .......................................................................4 1.2 Fernbedienung ...............................................................4 2. Symbolbeschreibung ........................................................... 4 3. Zur Ihrer Sicherheit............................................................. 5 3.1 Bestimmungsgemäßer Gebrauch....................................5 3.
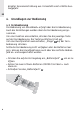
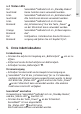
1. Kurzübersicht DE 1.1 Sitzeinheit 1.2 Fernbedienung A B C D E F G H 1 2 3 4 5 6 7 8 Power Status-LED Gesäßdusche Umgebungslichtsensor Ladydusche Infrarotempfänger Nachtlicht Absenkautomatik Infrarotsender Gesäßdusche Ladydusche Komfortdusche Duschstabposition Wassertemperatur Stopp Batteriefach Die Abbildungen zu den Verweisen finden Sie auf der Ausklappseite. 2.
3. Zur Ihrer Sicherheit Damit Sie viele Jahre Freude an Ihrem SensoWash® haben, lesen Sie bitte diese Bedienungsanleitung, insbesondere die Sicherheitshinweise, aufmerksam durch. Bewahren Sie die Bedienungsanleitung sorgfältig auf und geben Sie sie gegebenenfalls an den neuen Besitzer weiter. Diese Bedienungsanleitung entspricht dem technischen Stand des Geräts zum Zeitpunkt der Drucklegung. Duravit behält sich das Recht vor, im Sinne der Weiterentwicklung Änderungen vorzubehalten. DE 3.
DE Verwenden Sie das Gerät nur bei voller Funktionsfähigkeit λϡAchten Sie darauf, dass das Stromkabel nicht beschädigt ist. λϡDas Stromkabel darf nicht eingeklemmt oder gequetscht werden. λϡHalten Sie das Stromkabel von heißen Oberflächen und scharfen Kanten fern. λϡBenutzen Sie das Produkt NICHT, wenn es nicht ordnungsgemäß funktioniert. Unterbrechen Sie sofort die Stromversorgung. Schließen Sie das Absperrventil, um die Wasserversorgung zu unterbrechen. Kontaktieren Sie help@duravit.com.
Reparaturen dürfen nur durch eine entsprechende Fachkraft vorgenommen werden. λϡNehmen Sie KEINE Veränderungen, Manipulationen, Zusatzinstallationen oder Reparaturversuche am SensoWash® vor. λϡReparaturen dürfen nur von qualifizierten Elektroinstallateuren oder Technikern durchgeführt werden. λϡUnsachgemäße Reparaturen können zu Unfällen, Schäden und Betriebsstörungen führen. λϡVerwenden Sie KEIN Zubehör, das nicht von Duravit empfohlen wird.
direkter Sonneneinstrahlung aus. Es besteht sonst erhöhte Auslaufgefahr. DE 4. Grundlagen zur Bedienung 4.1 Fernbedienung Die Bedienung von SensoWash® erfolgt über die Fernbedienung. Auch die Einstellungen werden über die Fernbedienung vorgenommen. Um eine Funktion anzuschalten, drücken Sie die jeweilige Taste auf der Fernbedienung. Die Taste leuchtet kurz hell auf. Um eine Duschfunktion auszuschalten, „Stopp“ 7 auf der Fernbedienung drücken.
4.2 Status-LEDs Rot leuchtend: Grün leuchtend: Grün blinkend: Orange blinkend: Rot blinkend: SensoWash® befindet sich im „Standby-Modus“. Keine Funktion kann verwendet werden. SensoWash® befindet sich im „Betriebsmodus“. Alle Funktionen können verwendet werden. SensoWash® befindet sich im Prozess der„Initialisierung“. Nur die Taste „Power“ A an der Sitzeinheit kann verwendet werden. SensoWash® befindet sich im „Entleerungsmodus“. Fehlfunktion.
6. Bedienung DE Ein Funktionsvideo zur Bedienung dieses Dusch-WCs steht unter www.duravit.com/vid_sewa_slim zur Verfügung. Nutzen Sie dazu einfach diesen QR-Code 6.1 An- / Ausschalten von SensoWash® > Drücken Sie die Taste „Power“ A an der Sitzeinheit, um SensoWash® anzuschalten. Die grün leuchtende Status-LED weist auf den „Betriebsmodus“ hin. Drücken Sie die Taste „Power“ A an der Sitzeinheit erneut, um SensoWash® auszuschalten. Die rot leuchtende Status-LED weist auf den „Standby-Modus“ hin. 6.
1 2 3 DE > Drücken Sie die Plusoder MinusTaste, um die Gesäßdusche zu aktivieren. Die Gesäßdusche ist aktiviert, der Duschstab fährt langsam aus. > Drücken Sie „Stopp“, um die Gesäßdusche zu beenden. Anderenfalls stoppt sie nach 2 Minuten automatisch. Alternativ können Sie die Taste „Gesäßdusche“ C an der Sitzeinheit drücken, um die Gesäßdusche zu aktivieren. Drücken Sie erneut die Taste „Gesäßdusche“ C an der Sitzeinheit, um die Gesäßdusche zu stoppen.
DE Alternativ können Sie die Taste „Ladydusche“ E an der Sitzeinheit drücken, um die Ladydusche zu aktivieren. Drücken Sie erneut die Taste „Ladydusche“ E an der Sitzeinheit, um die Ladydusche zu stoppen. Anderenfalls stoppt sie nach 2 Minuten automatisch. „Komfortdusche“ aktivieren / deaktivieren Vorwärts- und Rückwärtsbewegung des Duschstabs während des Duschvorgangs. Voraussetzung: Die Funktion Gesäß- oder Ladydusche ist aktiviert. 1 2 > Drücken Sie die PlusTaste, um die Komfortdusche zu aktivieren.
1 2 DE > Drücken Sie > Drücken Sie die Plusdie MinusTaste, um die Taste, um die DuschstrahlDuschstrahlintensität zu intensität zu erhöhen. senken. Gehen Sie bei der Funktion „Ladydusche“ 3 entsprechend vor. Duschstabposition einstellen Der Duschstab lässt sich auf 5 Positionen individuell einstellen: Vorn 1 <––––––––––––––––––––––––––––––––> Hinten 2 > Drücken Sie > Drücken Sie die Taste die Taste „rechter „linker Pfeil“, Pfeil“, um die um die PoPosition nach sition nach vorne zu hinten zu verändern.
Aus > Niedrig > DE 1 Mittel > Hoch 2 > Drücken Sie die PlusTaste, um die Wassertemperatur zu erhöhen. > Drücken Sie die MinusTaste, um die Wassertemperatur zu senken. 6.3 Einstellungen Nachtlicht einstellen Beleuchtetes Innenbecken zur Orientierung bei Nacht, auch bei geschlossenem WC-Deckel sichtbar. Im Auto-Modus schält sich das Nachtlicht je nach Umgebungshelligkeit automatisch ein bzw. aus.
1 2 DE > Drücken und halten Sie die Taste „Stopp“. > Drücken Sie die Taste „Ladydusche - Minus“. Signalton aktivieren / deaktivieren Als Hinweis auf einen Befehl. Ein > Aus Drücken Sie die Tastenkombination „Stopp“ und „Ladydusche Plus“, um den Signalton zu aktivieren / deaktivieren: 1 2 > Drücken und halten Sie die Taste „Stopp“. > Drücken Sie die Taste „Ladydusche - Plus“.
Fernbedienung sperren/entsperren Sperrfunktion über die Fernbedienung. Wenn diese Funktion aktiviert wurde, kann keine andere Funktion genutzt werden. DE Drücken Sie innerhalb von 5 Sekunden die folgende Tastenkombination um die Fernbedienung zu sperren/entsperren. Die Stopptaste muss dabei ständig gedrückt werden. 1 2 > Drücken und halten Sie die Taste „Stopp“. > Drücken Sie die Taste „Duschstabposition linker Pfeil“.
7. Reinigung und Pflege 7.1 Sitz und Deckel Sitz und Deckel können zur Reinigung mit einem Handgriff abgenommen werden (siehe Abbildung auf der Ausklappseite). ACHTUNG DE Gelbe Verfärbungen oder Ablösung der Oberflächenbeschichtung durch falsche Reiniger! > Verwenden Sie keine scheuernden, chlor- oder säurehaltigen Reinigungsmittel. > Verwenden Sie nur Reinigungsmittel und -geräte, die für den Anwendungsbereich bestimmt sind. > Befolgen Sie die Gebrauchsanweisung der Reinigungsmittelhersteller.
1 2 3 4 DE > Drücken und halten Sie die Taste „Stopp“. > Drücken Sie die Taste „Gesäßdusche - Plus“. > Reinigen > Drücken Sie Sie die Düse auf „Stopp“, mit einem um die Tuch, einem Reinigung Schwamm zu beenden. oder einer Anderenfalls Bürste und stoppt sie einem milden nach 2 MinuReinigungsten automamittel. tisch. Selbstreinigung von Duschstab und -kopf Duschstab und -kopf reinigen sich selbsttätig. 1 2 > Drücken und halten Sie die Taste „Stopp“. > Drücken Sie die Taste „Komfortdusche Plus“.
7.4 Längerer Nichtgebrauch Wenn Sie SensoWash® für zwei Wochen oder länger nicht verwenden, entleeren Sie das Gerät. Voraussetzung: SensoWash® befindet sich im „Betriebsmodus“ und die „Status-LED“ B leuchtet grün. > Unterbrechen Sie die Wasserversorgung. > Drücken und halten Sie die Taste „Power“ A an der Sitzeinheit. > Drücken Sie anschließend (innerhalb von 2 Sekunden) die Taste Gesäßdusche“ C an der Sitzeinheit länger als 10 Sekunden. Ein Signalton ertönt.
DE Kinder dürfen nicht mit Kunststofftüten oder Verpackungsmaterial spielen, da eine Verletzungs- oder Erstickungsgefahr besteht. Lagern Sie solche Materialien an einem sicheren Ort oder entsorgen Sie sie auf umweltfreundliche Art und Weise. Bewahren Sie die Verpackung nach Möglichkeit bis zum Ablauf der Garantiezeit auf. 9.
Problem Mögliche Ursache Lösung Kap. Anzeigeleuchten und Alarmfunktion Fehlfunktion. Die „StatusLED“ B an der Einheit blinkt im Abstand von 3 Sekunden einmal rot auf. > Schalten Sie SensoWash® aus. > Schalten Sie SensoWash® wieder ein. Wenn das Blinken anhält: > Unterbrechen Sie die Stromversorgung. > Stellen Sie die Stromversorgung nach 30 Sekunden wieder her. Die „StatusFehlfunktion. LED“ B an der Einheit blinkt im Abstand von 3 Sekunden dreimal rot auf. > Kontaktieren Sie help@duravit.
Problem Mögliche Ursache Lösung Kap. Funktion allgemein DE SensoWash® funktioniert nicht. SensoWash® ist nicht eingeschaltet. (Die „StatusLED“ B leuchtet nicht.) > Stellen Sie die Stromversorgung her. SensoWash® befindet sich im Standby-Modus. (Die „Status-LED“ B leuchtet rot.) > Schalten Sie das Gerät in den „Betriebsmodus“. Ein Wasserleck Fehlfunktion. liegt vor. 6.1 > Schließen Sie das Hauptventil für die Wasserzufuhr. > Unterbrechen Sie die Stromversorgung. > Rufen Sie den Installateur.
Problem Mögliche Ursache Lösung Kap. Die Fernbedienung funktioniert nicht. Es sind keine Batterien eingelegt. > Legen Sie Batterien 4.1 ein. Die Batterien sind leer. > Wechseln Sie die Batterien. 4.1 Die Batterien sind falsch gepolt. > Setzen Sie die Batterien in der richtigen Richtung ein. 4.1 Die Fernbedie> Entsperren Sie die nung ist gesperrt Fernbedienung. („Duschstabposition“ 5 und „Wassertemperatur“ 6 blinken dreimal auf). 6.3 DE Die Fernbedienung > Kontaktieren Sie ist defekt.
Problem DE Mögliche Ursache Lösung Kap. Die Duschstrahlin- > Stellen Sie die Die Dusch6.2 „Duschstrahlintenstrahlintensität tensität wurde auf sität“ 2 und/oder ist zu schwach. „Niedrig“ eingestellt. 3 auf „Mittel“ oder „Hoch“. Der Wasserversor- > Kontaktieren Sie Ihren Installateur. gungsschlauch ist abgeknickt. Die Wassertemperatur ist nicht warm genug. > Stellen Sie die Die Wassertem6.2 „Wassertemperatur“ peratur wurde auf „Aus“ oder „Nied6 auf „Mittel“ oder rig“ eingestellt. „Hoch“.
Problem Mögliche Ursache Lösung Das Nachtlicht leuchtet dauernd. Das Nachtlicht wurde auf „Ein“ eingestellt. Dies ist normal. > Stellen Sie das Nachtlicht in den Modus „Auto“ oder „Aus“. Kap. 6.3 DE Das Nachtlicht ist Dies ist normal. im „Auto-Modus“, und das Umgebungslicht leuchtet schwach. Die Scheibe am Umgebungslichtsensor ist verschmutzt. > Reinigen Sie die Scheibe auf dem „Umgebungslichtsensor“ D . Manuelle Reinigungsfunktion des Duschstabs Der Duschstab fährt automatisch zurück.
10. Technische Daten Artikelnummer 611.00 00 2 00 4300 Nennspannung Frequenz Nominale Leistungsaufnahme Leistungsaufnahme im Standby-Modus Max.
Contents 1. Brief overview ................................................................. 28 1.1 Toilet unit ..................................................................... 28 1.2 Remote control ........................................................... 28 2. Description of Symbols .................................................... 28 3. For your safety ................................................................ 29 3.1 Normal Use..............................................................
1. Brief overview 1.1 Toilet unit EN A B C D E F G H 1.2 Remote control Power Status LED Rearwash Ambient light sensor Ladywash Infrared receiver Night light Soft closing mechanism 1 2 3 4 5 6 7 8 Infrared transmitter Rearwash Ladywash Comfortwash Spray wand position Water temperature Stop Battery Compartment The overviews referred to are collected toghether on the fold out page. 2.
3. For your safety To ensure that you will enjoy your SensoWash®, read these operating instructions carefully, particularly the safety instructions. Keep the operating instructions in a safe place and in the case of a change in ownership, ensure they are given to the new owner. These operating instructions correspond to the device’s state of technology at the time of printing. Duravit reserves the right to make changes in terms of further development. EN 3.
λϡKeep the power cord away from hot surfaces and sharp edges. λϡDo NOT use the product if it is not working properly. Disconnect from the power supply immediately. Close the stop valve to interrupt the water supply. Contact help@duravit.com. Avoid malfunctions and damage to the product as a result of improper use. CAUTION EN Health damage and potential product damage! > Supply the device with cold drinking water from the main water system.
Use of batteries CAUTION Health damage! > Avoid contact with skin, eyes and mucous membranes if battery acid has leaked. > In case of contact with the acid, flush the affected areas with large amounts of clean water and consult a doctor immediately. λϡKeep batteries out of the reach of small children. Batteries can be life-threatening if swallowed. If a battery has been swallowed, call for medical assistance immediately.
then basic functions can also be switched on or off from the side control buttons. > Press the lock of the “Battery Compartment” 8 to open it. > Insert two lithium batteries (CR2032) with + facing upwards. > Close the “Battery Compartment” 8 . EN 4.2 Status LEDs Red illuminated: SensoWash® is in the „Standby mode“, all functions cannot be used. Green illumina- SensoWash® is in the „On mode“, all functions ted: can be used.
Power supply > Connect the main power supply. SensoWash® will start “Initialization” for about 15 seconds when it is connected to the power supply. During this time the “Status LED” B flashes green and only “Power” A on the seat unit can work, all other operations will not work. Switch SensoWash® on Requirement: SensoWash® is in the “Standby mode”, the “Status LED” B is red illuminated. > Press “Power” D on the seat unit. SensoWash® is now switched on. The “Status LED” B is green illuminated.
Activating / deactivating “Rearwash” Gentle and safe rear cleansing. 1 EN 2 > Press Plus or Minus to activate Rearwash. 3 > Press Stop to Rearwash is end Rearwash active, the or after 2 min. spray wand auto stop. extracts slowly. Alternatively press “Rearwash” C on the seat unit to activate Rearwash. Press “Rearwash” C on the seat unit again to stop Rearwash or after 2 min. auto stop. Activating / deactivating “Ladywash” Additional nozzle outlet for female intimate care.
Activating / deactivating “Comfortwash” Forward and backward movement of spray wand during use of shower. Requirement: Rearwash or Ladywash function is activated. 1 2 3 EN > Press Plus Comfortwash to activate is active. Comfortwash. > Press Minus to stop Comfortwash. The function (Rear- or Ladywash) that was previously set is still active. After 2 min. auto stop.
Same action for “Ladywash” 3 . Adjusting the spray wand position The spray wand position can be set individually to 5 different positions: Front EN <––––––––––––––––––––––––––––––––––––––> 1 Rear 2 > Press Right arrow to retract the spray wand. > Press Left arrow to extract the spray wand.
6.3 Settings Adjusting the night light Illuminated inner bowl for night mode orientation, also visible with closed lid. In the Auto modus the night light will be switched on and off according to the surrounding brightness. The night light can be set individually in 3 modes: On > Auto > Off EN Press button combination Stop and Ladywash Minus to cycle through the night light settings: 1 2 > Press and hold Stop. > Press Ladywash Minus.
Short confirmation tone: On Longer confirmation tone: Off Lock / unlock the remote control Blocking function via remote control. No function can be used while this function is activated. Press within 5 sec. the following button combination to lock / unlock the remote control. The stop button has to be pressed constantly. EN 1 > Press and hold Stop. 2 3 > Press Tempe> Press Spray > Press Spray wand position wand position rature Minus. Left arrow. Right arrow. 5 > Press Temperature Plus.
7. Cleaning and Care 7.1 Seat and lid For cleaning purpose seat and lid can be easily removed onehanded (see picture on foldout page). NOTICE Yellow discolouration or paint delamination due to incorrect cleaner! > Do not use abrasive cleaning agents or cleaning agents containing chlorine or acid. > Only use cleaning agents and equipment which is intended for this area of application. > Follow the instructions of the cleaning agent manufacturer. > Never mix cleaners.
1 2 > Press and hold Stop. > Press Rearwash Plus. EN 3 4 > Clean the > Press Stop nozzle with a to end the cloth, sponge cleaning or or brush and after 2 min. mild cleaning auto stop. agent. Self-cleaning of the spray wand and nozzle Spray wand and nozzle are cleaned automatically. 1 2 > Press and hold Stop. 3 > Press > Press stop to Comfortwash end cleaning Plus. or after 90 sec. auto stop. Spray wand and nozzle are cleaned automatically before and after each use. 7.
7.4 Prolonged disuse If you do not use SensoWash® for two weeks or above, drain the water inside the product. Requirement: SensoWash® is in “On” mode, the “Status LED” B is green illuminated. > Disconnect the water supply. > Press “Power” A on the seat unit and keep it pressed. > Now (within 2 seconds) press “Rearwash” C on the seat unit for more than 10 seconds. A confirmation tone is audible. > Within 5 seconds release the buttons. A confirmation tone is audible.
Children must not play with plastic bags and packaging material, due to possible injury or danger of suffocation. Store such material safely or dispose of it in an environmentally-friendly manner. If possible, keep the packaging until the warranty period expires. 9. Troubleshooting support EN Recommendation: Initial general action in case of a malfunction > Disconnect the unit from the mains at the fuse box for at least 3 hours and then reconnect it again.
Problem Potential cause Solution Ch. Malfunction. The “Status LED” B on the unit flashes red four times each 3 seconds. > Turn off “Water 6.2 temperature” 6 . > Activate any shower function. Malfunction. A continuous confirmation tone is audible. > Cut off the power supply. > After 30 sec. connect it again. EN General function SensoWash® is not working. A water leak exists. SensoWash® is not switched on. (“Status LED” B is not illuminated) > Switch on the main power supply.
Problem Potential cause Solution Ch. > Change the batteries. 4.1 No batteries are inserted. > Insert batteries. 4.1 The batteries are flat. > Change the batteries. 4.1 Remote control Icons on remote The batteries are low. control flash during operation. (instead of beeing illuminated) EN The remote control does not work. The battery connec- > Insert the batteries 4.1 tions are reversed. the correct way. The remote control > Unlock the is locked (“Spray remote control.
Problem Potential cause Solution Ch. The water spray intensity is too weak. The water spray intensity has been set to Low. > Adjust the “Water spray intensity” 2 and/or 3 to Medium or High. 6.2 The water supply hose has buckled. > Contact your installer. The water tem- The water tempera- > Adjust the “Water perature is not ture has been set to temperature” 6 to warm enough. Off or Low. Medium or High. The function auThe water spray from the tomatically stops after 2 minutes.
Problem Potential cause Solution The night light stays on continuously. The night light has been set to On mode. 6.3 This is normal. > Set the night light to Auto or Off mode. This is normal. The night light is in Auto mode and the ambient light is dim. The ambient light sensor window is not clean. EN > Clean the “Ambient light sensor” D window. Manual cleaning function of the spray wand This is normal. The spray wand The function autoretracts auto- matically stops after 2 minutes. matically.
Temperature range λϡOperating temperature λϡWater temperature Incoming water pressure Water consumption in spray mode Protection degree Integrated safety device Warranty 4 - 40 °C 32 - 40 °C 0.07 - 0.75 MPa (0.7 - 7.5 bar) 0.35 - 0.60 l/min IP X4 Protection against water spray from all sides EN13077 - type AB EN Our warranty terms can be found in our General Terms and Conditions (GTC) at www.pro.duravit.com/gtc.
Sommaire FR 48 1. Bref aperçu .......................................................................49 1.1 Toilette...........................................................................49 1.2 Télécommande .............................................................49 2. Description des symboles ..................................................49 3. Pour votre sécurité............................................................50 3.1 Utilisation normale ............................................
1. Bref aperçu 1.1 Toilette 1.2 Télécommande A B C D 1 2 3 4 5 6 7 8 E F G H Puissance LED d'état Douche rectale Capteur d'éclairage ambiant Douche féminine Récepteur infrarouge Éclairage de nuit Mécanisme de fermeture en douceur Transmetteur à infrarouge Douche rectale Douche féminine Douche confort Position de la douche Température de l'eau Arrêt Logement des piles Vous trouverez les illustrations de référence sur le rabat de la couverture. FR 2.
Fonction automatique temporisée. 3. Pour votre sécurité Pour garantir que vous profiterez de votre SensoWash®, lire soigneusement ces instructions d'utilisation, et plus particulièrement les instructions de sécurité. Conserver les instructions d'utilisation dans un lieu sûr, et en cas de changement de propriétaire, assurez-vous de bien les transmettre au nouveau propriétaire. Ces instructions d'utilisation correspondent à l'état technologique du dispositif au moment de l'impression.
les instructions ou sous la supervision d'une autre personne. λϡAssurez-vous que les enfants ne puissent pas jouer avec le SensoWash®. AVERTISSEMENT Risques pour la santé ! Le produit doit être mis à la terre. > Comparer avec les instructions de montage. N'utiliser le dispositif que lorsqu'il est parfaitement fonctionnel λϡAssurez-vous que le câble de puissance n'est pas endommagé. λϡLe câble de puissance ne doit être ni coincé ni pincé.
λϡNe PAS monter ni se tenir sur le produit. λϡNe PAS placer d'objets lourds sur le couvercle. λϡNE PAS souiller, pulvériser ou bloquer délibérément la douche. Les réparations doivent être effectuées par une personne ayant l'expérience nécessaire. λϡNE PAS effectuer de modifications, manipuler, installer des équipements supplémentaires ou tenter de réparer le SensoWash®. λϡLes travaux de réparation doivent être effectués par des électriciens ou des techniciens qualifiés.
λϡNe pas exposer les piles à des conditions extrêmes : éviter le contact avec les surfaces chaudes et les rayons directs du soleil. Dans le cas contraire, celles-ci risqueraient de fuir. 4. Opérations de base 4.1 Télécommande Le SensoWash® est commandé à partir de la télécommande. Les réglages sont également modifiés à partir de la télécommande. Appuyer sur la touche correspondante de la télécommande pour activer une fonction. La touche s'allume brièvement en blanc.
Verte : Clignotement vert : Clignotement orange : Clignotement rouge : Le SensoWash® est en « Mode actif », toutes les fonctions peuvent être utilisées. Le SensoWash® est en phase « Initialisation », seule la touche « Puissance » A de la lunette peut fonctionner. Le SensoWash® est en « Mode d'évacuation interne ». Dysfonctionnement. Couper l'alimentation principale et continuer avec le chapitre 9. 5. Mise en service FR Télécommande > Appuyer sur le verrou du « compartiment des piles » 8 pour l'ouvrir.
6. Utilisation Vous trouverez une vidéo concernant l’utilisation de cet abattant douche sur www.duravit.com/vid_sewa_slim. Il vous suffit d’utiliser pour cela ce code QR 6.1 Mise sous/hors tension du SensoWash® > Appuyer sur la touche « Puissance » A de la lunette pour activer le SensoWash®. La LED d'état verte indique « Mode actif ». > Appuyer à nouveau sur la touche « Puissance » A de la lunette pour arrêter le SensoWash®. La LED d'état rouge indique « Mode Standby ». FR 6.
1 2 > Appuyer sur Plus ou Moins pour activer la douche rectale. La douche rectale est activée, la douchette sort lentement. 3 > Appuyer sur Arrêt pour terminer la douche rectale. Elle s'arrête automatiquement au bout de 2 min. Presser alternativement « Douche rectale » C sur la lunette pour activer la douche rectale. Appuyer à nouveau sur la touche « Douche rectale » C sur la lunette pour arrêter la douche rectale. Elle s'arrête automatiquement au bout de 2 minutes.
féminine. Elle s'arrête automatiquement au bout de 2 minutes. Activation/désactivation de la « Douche confort » Mouvement avant et arrière de la douche pendant son utilisation. Exigence : La douche rectale ou féminine est activée. 1 2 > Appuyer sur Plus pour activer la douche confort. 3 La douche confort est active. > Appuyer sur Moins pour arrêter la douche confort. Les fonctions sont désactivées, la fonction (douche rectale ou douche féminine) préalablement définie est toujours active.
1 2 > Appuyer sur Plus pour augmenter l'intensité de la douche rectale. > Appuyer sur Moins pour diminuer l'intensité de la douche rectale. Même action pour la « douche féminine » 3 . Réglage de la position de la douche FR La position de la douche peut être réglée sur 5 positions individuelles: Avant <–––––––––––––––––––––––––––––> 1 > Appuyer sur la touche fléchée droite pour rétracter la douche. 58 2 > Appuyer sur la touche fléchée gauche pour extraire la douche.
Réglage de la température de l'eau La température de l'eau peut être réglée en 4 niveaux: Off > Low > Medium 1 > High 2 > Appuyer sur > Appuyer sur Plus pour Moins pour augmenter diminuer la la températempérature ture de l'eau. de l'eau. FR 6.3 Réglages Réglage de l'éclairage de nuit Éclairage intérieur de la cuvette pour s’orienter la nuit, visible même si le couvercle des toilettes est fermé.
1 2 > Appuyer sur la touche Arrêt et la maintenir enfoncée. > Appuyer sur Douche féminine Moins. Activation/désactivation du bip de confirmation Pour signaler toutes les commandes. On > Off Appuyer sur la combinaison de touches Arrêt et Douche féminine Plus pour faire défiler les paramètres du bip de confirmation : FR 1 2 > Appuyer sur la touche Arrêt et la maintenir enfoncée. > Appuyer sur Douche féminine Plus.
peut être utilisée si cette fonction est activée. Saisissez la combinaison de touches suivantes dans les 5 secondes afin de verrouiller/déverrouiller la télécommande. La touche stop doit restée enfoncée pendant tout ce temps. 1 2 > Appuyer sur la touche Arrêt et la maintenir enfoncée. 3 4 > Appuyer sur > Appuyer sur > Appuyer sur Température la touche fléla touche fléchée gauche chée droite de Moins. de position de position de la la douche. douche. FR 5 > Appuyer sur Température Plus.
retirés d'une main (voir l'image sur la page à déplier). AVIS Décoloration jaune due à un mauvais détergent ! > Ne pas utiliser de détergent abrasif ou de produits de nettoyage contenant du chlore ou des acides. > N'utiliser que des produits de nettoyage et des équipements prévus pour ce type d'application. > Suivre les instructions du fabricant de détergent. > Ne jamais mélanger les détergents. Une solution savonneuse douce convient pour le nettoyage quotidien.
1 2 > Appuyer sur la touche Arrêt et la maintenir enfoncée. > Appuyer sur Douche rectale Plus. 3 4 > Nettoyer la > Appuyer sur buse à l'aide Arrêt pour d'un chifterminer le fon, d'une nettoyage. éponge ou Il s'arrête d'une brosse automatiet d'un déquement tergent doux. au bout de 2 min. Auto-nettoyage de la douche et de la buse La douche et la buse sont nettoyées automatiquement. 1 2 > Appuyer sur la touche Arrêt et la maintenir enfoncée. > Appuyer sur Douche confort Plus.
7.3 Télécommande > Nettoyer la télécommande et le support mural à l'aide d'un chiffon humide doux. 7.4 Non utilisation prolongée FR Si vous n'utilisez pas le SensoWash® pendant deux semaines ou plus, évacuer l'eau dans le produit. Exigence : Le SensoWash® est en mode « Actif », la « LED d'état » B est verte. > Déconnecter l'alimentation en eau. > Appuyer sur la touche « Puissance » A de la lunette et la maintenir enfoncée.
aiderez à préserver les ressources et à protéger l'environnement. Contactez votre fournisseur ou les autorités locales pour plus d'informations. Les piles usées doivent être correctement mises au rebut. Pour ce faire, des containers sont à disposition dans les magasins vendant des piles et aux points de collecte communautaires. Les enfants ne doivent pas jouer avec des sacs en plastique et le matériau d'emballage en raison des blessures possibles ou du risque d'étouffement.
Problème Cause potentielle Solution Ch. Voyants et fonctionnement de l'alarme Dysfonctionnement. > Mettre le La « LED SensoWash® hors d'état » B sur la lunette tension. clignote en > Réactiver le SensoWash®. rouge toutes les 3 secondes. Si le clignotement ne s'arrête pas : > Couper l'alimentation électrique. > La rebrancher au bout de 30 secondes. FR La « LED Dysfonctionnement. > Contacter d'état » B sur help@duravit.com la lunette clignote en rouge trois fois toutes les 3 secondes.
Problème Cause potentielle Solution Ch. Fonctionnement général > Mettre sous tension. Le SensoWash® Le SensoWash® ne fonctionne n'est pas sous pas. tension. (La « LED d'état » B ne brille pas) Le SensoWash® est en mode standby. (La « LED d'état » B est rouge) > Régler sur « Actif ». 6.1 Présence d'une Dysfonctionnement. > Fermer la vanne fuite d'eau. principale de l'alimentation en eau. > Couper l'alimentation électrique. > Appeler l'installateur.
Problème Cause potentielle Solution Ch. Absence de piles. > Insérer des piles. 4.1 La télécommande ne fonc- Les piles sont vides. > Remplacer les piles. 4.1 tionne pas. 4.1 Les connexions des > Réinstaller piles sont inversées. correctement les piles. La télécommande > Déverrouiller la est verrouillée télécommande. (« Position de la douche » 5 et « Température de l'eau » 6 clignotent trois fois). La télécommande est défectueuse. FR 6.3 > Contacter votre installateur.
Problème Cause potentielle Solution Ch. L'eau n'est pas assez chaude. La température de l'eau a été réglée sur Off ou Low. > Régler la « température de l'eau » 6 sur Medium ou High. 6.2 La fonction s'arrête Ceci est normal. La pulvérisation d'eau de la automatiquement douche s'arrête après 2 minutes. brutalement. Aucun jet d'eau La buse est colmatée. ne sort de la douche. > Nettoyer la buse. 7.2 Fonctionnement de l'éclairage de nuit L'éclairage de nuit ne s'allume pas. 6.
Problème Cause potentielle L’éclairage de L'éclairage de nuit nuit est allumé a été réglé sur On. en continu. Solution 6.3 Ceci est normal. > Placer l'éclairage de nuit en mode Auto ou Off. L'éclairage de nuit Ceci est normal. est en mode Auto avec une faible luminosité ambiante. La fenêtre du capteur de lumière ambiante n'est pas propre. FR > Nettoyer la fenêtre du « capteur de lumière ambiante » D. Fonction de nettoyage manuel de la douche La douche se rétracte automatiquement.
10. Données techniques Numéro d'article 611.
Inhoudsopgave NL 72 1. Kort overzicht ................................................................... 74 1.1 Ziteenheid .....................................................................74 1.2 Afstandsbediening ........................................................74 2. Beschrijving van de symbolen ...........................................74 3. Voor uw veiligheid.............................................................75 3.1 Normaal gebruik .................................................
9. Hulp bij problemen............................................................90 10.Technische gegevens .........................................................
1. Kort overzicht 1.1 Ziteenheid 1.2 Afstandsbediening A B C D E F G H 1 2 3 4 5 6 7 8 Power Status-LED Bidet Omgevingslichtsensor Lady-douche Infraroodontvanger Nachtverlichting Zachtsluitend mechanisme Infraroodzender Bidet Lady-douche Comfortdouche Douchestangpositie Watertemperatuur Stop Batterijenvak De afbeeldingen bij de verwijzingen vindt u op de uitvouwbare pagina. 2. Beschrijving van de symbolen WAARSCHUWING NL VOORZICHTIG LET OP Geeft een gevaarlijke situatie aan.
Tijdgeschakelde automatische functie. 3. Voor uw veiligheid Om vele jaren plezier van uw SensoWash® te hebben, verzoeken wij u deze gebruikshandleiding, met name de veiligheidsvoorschriften, zorgvuldig door te lezen. Bewaar de gebruikshandleiding altijd zorgvuldig en geef deze eventueel door aan de nieuwe eigenaar. Deze gebruikshandleiding komt op het moment van drukken overeen met de technologische stand van het apparaat.
WAARSCHUWING Schade aan de gezondheid! Het product moet worden geaard. > Raadpleeg de montage-instructies. Gebruik het apparaat uitsluitend wanneer het volledig functioneel is λϡZorg ervoor dat de voedingskabel niet beschadigd is. λϡDe voedingskabel mag niet ingeklemd of afgeklemd worden. λϡHoud de voedingskabel weg van hete oppervlakken en scherpe randen. λϡGebruik het product NIET als het niet goed werkt. Verbreek onmiddellijk de netspanning. Sluit de kogelstopkraan om de watertoevoer te onderbreken.
Reparaties mogen alleen door een vakbekwame persoon worden uitgevoerd. λϡDe SensoWash® mag NIET worden gewijzigd, gemanipuleerd, worden uitgebreid met extra voorzieningen of worden gerepareerd. λϡReparaties moeten worden uitgevoerd door gekwalificeerde elektromonteurs of monteurs. λϡOnjuist uitgevoerde reparaties kunnen resulteren in ongevallen, schade en storingen. λϡGebruik geen accessoires die niet door Duravit worden aanbevolen.
bloot. Anders bestaat het risico van lekkage. 4. Grondbeginselen van de bediening 4.1 Afstandsbediening De SensoWash® wordt bediend via de afstandsbediening. Ook de instellingen worden gewijzigd via de afstandsbediening. Druk op de betreffende toets van de afstandsbediening om een functie in te schakelen. De toets licht even wit op. Om een douchefunctie uit te schakelen, drukt u op "Stop" 7 op de afstandsbediening.
Groen knipperend: Oranje knipperend: Rood knipperend: SensoWash® bevindt zich in het "initialisatieproces", alleen "Power" A bij de ziteenheid werkt. SensoWash® bevindt zich in de "interne afvoermodus". Storing. Verbreek de netspanning en ga verder met hoofdstuk 9. 5. Eerste gebruik Afstandsbediening > Druk op de vergrendeling van het batterijenvak 8 om dit te openen. > Verwijder de beveiligingsstrip uit het batterijenvak. > Sluit het batterijenvak 8 .
6. Gebruik Een video over de bediening van deze douche-wc is beschikbaar op www.duravit.com/vid_sewa_slim. Gebruik hiervoor gewoon deze QR-code 6.1 In-/uitschakelen van de SensoWash® > Druk op "Power" A op de ziteenheid om de SensoWash® in te schakelen. Een groen verlichte status-LED geeft de stand "Aan" weer. > Druk opnieuw op "Power" A op de ziteenheid om de SensoWash® uit te schakelen. Een rood verlichte status-LED geeft de stand "Stand-by" weer. 6.
1 2 > Druk op Plus of Min om de functie Bidet te activeren. Het bidet is geactiveerd, de douchearm komt langzaam tevoorschijn. 3 > Druk op Stop om de functie Bidet te beeindigen. Na 2 min. wordt de automatische stopfunctie geactiveerd. Druk als alternatief op "Bidet" C op de ziteenheid om de functie Bidet te activeren. Druk opnieuw op "Bidet" C op de ziteenheid om de functie Bidet te stoppen. Na 2 min. wordt de automatische stopfunctie geactiveerd.
Druk als alternatief op "Lady-douche" E op de ziteenheid om de functie Lady-douche te activeren. Druk opnieuw op "Ladydouche" E op de ziteenheid om de functie Lady-douche te stoppen. Na 2 min. wordt de automatische stopfunctie geactiveerd. In-/uitschakelen van "Comfortdouche" Voor- en achterwaartse beweging van de douchestang tijdens het gebruik van de douche. Voorwaarde: De functie Bidet of Lady-douche is geactiveerd. 1 2 3 > Druk op Plus Comfortdouom de Com- che is ingefortdouche in schakeld.
1 2 > Druk op Plus om de kracht van de waterstraal te verhogen. > Druk op Min om de kracht van de waterstraal te verlagen. Dezelfde handelingen voor "Lady-douche" 3 . De douchestangpositie instellen De positie van de douchestang kan afzonderlijk in 5 standen worden ingesteld: Voorzijde <–––––––––––––––––––-----–––> 1 Achterzijde 2 NL > Druk op de rechterpijl om de douchestang uit te schuiven. > Druk op de linkerpijl om de douchestang in te schuiven.
De watertemperatuur instellen De watertemperatuur kan afzonderlijk worden ingesteld op 4 standen: Uit > Laag 1 > Midden > Hoog 2 > Druk op Plus om de watertemperatuur te verhogen. > Druk op Min om de watertemperatuur te verlagen. 6.3 Instellingen NL De nachtverlichting instellen Verlichte binnenkant voor een betere oriëntatie ‘s nachts, ook bij gesloten wc-deksel zichtbaar. In de Auto-modus wordt het nachtverlichting afhankelijk van het omgevingslicht automatisch in- resp. uitgeschakeld.
1 2 > Houd Stop ingedrukt. > Druk op "Lady-douche - Min". In-/uitschakelen van de bevestigingstoon Om een willekeurige opdracht te signaleren. Aan > Uit Druk op de toetsencombinatie Stop en Ladydouche plus om door de instellingen van de bevestigingstoon te bewegen: 1 > Houd Stop ingedrukt. 2 > Druk op "Lady-douche - Plus".
Ver-/ontgrendelen van de afstandsbediening Blokkeerfunctie via afstandsbediening. Wanneer deze functie ingeschakeld is, kan er geen functie worden gebruikt. Druk binnen 5 seconden op de volgende toetscombinatie om de afstandsbediening te vergrendelen/ontgrendelen. Hierbij moet de Stop-toets voortdurend worden ingedrukt. 1 > Houd Stop ingedrukt. 2 3 4 > Druk op > Druk op de > Druk op de Temperatuur linkerpijl rechterpijl min. douchestangdouchestangpositie. positie. 5 NL > Druk op Temperatuur plus.
7. Reinigen en onderhoud 7.1 Zitting en deksel Ten behoeve van de reiniging kunnen zitting en deksel gemakkelijk met een hand worden verwijderd (zie afbeelding op de uitvouwpagina). LET OP Gele verkleuring of afbladderende verf als gevolg van verkeerd reinigingsmiddel! > Gebruik geen schurende, chloor- of zuurhoudende reinigingsmiddelen. > Gebruik alleen reinigingsmiddelen en -apparaten die voor het toepassingsgebied zijn bedoeld. > Volg de gebruiksaanwijzing van de fabrikant van het reinigingsmiddel.
1 > Houd Stop ingedrukt. 2 > Druk op "Bidet - Plus". 3 > Reinig de sproeikop met een doek, spons of borstel en een mild reinigingsmiddel. 4 > Druk op Stop om de reiniging te beëindigen. Na 2 min. wordt de automatische stopfunctie geactiveerd. Zelfreiniging van de douchestang en de sproeikop Douchestang en sproeikop worden automatisch gereinigd. 1 2 3 NL > Houd Stop ingedrukt. > Druk op "Comfortdouche Plus". > Druk op Stop om de reiniging te beeindigen. Na 90 sec.
7.3 Afstandsbediening > Reinig de afstandsbediening en de wandhouder met een zachte, vochtige doek. 7.4 Langere tijd buiten gebruik Wanneer u de SensoWash® gedurende twee weken of langer niet gebruikt, moet het water in het apparaat worden afgetapt. Voorwaarde: De SensoWash® moet zich in de stand "Aan" bevinden, de LED "Status" B is groen verlicht. > Sluit de watertoevoer af. > Druk op "Power" A op de ziteenheid en houd deze ingedrukt.
Lege batterijen moeten op de juiste wijze worden afgevoerd. Hiervoor vindt u in winkels waar batterijen worden verkocht en bij gemeentelijke inzamelpunten containers met de desbetreffende opschrift. Kinderen mogen niet met plastic zakken en verpakkingsmateriaal spelen, vanwege mogelijk letsel of verstikkingsgevaar. Berg dergelijke materialen op een veilige manier op of voer ze op een milieuvriendelijke manier af. Waar mogelijk bewaart u het verpakkingsmateriaal tot de garantieperiode is verstreken. 9.
Probleem Mogelijke oorzaak Oplossing Hfdst. Displaylampjes en alarmfunctie De LED "Status" Storing. B op de ziteenheid geeft elke 3 seconden een rood knippersignaal. > Schakel de SensoWash® uit. > Schakel de SensoWash® weer in. Wanneer het knipperen niet stopt: > Verbreek de netspanning. > Sluit het apparaat na 30 sec. opnieuw aan. De LED "Status" Storing. B op de ziteenheid geeft elke 3 seconden drie rode knippersignalen. > Neem contact op via help@duravit.com De LED "Status" Storing.
Probleem Mogelijke oorzaak Oplossing Hfdst. Algemene werking SensoWash® werkt niet. > Schakel de netSensoWash® is spanning in. niet ingeschakeld. (De LED "Status" B brandt niet) SensoWash® be> Schakel de stand vindt zich in de "Aan" in. stand "Stand-by". (De LED "Status" B is rood verlicht) Er is lekkage. NL Storing. > Sluit de hoofdkraan van de watertoevoer. > Verbreek de netspanning. > Schakel een installateur in. Afstandsbediening Pictogrammen De batterijen op de afstands- zijn uitgeput.
Probleem Mogelijke oorzaak Oplossing Hfdst. > Plaats batterijen. 4.1 De batterijen zijn leeg. > Vervang de batterijen. 4.1 De batterijen zijn verkeerd om geplaatst. > Plaats de batterijen op de juiste wijze. 4.1 De afstandsbe- Er zijn geen diening werkt batterijen geplaatst. niet. De afstandsbedie- > Ontgrendel de 6.3 ning is vergrendeld afstandsbediening. (de pictogrammen "Douchestangpositie" 5 en "Watertemperatuur" 6 knipperen driemaal). De afstandsbediening is defect.
Probleem Mogelijke oorzaak De kracht van de waterstraal is te zwak. > Stel de kracht van 6.2 De kracht van de waterstraal is inge- de waterstraal steld op "Laag". 2 en/of 3 in op "Midden" of "Hoog". De watertoevoerslang is geknikt. De temperatuur De temperatuur van het water is van het water is ingesteld op "Uit" te laag. of "Laag". NL Oplossing Hfdst. > Neem contact op met uw installateur. > Stel de "Water 6.2 temperatuur" 6 in op "Midden" of "Hoog".
Probleem Mogelijke oorzaak Oplossing Hfdst. De nachtverlichting blijft continu ingeschakeld. 6.3 De nachtverlichting Dat is normaal. > Zet de nachtverstaat in de lichting stand "Aan". in de stand "Auto" of "Uit". De nachtverlichting Dat is normaal. bevindt zich in de stand "Auto" en er is onvoldoende omgevingslicht. Het venster van de > Reinig het venomgevingslichtsen- ster van de "omgevingslichtsor is vuil. sensor" D .
10. Technische gegevens Artikelnummer 611.00 00 2 00 4300 Nominale spanning Frequentie Nominaal opgenomen vermogen Opgenomen vermogen tijdens stand-by Max.
Contenido 1. Vista general breve ...........................................................98 1.1 Inodoro ..........................................................................98 1.2 Mando a distancia ........................................................98 2. Descripción de símbolos ....................................................98 3. Advertencias de seguridad ................................................ 99 3.1 Uso normal ....................................................................
1. Vista general breve 1.1 Inodoro 1.2 Mando a distancia A B C D E F G H 1 2 3 4 5 6 7 8 Power LED de estado Lavado general Sensor de luz ambiente Lavado femenino Receptor infrarrojo Luz nocturna Mecanismo de cierre suave Transmisor infrarrojo Lavado general Lavado femenino Lavado confort Posición del caño de lavado Temperatura del agua Parada Compartimento de las pilas Las imágenes de las indicaciones se encuentran en la pagina desplegable. 2.
Función automática temporizada. 3. Advertencias de seguridad Para asegurar que disfrute de su SensoWash® lea estas instrucciones de funcionamiento con cuidado, especialmente las instrucciones de seguridad. Mantenga las instrucciones de funcionamiento en un lugar seguro y en caso de que se transfiera la propiedad, asegúrese de que el nuevo propietario reciba las instrucciones. Estas instrucciones de funcionamiento corresponden al estado tecnológico del dispositivo en el momento de la impresión.
supervisión. λϡAsegúrese de que los niños no jueguen con el SensoWash®. ADVERTENCIA ¡Daño para la salud! El producto tiene que estar puesto a tierra. > Por favor, consulte las instrucciones de montaje. Utilice el dispositivo solo cuando sea plenamente operativo λϡAsegúrese de que el cable de alimentación no esté dañado. λϡEl cable de alimentación no puede quedar atascado ni apretado. λϡMantenga el cable de alimentación lejos de superficies calientes y de bordes afilados.
λϡNO ensucie, pulverice ni bloquee deliberadamente el caño de lavado. Las reparaciones solo pueden ser realizadas por personas del Servicio Técnico de Duravit. λϡNO realice modificaciones, ni manipule, ni instale equipamiento adicional ni intente reparar el SensoWash®. λϡLas reparaciones solo pueden ser realizadas por electricistas o técnicos cualificados. λϡLas reparaciones realizadas de forma incorrecta pueden causar, accidentes, daños o funcionamientos defectuosos.
4. Aspectos básicos de operación 4.1 Mando a distancia SensoWash® se controla a través del mando a distancia. Los ajustes también se pueden modificar a través del mando a distancia. Pulse el botón correspondiente en el mando a distancia para pasar a una función. El botón se encenderá brevemente. Para apagar una función de lavado pulse "Stop" 7 en el mando a distancia.
Parpadeando en naranja: Parpadeando en rojo: SensoWash® se encuentra en el "Modo de drenaje interno". Funcionamiento defectuoso. Desconecte la fuente de alimentación principal y continúe con el capítulo 9. 5. Operación inicial Mando a distancia > Pulse el bloqueo del "Compartimento de las pilas" 8 para abrirlo. > Quite la etiqueta laminada de seguridad en el compartimento de las pilas. > Cierre el "Compartimento de las pilas" 8 .
6. Operación Hay disponible un vídeo funcional sobre el manejo de este inodoro-ducha en www.duravit.com/vid_sewa_slim. Utilice para ello simplemente este código QR 6.1 Encender/apagar el SensoWash® > Pulse "Power" A en el asiento para encender el SensoWash®. Un LED de estado verde indica el "Modo activo". Pulse de nuevo "Power" A en el asiento para apagar el SensoWash®. Un LED de estado rojo indica el "Modo standby". 6.
1 2 > Pulse "Más" o "Menos" para activar el lavado general. La función “Bidé” está activada y el surtidor se despliega lentamente. 3 > Pulse "Stop" para terminar el lavado general o se detendrá automáticamente después de 2 min. También puede pulsar "Lavado general" C en el asiento para activar el lavado general. Pulse "Lavado general" C en el asiento para detener el lavado general o se detendrá automáticamente después de 2 min.
asiento para detener el lavado femenino o se detendrá automáticamente después de 2 min. Activar/desactivar el "Lavado confort" Movimiento hacia delante y hacia atrás del caño de lavado durante su aplicación. Requisito: Se ha activado la función de lavado general o lavado femenino. 1 2 > Pulse "Más" para activar el lavado confort. 3 El lavado confort está activo. > Pulse "Menos" para detener el lavado confort. La función (lavado general o lavado femenino) que se había puesto anteriormente sigue activa.
1 2 > Pulse "Más" para aumentar la intensidad del lavado general. > Pulse "Menos" para reducir la intensidad del lavado general. La misma acción para el "Lavado femenino" 3 . Ajustar la posición del caño de lavado La posición del caño de lavado se puede ajustar de forma individual en 5 posiciones diferentes: Delante <––––––––––––––––––-------–––––> Detrás 1 > Pulse la flecha derecha para recoger el caño de lavado. 2 > Pulse la flecha izquierda para sacar el caño de lavado.
Ajustar la temperatura del agua La temperatura del agua se puede ajustar de forma individual en 4 niveles: Desactivada > Baja 1 > Media > Alta 2 > Pulse "Más" para aumentar la temperatura del agua. > Pulse "Menos" para reducir la temperatura del agua. 6.3 Ajustes Ajustar la luz nocturna Urinario interior iluminado para facilitar la orientación incuso por la noche, también visible con la tapa del inodoro cerrada.
1 2 > Pulse "Stop" y manténgalo pulsado. > Pulse "Lavado femenino menos". Activar/desactivar el sonido de confirmación Para indicar cualquier comando. Activada > Desactivado Pulse la combinación de botones Stop y "Lavado femenino más" para recorrer los ajustes del sonido de confirmación: 1 2 > Pulse "Stop" y manténgalo pulsado. > Pulse "Lavado femenino más".
Bloquear/desbloquear el mando a distancia Función de bloqueo con el mando a distancia. No se puede usar ninguna función cuando se ha activado esta función. Pulse en 5 segundos la siguiente combinación de teclas para bloquear o desbloquear el mando a distancia. Se debe mantener pulsada continuamente la tecla de parada. 1 2 > Pulse "Stop" y manténgalo pulsado. 5 3 4 > Pulse "Tem> Pulse "Posi> Pulse "Posiperatura ción del caño ción del caño menos". de lavado flede lavado flecha izquiercha derecha". da".
para limpiarlos (véase la imagen en la página desplegable). AVISO ¡Decoloración amarilla o eliminación de la pintura si se usa un limpiador incorrecto! > No use productos de limpieza abrasivos ni productos de limpieza que contengan cloro o ácido. > Utilice solo agentes y equipos de limpieza que se hayan destinado para esta área de aplicación. > Siga las instrucciones del fabricante del producto de limpieza. > Nunca mezcle limpiadores. Una solución jabonosa suave es adecuada para la limpieza diaria.
1 2 > Pulse "Stop" y manténgalo pulsado. > Pulse "Lavado general más". 3 4 > Limpie los > Pulse "Stop" jets con un para terpaño, una esminar la ponja suave limpieza o o un cepillo y se detendrá con un limautomátipiador suave. camente después de 2 min. Limpieza automática del caño de lavado y de los jets El caño de lavado y los jets se limpian automáticamente. 1 2 > Pulse "Stop" y manténgalo pulsado. ES > Pulse "Lavado confort más".
7.3 Mando a distancia > Limpie el mando a distancia y el soporte de pared con un paño suave y húmedo. 7.4 Si no se usa de forma prolongada Si no va a usar el SensoWash® durante dos semanas o más, drene el agua que hay dentro del producto. Requisito: SensoWash® está en el "Modo activo", el "LED de estado" B se ha encendido en rojo. > Desconecte el suministro de agua. > Pulse "Power" A en el asiento y manténgalo pulsado.
el medio ambiente. Póngase en contacto con su proveedor o con las autoridades locales para recibir más información al respecto. Hay que eliminar las pilas usadas de manera correcta. Para este propósito, se facilitan contenedores etiquetados de forma adecuada para eliminar las pilas en las tiendas donde se venden pilas y en los puntos de recogida de la comunidad. Los niños no pueden jugar con bolsas de plástico ni material de embalaje debido al riesgo de sufrir lesiones o al peligro de asfixia.
Problema Causa potencial Solución Cap. Lámparas de indicación y función de alarma Funcionamiento El "LED de estado" B de la defectuoso. unidad parpadea en rojo una vez cada 3 segundos. > Apague el SensoWash®. > Vuelva a encender el SensoWash®. Si no deja de parpadear: > Corte la fuente de alimentación. > Vuélvala a conectar después de 30 segundos. El "LED de Funcionamiento estado" B de la defectuoso. unidad parpadea en rojo tres veces cada 3 segundos. > Póngase en contacto con help@duravit.
Problema Causa potencial Solución Cap. Funcionamiento general SensoWash® no SensoWash® no está > Conecte la fuente de funciona. encendido. (El "LED alimentación principal. de estado" B no se ha encendido) El SensoWash® está > Póngalo en el en modo standby. "Modo activo". (El "LED de estado" B está encendido en rojo) Hay una fuga de agua. Funcionamiento defectuoso. 6.1 > Cierre la válvula principal del suministro de agua. > Desconecte la fuente de alimentación. > Llame al instalador.
Problema Causa potencial Solución El mando a distancia no funciona. No se han insertado > Inserte pilas. pilas. 4.1 No quedan pilas. 4.1 > Cambie las pilas. Cap. Se han invertido las > Inserte las pilas de forma correcta. polaridades de las pilas. 4.1 El mando a distan- > Desbloquee el cia está bloqueado mando a distancia. ("Posición del caño de lavado" 5 y "Temperatura del agua" 6 parpadean tres veces). 6.3 El mando a distan- > Contacte con su cia está estropeado. instalador.
Problema Causa potencial Solución Cap. La intensidad del chorro de agua es demasiado débil. La intensidad del chorro de agua se ha configurado en "Baja". > Ajuste la "Intensidad 6.2 del chorro de agua" 2 y/o 3 a "Media" o "Alta". > Contacte con su El tubo flexible de instalador. suministro de agua se ha deformado. La temperatura del agua no es lo suficientemente caliente. La temperatura del > Ajuste la "Tempera- 6.2 tura del agua" 6 a agua está configurada en "Desactiva- "Media" o "Alta".
Problema Causa potencial Solución La luz nocturna permanece encendida de forma continua. Esto es normal. La luz nocturna > Ponga la luz nocse ha configurado en el modo "Activa- turna en el modo "Auto" o "Desactido". vado". Cap. 6.3 La luz nocturna está Esto es normal. en el modo "Auto" y la luz ambiente es oscura. La ventana del sen- > Limpie la ventana sor de luz ambiente del sensor de luz ambiente D . no está limpia.
Consumo nominal de energía Consumo de energía en reposo Corriente máxima 1050 W < 0,5 W 6,8 A Rango de temperatura λϡTemperatura de funcionamiento λϡTemperatura del agua 4 - 40 °C 32 - 40 °C Presión del agua entrante Consumo del agua en el modo de pulverización Grado de protección Dispositivo de seguridad integrado Disposiciones de garantía ES 120 0,07 - 0,75 MPa (0,7 - 7,5 bar) 0,35 - 0,60 l/min IP X4 Protección contra el chorro de agua por todos los lados EN13077 - Tipo AB Encontrará nuestras disp
Sommario 1. Breve panoramica ...........................................................122 1.1 Sedile ......................................................................... 122 1.2 Telecomando ............................................................. 122 2. Legenda ..........................................................................122 3. Per la vostra sicurezza ....................................................123 3.1 Utilizzo appropriato ....................................................
1. Breve panoramica 1.1 Sedile 1.2 Telecomando A B C D E F G H 1 Power Spia LED Doccetta posteriore Sensore luce ambientale Doccetta Lady Ricevitore infrarossi Luce notturna Chiusura ammortizzata 2 3 4 5 6 7 8 Trasmettitore infrarossi Doccetta posteriore Doccetta Lady Doccetta comfort Posizione della testina della doccetta Temperatura dell'acqua Stop Vano batterie Le figure relative ai riferimenti si trovano sul lato di apertura. 2.
3. Per la vostra sicurezza Per poter sfruttare al meglio SensoWash® e garantirne la massima durata, si consiglia di leggere attentamente le presenti istruzioni d'uso ed in particolare le indicazioni di sicurezza. Conservare con cura le istruzioni d'uso e consegnarle all'eventuale successivo proprietario. Le presenti istruzioni d'uso corrispondono allo stato della tecnica relativa all'apparecchio al momento della stampa.
Utilizzare l'apparecchio solo se in piena funzionalità λϡAssicurarsi che il cavo di alimentazione non sia danneggiato. λϡIl cavo di alimentazione non deve rimanere bloccato o essere schiacciato. λϡTenere lontano il cavo di alimentazione da superfici calde e spigoli taglienti. λϡNON utilizzare il prodotto se non funziona correttamente. Scollegarlo subito dall'alimentazione elettrica. Chiudere la valvola di arresto per interrompere l'alimentazione dell'acqua. Contattare help@duravit.com.
λϡLe riparazioni possono essere effettuate solo da elettricisti o tecnici specializzati. λϡLe riparazioni scorrette possono causare infortuni, danni e malfunzionamenti. λϡNON utilizzare accessori non consigliati da Duravit. Indicazioni sull'uso ATTENZIONE Pericolo di danni per la salute! > Qualora sia fuoriuscito del liquido, evitarne il contatto con la pelle, gli occhi e le mucose.
4. Nozioni di base sul funzionamento 4.1 Telecomando SensoWash® viene comandato mediante il telecomando, che permette inoltre di modificare le impostazioni. Per attivare una funzione, premere il tasto del telecomando relativo alla funzione desiderata. Il tasto si illumina brevemente. Per disattivare una funzione doccetta, premere "Stop" 7 sul telecomando.
Luce rossa lampeggiante: Malfunzionamento. Staccare il collegamento alla rete elettrica e passare al capitolo 9. 5. Messa in funzione Telecomando > Premere sulla chiusura del "Vano batterie" 8 per aprirlo. > Rimuovere la linguetta di protezione dal vano batterie. > Chiudere il "Vano batterie" 8 . Alimentazione elettrica > Collegare l'apparecchio alla rete elettrica. Una volta collegato all'alimentazione elettrica, SensoWash® avvia la procedura di "Inizializzazione" per circa 15 secondi.
6. Funzionamento Un video sul funzionamento dei comandi di questo WC con doccetta è disponibile sul sito www.duravit.com/vid_sewa_slim. È sufficiente utilizzare questo codice QR 6.1 Accensione/spegnimento di SensoWash® > Premere il tasto "Power" A sul sedile per accendere SensoWash®. La spia LED verde indica la "Modalità On". Premere nuovamente "Power" A sul sedile per spegnere SensoWash®. La spia LED rossa indica la "Modalità standby". 6.
1 2 > Premere i tasti Più o Meno per attivare la Doccetta posteriore. La doccetta posteriore è attiva, la testina fuoriesce lentamente. 3 > Premere il tasto "Stop" per fermare la Doccetta posteriore o attendere l'arresto automatico dopo 2 min. In alternativa, premere il tasto "Doccetta posteriore" C sul sedile per attivare la Doccetta posteriore. Premere nuovamente il tasto "Doccetta posteriore" C sul sedile per fermare la Doccetta posteriore o attendere 2 min. per l'arresto automatico.
In alternativa, premere "Doccetta Lady" E sul sedile per attivare la Doccetta Lady. Premere nuovamente "Doccetta Lady" E sul sedile per fermare la Doccetta Lady o attendere 2 min. per l'arresto automatico. Attivazione/disattivazione della "Doccetta comfort" Movimento in avanti e indietro della testina durante l'uso della doccetta. Requisito: è stata attivata la funzione Doccetta posteriore o Doccetta Lady. 1 2 > Premere il tasto "Più" per attivare la Doccetta comfort. 3 La Doccetta comfort è attivata.
1 2 > Premere il tasto "Più" per aumentare l'intensità del getto doccetta. > Premere il tasto "Meno" per abbassare l'intensità del getto doccetta. Seguire lo stesso procedimento per la funzione "Doccetta Lady" 3 . Regolazione della posizione della testina della doccetta La posizione della testina può essere impostata a scelta su 5 livelli diversi: Avanti <––––––––––––––––––––––––––-–––> Indietro 1 > Premere il tasto "Freccia destra" per muovere la testina in avanti.
Regolazione della temperatura dell'acqua La temperatura dell'acqua può essere impostata a scelta su 4 livelli diversi: Off > Bassa > 1 Media > Alta 2 > Premere il tasto "Più" per aumentare la temperatura dell'acqua. > Premere il tasto "Meno" per abbassare la temperatura dell'acqua. 6.3 Impostazioni Regolazione della luce notturna Interno tazza illuminato per orientarsi di notte, visibile anche a coperchio WC chiuso.
1 2 > Premere e tenere premuto il tasto "Stop". > Premere il tasto "Doccetta Lady Meno". Attivazione/disattivazione del segnale acustico Segnala l'attivazione di un comando. On > Off Premere in successione i tasti "Stop" e "Doccetta Lady - Più" per selezionare le diverse impostazioni del segnale acustico: 1 2 > Premere e tenere premuto il tasto "Stop". > Premere il tasto "Doccetta Lady Più".
Blocco/sblocco del telecomando Funzione di blocco tramite telecomando. Non è possibile utilizzare alcuna funzione quando questa funzione è attiva. Premere la seguente combinazione di tasti entro 5 secondi per bloccare/sbloccare il telecomando. Durante l’operazione, tenere sempre premuto il tasto di stop. 1 2 > Premere e tenere premuto il tasto "Stop". 3 4 > Premere il ta- > Premere il ta- > Premere il sto "Posizione sto "Posizione tasto "Temtestina - Frec- testina - Frec- peratura Meno". cia sinistra".
7. Pulizia e cura 7.1 Sedile e coperchio Coperchio e sedile possono essere facilmente e rapidamente rimossi per una pulizia approfondita (vedere la figura nella pagina ripiegata). AVVISO Macchie giallastre dovute all'utilizzo di detergenti inadatti. > Non utilizzare detergenti abrasivi, contenenti cloro o acidi. > Utilizzare solo detergenti e apparecchi per la pulizia adatti. > Rispettare le istruzioni d'uso del produttore del detergente. > Non mescolare i detergenti.
1 2 > Premere e tenere premuto il tasto "Stop". > Premere il tasto "Doccetta posteriore - Più". 3 4 > Pulire la te> Premere il stina con un tasto "Stop" panno, una per fermare spugna o una la pulizia o spazzola ed attendere un detergenl'arresto te delicato. automatico dopo 2 min. Pulizia automatica della testina e dell'ugello Testina e ugello si puliscono automaticamente. 1 2 > Premere e tenere premuto il tasto "Stop".
7.4 Periodi di inutilizzo prolungato Se non si utilizza SensoWash® per due o più settimane, è necessario svuotare l'apparecchio. Requisito: SensoWash® deve essere in modalità "On", la luce del "LED di accensione" B è verde fissa. > Interrompere l'alimentazione dell'acqua. > Premere e tenere premuto il tasto "Power" A sul sedile. > Premere immediatamente (entro 2 secondi) il tasto "Doccetta posteriore" C sul sedile per più di 10 secondi. Viene emesso un segnale acustico. > Rilasciare i tasti entro 5 secondi.
I bambini non devono giocare con sacchetti di plastica e materiali di imballaggio, a causa della possibilità di lesioni o del pericolo di soffocamento. Conservare tali materiali in modo sicuro o smaltirli nel rispetto dell'ambiente. Se possibile, conservare l'imballo per tutta la durata della garanzia. 9.
Problema Possibile causa Soluzione Cap. Malfunzionamento. > Contattare La "spia LED" help@duravit.com B sul sedile lampeggia in rosso tre volte ogni 3 secondi. Malfunzionamento. > Spegnere "Tempe- 6.2 La "spia LED" ratura dell'acqua" sul sedile B lampeggia in 6. rosso quattro > Attivare una funvolte ogni 3 sezione doccetta a condi. piacere. Malfunzionamento. > Interrompere l'aViene emesso limentazione eletun segnale acutrica. stico continuo. > Ripristinarla dopo 30 sec.
Problema Possibile causa Soluzione Cap. È presente una Malfunzionamento. > Chiudere la valvola principale di aliperdita d'acmentazione dell'acqua. qua. > Interrompere l'alimentazione elettrica. > Telefonare all'installatore. Telecomando Le batterie sono I simboli sul quasi scariche. telecomando lampeggiano durante il funzionamento. (anziché essere fisse). IT 140 > Sostituire le batte- 4.1 rie.
Problema Possibile causa Soluzione Cap. Il telecomando non funziona. Le batterie non sono inserite. > Inserire le batterie. 4.1 Le batterie sono scariche. > Sostituire le batterie. 4.1 Le batterie sono in- > Collocare le batte- 4.1 serite con la polari- rie nella posizione corretta. tà non corretta. Il telecomando è > Sbloccare il bloccato ("Posizione telecomando. testina" 5 e "Temperatura dell'acqua" 6 lampeggiano tre volte). Il telecomando è difettoso. 6.3 > Contattare l'installatore.
Problema Possibile causa Soluzione La temperatura dell'acqua non è abbastanza elevata. > Impostare la La temperatura > "Temperatura dell'acqua è stata impostata su "Off" o dell'acqua" 6 su "Bassa". "Media" o "Alta". Il getto d'acqua dalla testina si arresta all'improvviso. La funzione viene interrotta automaticamente dopo 2 minuti. Questo è normale. Dalla testina non fuoriesce alcun getto d'acqua. L'ugello è intasato. > Pulire l'ugello. Cap. 6.2 7.
Problema Possibile causa Soluzione Cap. La luce notturna rimane accesa. La luce notturna è stata impostata su "On". 6.3 Questo è normale. > Impostare la luce notturna su "Auto" o "Off". La luce notturna è Questo è normale. impostata su "Auto" e la luce nella stanza è scarsa. Il vetro del sensore luce ambientale è sporco. > Pulire il vetro del "Sensore luce ambientale" D . Funzione di pulizia manuale della testina La testina si ritrae automaticamente.
10. Dati tecnici Codice articolo 611.00 00 2 00 4300 Tensione nominale Frequenza Max. potenza assorbita Potenza assorbita in mod.