
Operating instructions
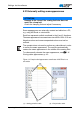


Settings via the software
Operating Manual 512/532 Version 00.0 - 12/2013 53
5. Use the +/– Function buttons to set the coordinates of the
1
st
stitch for the Y axis.
6. Use the +/– Program buttons to select the next stitch.
7. Repeat steps 3 to 5 for all further stitches.
8. Press the Ready button to save the edited seam appearance.
9. Press the Reset button.
The button LED goes out.
10. Press the USB button.
The button LED goes out.
5.23Error messages
If an error occurs, the Error symbol LED illuminates.
Error message Description Possible cause Remedy
E 8 Table data error Table data could not be read • Save the table data anew.
E10Seam
appearance
number error
The selected seam
appearance is not stored in
ROM or has been disabled.
Seam appearance “0”
• Press the Reset button to
confirm the seam
appearance number.
E 3 0 Needle bar
position raised
error
Needle bar is not in the
upper position
• Check the connections.
• Rotate the needle bar to
the upper dead point.
E 4 0 Needle field
area error
Needle field area error
exceeded
• Press the Reset button.
• Check the X/Y scaling.
E 4 2 Enlargement
error
Sewing length is less than
10 mm
• Press the Reset button.
• Check the seam
appearance and the X/Y
scaling.
E45Seam
appearance
data error
Seam appearance data
could not be accepted
• Press the Reset button.
• Check the ROM.
E 5 0 Pause Reset button pressed while
sewing.
Sewing machine stopped.
• Press the Reset button.
• Trigger the thread cutter.
• Start the sewing process
anew.