75 176 179 Spezialnähmaschine Betriebsanleitung D Instruction manual GB Postfach 17 03 51, D-33703 Bielefeld • Potsdamer Straße 190, D-33719 Bielefeld Telefon +49 (0) 521 / 9 25-00 • Telefax +49 (0) 521 / 9 25 24 35 • www.duerkopp-adler.com Ausgabe / Edition: 10/2010 Änderungsindex Rev. index: 02.0 Printed in Federal Republic of Germany Teile-Nr./Part.-No.
Alle Rechte vorbehalten. Eigentum der Dürkopp Adler AG und urheberrechtlich geschützt. Jede, auch auszugsweise Wiederverwendung dieser Inhalte ist ohne vorheriges schriftliches Einverständnis der Dürkopp Adler AG verboten. All rights reserved. Property of Dürkopp Adler AG and copyrighted. Reproduction or publication of the content in any manner, even in extracts, without prior written permission of Dürkopp Adler AG, is prohibited.
Foreword This instruction manual is intended to help the user to become familiar with the machine and take advantage of its application possibilities in accordance with the recommendations. The instruction manual contains important information on how to operate the machine securely, properly and economically. Observation of the instructions eliminates danger, reduces costs for repair and down-times, and increases the reliability and life of the machine.
General safety instructions The non-observance of the following safety instructions can cause bodily injuries or damages to the machine. 1. The machine must only be commissioned in full knowledge of the instruction book and operated by persons with appropriate training. 2. Before putting into service also read the safety rules and instructions of the motor supplier. 3. The machine must be used only for the purpose intended. Use of the machine without the safety devices is not permitted.
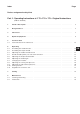
Index Page: Preface and general safety hints Part 1: Operating Instructions cl. 175 176 179 – Original Instructions (Edition 10/2010) 1 Product description . . . . . . . . . . . . . . . . . . . . . . . . . . . . . . . . . . . . . . . . . . . . 5 2 Designated use . . . . . . . . . . . . . . . . . . . . . . . . . . . . . . . . . . . . . . . . . . . . . . . 5 3 Subclasses . . . . . . . . . . . . . . . . . . . . . . . . . . . . . . . . . . . . . . . . . . . . . . . . . . 7 4 Optional equipment.
1 Product description The DÜRKOPP ADLER class 175 is a single needle flat bed double-chainstitch crossline sewing machine with differential foot top feed and bottom feed for linear seams according to stitch type 401 for processing light to medium-weight material. The class 176 is a single needle flat bed double-chainstitch crossline sewing machine with differential bottom feed. For linear seams according to stitch type 401 for processing light to medium-weight material.
Generally only dry fabrics must be processed on this sewing machine head. The material must not be thicker than 4 mm when compressed by the lowered sewing feet. It must not include any hard objects because otherwise the sewing machine head would be allowed to be operated with an additional eye protection only. Such an eye protection cannot be delivered at present. In general the seam is produced with sewing threads made of textile fibers up to 70/3 Nm (core thread).
3 Subclasses 175-141621 Single needle double-chainstitch machine with bottom feed and differential top feed, with condensed stitches (electropneumatic), electropneumatic sewing foot lift and thread trimmer for needle and looper thread underneath the throat plate. The electropneumatic thread advancing device for needle and looper thread combined with the electropneumatically driven thread tension and the clamp spring on the looper allows a safe stitch formation.
179-171629 8 Single-needle flatbed single-chainstitch crossline sewing machine with bottom feed and differential upper foot feed, but with electropneumatic sewing foot lifting, adjustable electropneumatic thread advancing device, electropneumatic driven thread tension and with electropneumatic thread cutter for the needle thread below the stitch plate. The remaining thread on the material is long enough to prevent the seam’s unravelling.
4 Optional equipment Optional equipment 176-141621 Subclasses 0271 590024 Reflecting infrared light barrier for automatic sewing stop and end sensing of the fabric with the following functions: condensed stitches, thread trimming, sewing foot lifting. Can be mounted either on the right/left. x x 0275 590014 Mechanical device to increase the overfeed length during sewing (second pedal). x x 0175 590044 Electro-pneumatic device to increase the overfeed length during sewing via keystroke.
N079 008533 Guiding attachment for closing seams x N900 002841 Swivel guide for device N079 008533 x N900 003601 Intermediate plate especially made for sewing intensively with fullness, swivelling.
Optional equipment 176-141621 179-171629 Subclasses 0171 003502 Double-needle kit for the transformation of a single-needle machine to a double-needle double chainstitch machine (Without thread trimming function) x 9800 330009 Control panel Efka V810 x x x 9800 330010 Control panel Efka V820 x x x 9830 515064 L-Bracket for fastening the control panel to the sewing machine for Efka V810 and V820 x x x 175-141621 Order number x = Optional equipment o = Standard equipment GB 11
179-171629 Subclasses 176-141621 Optional equipment 175-141621 Order number MG53 400624 Stand set MG 53-3 Table top 1060 x 500 mm, with one pedal x x x MG53 400634 Stand set MG 53-3 Table top 1060 x 600 mm, with one pedal x x x MG53 400644 Stand set MG 53-3 Table top 1250 x 900/700 mm, with one pedal x x x MG53 400664 Stand set MG 53-3 Table top 1060 x 500 mm, with one pedal and rollers x x x MG53 400674 Stand set MG 53-3 Table top 1060 x 600 mm, with one pedal and rollers x x x
Please contact our Application Center (APC) for further optional equipment. E-Mail: marketing@duerkopp-adler.
5.
Technical data of the subclasses Stitch type Chainstitch 401 Hook type Crossline Needle system 179-171629 176-141621 Subclasses 175-141621 5.1 101 933 934 RG Needle size [Nm] 80-130 Max. sewing thread sizes core thread [Nm] Stitch length forwards only [mm] 1-4 Max. feeding length top feed foot [mm] 8 Max. feeding length differential bottom feed [mm] 6 Max. number of stitches (Speed) [min ] 5000 5000 5000 No.
6. 6.1 Operating Threading the needle thread Caution: Risk of injury ! Switch the main switch off ! Thread the needle thread only with the sewing machine switched off. Thread the needle thread as shown in the illustrations.
6.2 Threading the looper thread (Cl. 175/176) Caution: Risk of injury ! Switch the main switch off ! Thread the looper thread only with the sewing machine switched off. 6 5 2 Thread the looper thread as shown in the illustrations – Lift the thread downholder 2 out of its catch mechanism. – Pull the thread through the boreholes 3 and 4. – Pull the thread through the looper boreholes 5 and 6. – Shut the thread downholder 2.
6.3 Adjusting the needle thread tension The needle thread tension has to be tighter than that of the looper thread. Increase the needle thread tension: Turn setting wheel 1 clockwise. Reduce the needle thread tension: Turn setting wheel 1 counter-clockwise. Too tight thread tensions cause puckering of the material. A too loose looper thread tension may lead to skipped stitches. 1 6.4 Needle thread quantity for safe stitch formation In case of elastic sewing threads, e.g.
6.5 Adjusting the looper thread feeder (Cl. 175/176) The looper thread feeder 1 guarantees the automatic adaptation of the looper thread quantity to the set stitch length. This means an optimum stitch formation for every stitch length, even in case of condensed stitches. No gaping and ruffling of the seam. The looper thread quantity to be pulled can be quickly adjusted.
6.6 6.6.1 Adjusting the feed length Adjusting the bottom feed / top feed Bottom feed (cl. 175) The feed length of the feed-dog is adjusted at the setting wheel 1. 1 Bottom feed (cl. 179) The feed length for the feed dog has to be adjusted manually. – Tilt the machine. – Loosen screw 3 and remove the cover 2. – After loosening the lock nut 5, adjust the lever 4: Adjusting lever 4: to the back (+) = Increase feed length to the front (-) = Reduce feed length – Tighten lock nut 5.
Top feed (Cl. 175/179) If the stitch length for forward sewing is changed with adjustment wheel 1, the overfeed is automatically changed in line with it. The overfeed length is adjusted with adjustment wheel 5 and can be read off at pointer 3. When using the mechanically or electropneumatically connectable fullness facility (optional equipment), the maximum top feed length can be limited using handle 4. The maximum top feed length is displayed by pointer 2.
Notes: 22
6.6.2 Adjusting the condensed stitches (cl. 175/176) With the setting wheel 10 it is possible to select the desired condensed stitches. More condensed stitches: turn the setting wheel 10 clockwise. Less condensed stitches: turn the setting wheel 10 counter-clockwise. 10 Setting the differential bottom feed (cl. 176) The sewing machine class 176 has two adjustable feed dogs in a row independent from each other. Use the setting wheel 1 to adjust the feed length of the rear feed dog.
6.7 Changing the needles 1 2 3 Caution: Risk of injury ! Switch the main switch off. Change the needle only with the sewing machine switched off. – – – – – 24 Turn the handwheel until the needle bar 1 has reached its top position. Loosen screw 2. Pull the needle out of the needle bar 1 in downward direction. Push new needle in the bore of needle bar 1 as far as it will go. Align the needle in such a way that the hollow groove 3 shows in backward direction! Fasten screw 2.
6.8 Adjusting the sewing foot pressure Class 175/179 1 The desired sewing foot pressure is adjusted by means of the rotary knob 2. – Loosen the counter nut 3. – Increasing the sewing = Turn the rotary knob 2 foot pressure clockwise. – Reducing the sewing = Turn the rotary knob 2 foot pressure counter-clockwise. – Fasten the counter nut 3 again. 2 3 CAUTION: The sewing-foot pressure of the top feed foot must only be checked with the top feed foot in contact with the feeder.
6.9 Adjusting the top feed foot pressure Class 175/179 The required pressure for the top feed foot (grip-feed 4) is set with adjustment wheel 1. – Increasing the top feed= Turn adjustment wheel 1 foot pressure clockwise. Reducing the top feed = Turn adjustment wheel 1 foot pressure counter-clockwise. 1 2 4 3 5 CAUTION: The sewing-foot pressure and top feed foot contact pressure must only be checked with the top feed foot in contact with the feeder.
6.10 Sewing foot lift The sewing feet can be lifted mechanically or electropneumatically. According to the machine type and the equipment of the machine the lifting is done by actuating the knee lever or the pedal respectively. 6.11 Keypad on the machine arm (Cl. 175/176) Key Function One-time suppression/activation of condensed stitches 1 Needle position high/low during downtime.
7 Sewing Operating and function sequence when sewing: Sewing operation Operating / Explanation Before the sewing start Initial position - Pedal in idle position. Sewing machine is idle. Needle position high. Sewing foot down. Position the fabric at the seam beginning - Lifting the sewing foot. - Push the fabric close to the needle. - Lower the sewing foot. Sewing - Step forward on the pedal and hold it stepped. The machines moves forwards with the speed determined by the pedal.
8. 8.1 Maintenance Cleaning and testing Caution: Risk of injury ! Switch the main switch off. The maintenance of the sewing machine must only be carried out when the machine is switched off. Maintenance work has to be done after the intervals indicated in the tables at the latest (see column “Operating hours”). The processing of fluffy material may require shorter maintenance intervals. A clean sewing machine is a trouble-free machine.
6 4 8 2 10 1 2 Maintenance work to be carried out Explanation Operating hour Sewing drive Clean the air inlets from sewing dust and thread remainders 8 Check the water level in the pressure regulator. The water level must not rise up to the filter insert 1. - Drain water out of the water separator 2 under pressure after screwing out the drain screw 3. 40 Clean the filter insert. Dirt and condensed water are discharged through the filter insert 1.
8.2 Lubrication 4 5 6 7 Caution: Risk of injury ! Oil may cause skin eruption. Avoid a longer contact with the skin. Wash yourself thoroughly after a contact. ATTENTION ! The handling and disposal of mineral oils is subject to legal regulations. Deliver used oil to an authorized collecting station. Protect your environment. Be careful not to spill any oil.
Notes: 32