
User's Manual


D1120 EVALUATION KIT QUICK START GUIDE 11
3
Setting Up a Network
This chapter describes how to set up a D1120 Evaluation Kit in a simple sensor
network. For a more detailed explanation, see the Getting Started Guide that came with
your Evaluation Kit.
Setting Up the SmartMesh Manager
A Install the SmartMesh Console software.
B Connect Manager to the PC using the cross-over cable.
C Connect power to the Manager.
D If necessary, adjust the IP address of the PC to allow connection with the manager.
E Start Console.
F Connect to Manager.
G Go on to set up the network.
Setting Up the Network
A Power up one evaluation module by resetting it.
B Press the Test button on the module.
The green Power LED should turn on. If it does not, make sure that the batteries are
properly seated. The Link LED starts blinking when the module has found the
network. When the module joins the network, the Link LED remains on.
C Form the network by powering up additional modules (repeat steps 1 and 2).
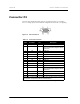
D Use the Console to verify network connectivity. For more information about
configuring and managing the network, refer to the SmartMesh Network
Administration Guide.