
- DXG TECHNOLOGY Digital Camera User's Manual DXG-568

30
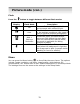
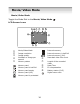
Macro / Normal
You can switch to the Macro mode by sliding the Macro / Normal switch down.
Mode Icon Description
Macro
This is suitable for taking pictures at a
distance of 9-10 inches. Best for
close-up shots.
Normal None
This is suitable for taking pictures at a
distance of 5 feet to infinity. As the
distance becomes further, the
background will slightly lose focus.
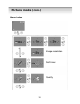
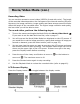
Digital Zoom
Press the top of the 4-way scroll button to zoom in or bottom to zoom out .
The maximum zoom is 4X.
Sometimes the recorded image will have slight distortion when using the digital
zoom. If you are taking important pictures or need strict image quality, do not
zoom more than 2X.
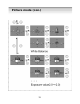
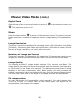
Self-timer Mode
While in the Picture Mode (photos), press the Menu button . The self-timer
mode icon will be shown on the right of the LCD screen. Press the right side of the
4-way scroll button to select the icon that looks like a yellow circle with a red line
through it. Next, press the top of the 4-way scroll button to select the icon and
remove the red line. Now press the center menu button. The icon wil now be on
the left had side of the screen meaning the time is activated.
Now press the Shutter button and the LCD screen will show the countdown in
seconds (default: 10 seconds). The self-timer LED starts blinking for the last 3
seconds and the picture is taken after the preset time has elapsed.
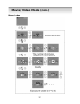
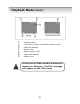
Be sure to select the proper photography
mode when taking pictures. If not, the photo
may be blurred.
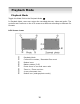
Picture mode (con.)