
Owners manual


24
XTL
®
300
User Guide
Editing and Formatting Text on Labels
This section describes the following:
Changing text size and style
Rotating and aligning the text
Inserting punctuation, symbols, and special characters
Creating a vertical label
The following sections describe formatting text using the keypad. You can also
access the formatting tools from
Properties.
Editing Text
The number of lines of text that you can insert on a label depends on the size of
the text and the width of the label. If the text is too large or you add too many lines,
you will see a warning icon and receive an error message when you try to
print.
To edit text in a text box
Select the text box and add text using the keypad.
Use the navigation keys to move through existing text.
Press to add a new line.
Select blocks of text using + the navigation keys.
See Navigation Keys on page 9 for information about moving the cursor and
selecting text.
Changing the Text Size
You can select the font size for the text or you can have the text automatically
sized to fit the available space on the label.
See each label type in Using the Label Applications on page 13 for how
changes to the text size are applied to that type of label.
To change the text size
1 Select some text.
To apply the size to all the text, select the text box.
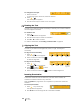
2 Press .
The Font Size tool appears.
3 Use or to select a font size from the list or select Auto fit text.
You can also enter a size directly in the Font size box.
Changing the Text Style
You can add bold, italic, and underline to your text. You can also add a box
around the text.
See Using the Label Applications on page 13 for how changes to the text style
are applied to each type of label.