
Owners manual


27
XTL
®
300
User Guide
Working with Objects on a Label
Depending on the label type, you can add text box, image,
or barcode objects to design your label. See Using the
Label Applications on page 13 for a description of which
objects can be used on each label type.
The label edit area is divided into five positions as shown:
above, below, center, left, right. Each object type is represented by an icon:
A blue border appears around the object when the object is selected.
A new object can replace a default object already on the label or you can place the
new object above, below, to the right, or to the left of the default object.
To select an object
Use the navigation keys to select an object on the label.
To move an object
1 Select the object, and then select Location.
2 Use the arrow keys to move the object to a new location.
To delete an object
Use the navigation keys to select the object and press .
Inserting a Text Box
Most labels include at least one text box by default. Only one text object is allowed
on a label. In most cases, a single text box will already be positioned on the label
when the editor starts. Depending on the label type, you can change the text box
location or, if the label includes a barcode or image, you can delete the text box.
To insert a text box
1 Select and select Text.
2 Use the navigation keys to select the location for the text box.
3 Add text and formatting.
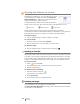
To edit the text box formatting
1 Select the text box and press .
The properties menu appears.
2 Select Text format.
3 Use the function keys to change the format.
Inserting an Image
You can add one or more images to some label types.
See Using the Label Applications on page 13 for a description of which objects
can be used on each label type
Text object Barcode object
Image object