
Owners manual


28
XTL
®
300
User Guide
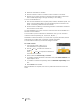
A number of standard images are built into your label maker. You can also transfer
images from your computer to the label maker for use on your labels. The image
categories are:
See Images and Symbols on page 46 for the complete list of images included.
A Custom category is added to the category list when you have transferred
custom images from your computer to the label maker.
You can mark images you use frequently as Favorites for easy access. See Using
Favorites on page 31 for more information.
To insert an image
1 From the edit screen, select and then select Image.
2 Select the image you want to insert.
3 Use the navigation keys to select the location for the image.
4 Select the Size and Alignment.
To edit the image properties
1 Use the navigation keys to select the image and press .
The image properties list appears.
2 Select the property you wish to change.
3 Change the settings and press .
4 When finished editing properties, select Close.
To change the image
1 Use the navigation keys to select the image and press .
The properties menu appears.
2 Select Change image.
3 Select a new image.
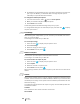
Inserting a Barcode
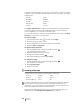
The label maker can generate the following types of barcodes.
This User Guide assumes that you already understand the differences between
barcode types and have a plan in place to incorporate barcodes into your
organization. If you need to learn more about barcodes, many excellent how-to
books are available at local libraries and book stores.
Code 128 is the default barcode type. You can choose another type as your
default barcode. See Setting the Default Barcode on page 36.
Warning
Mandatory
Prohibit
Fire and Exit
First aid
GHS
WHMIS
Electrical
ProAV
Arrows
Code 128 Codabar EAN 8
Code 39 EAN 13 UPC A
Code 39 w/Mod 43 PDF 417 QR