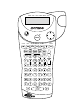
WRAP FLAG 1 FLAG 2 FIXED TBLOCK VERT CAPS BFONT STYLE BOX ULINE BCODE PRINT CLEAR VERT BCODE BOX/UL CARD ID LANG SAVE ALIGN ERASE SAVE GRAPHIC 219 Industrial Labelprinter Instructions for Use www.dymo.
WRAP FLAG 1 FLAG 2 FIXED TBLOCK VERT CAPS BFONT STYLE BOX ULINE BCODE PRINT CLEAR VERT BCODE BOX/UL CARD ID LANG SAVE 219 ALIGN SAVE GRAPHIC ERASE
Contents part I : Printer Manual Introduction ..................................................... 3 Getting Started . . . . . . . . . . . . . . . . . . . . . . . . . . . . . . . . . . . . . . . . . . . . . . . . . . . . . 3 1. Unpacking your ILP219 kit . . . . . . . . . . . . . . . . . . . . . . . . . . . . . . . . . . . . 3 2. Power Supply . . . . . . . . . . . . . . . . . . . . . . . . . . . . . . . . . . . . . . . . . . . . . . 3 3. Installing/Changing the cassette . . . . . . . . . . . . . . . . . . .
Contents part II : Software Manual Getting Started . . . . . . . . . . . . . . . . . . . . . . . . . . . . . . . . . . . . . . . . . . . . . . . . . . . . .21 Overview . . . . . . . . . . . . . . . . . . . . . . . . . . . . . . . . . . . . . . . . . . . . . . . . . . . .21 About Labels Sets . . . . . . . . . . . . . . . . . . . . . . . . . . . . . . . . . . . . . .21 About Graphics . . . . . . . . . . . . . . . . . . . . . . . . . . . . . . . . . . . . . . . .21 Installing ILP219 Card Loader Software . . .
Introduction The Dymo ILP219 helps you mark and identify cables, wires, patch panels and components around your plant. The ILP219 can print your information to suit the environment you work in: thermally printed tape can be wrapped around cables, flagged around wires or applied onto different surfaces. The information can be spaced along a label to fit a row of switches ,fuses or patch panels. It can create bar codes, print graphics, and display text in a variety of formats.
Fig. 2 Note: Please use the AC Adaptor to re-charge your battery pack and press the power-on key to activate the charging. 3. Installing/Changing the cassette • Press catch in and open access door (fig B1). • Hold cassette as shown, then lift cassette B2 straight up and out. • Ensure tape and ribbon B3 are taut across mouth of cassette and tape passes between guideposts before installing as shown. If necessary, turn spool B4 clockwise to tighten ribbon.
PART I : Printer Manual Getting to know your printer Display WRAP FLAG 1 FLAG 2 FIXED TBLOCK VERT CAPS BFONT STYLE BOX ULINE BCODE These annunciators are explained in more detail throughout the manual. Backlighting When the printer is used in a darker environment and the display is difficult to read than the backlighting can be used. Toggling this key will set the backlighting on or off. Typing text and symbols CAPITALS The standard setting for the ILP219 is to type upper case letters.
NAVIGATION KEY • Press Q or R to move the cursor along the text, one character at a time. • Press + Q or R to move the cursor to the beginning or end of the line of text. • When used in conjunction with certain function keys, use Q or R to select options. • To insert characters into the text, use Q or R to position the cursor under the character to the right of the insertion point, then type in the characters required.
Formatting your label TEXT SIZE The ILP219 can print text in four different heights (small, medium, large and big font) and in three different widths (condensed, normal and expanded). The combination of height and width is shown in the text size panel in the display. B To select the size of text you require, press . Use H or P on the navigator key to select the height of text you require, and Q or R to select the width of text. Confirm your selection in each case by pressing ENTER .
MULTIPLE LINES Press ENTER to start the next line of text on a multi-line label. This is a two ↵ line label on the display will be printed as: ROOM DATA and the display will indicate two lines: (show line display) You can print up to four lines on one label, depending on the width of the tape you are using: ALIGN JUSTIFYING TEXT IN MULTI-LINE LABELS For multi-line labels, you can choose three options for your text alignment: left-justified, centre-justified, or right-justified.
left-justified centre-aligned: STAIRCASE emergency lighting BX-243 left-justified right-aligned: STAIRCASE emergency lighting BX-243 centre-justified left-aligned: STAIRCASE emergency lighting BX-243 centre-justified centre-aligned: STAIRCASE emergency lighting BX-243 centre-justified right-aligned: STAIRCASE emergency lighting BX-243 right-justified left-aligned: STAIRCASE emergency lighting BX-243 right-justified centre-aligned: STAIRCASE emergency lighting BX-243 right-justified right-align
A two-line label always has small size text when it is mixed with a barcode. Text entered before pressing followed by H + , will result in text above the barcode: BCODE MODE ABC 123456 Entering the text after pressing at the end of a barcode will produce text below the barcode: 123456 ABC Text can be underlined, e.g.
BCODE Printing modes MODE WRAP-AROUND LABELS With WRAP-AROUND labels you can wrap your label completely around your wire or cable. The data is automatically printed onto the label as many times as possible. This way the data is clearly legible from any angle once applied. The number of times your text is repeated will depend on the length of the label which is set by the diameter of the cable you have entered or the size of the tape ( horizontal wrapping). 1.
FLAG LABELS With flag labels, the unprinted part of the tape is wrapped around your wire or cable, and the tape is folded back on itself to form a flag. The flag is therefore as long as the text. The information is automatically printed on both sides of this ‘flag’ part of the tape, so that it is clearly legible from almost any angle. The ILP219 can print two types of flag labels: in both cases, it will prompt you to enter the diameter of the wire or cable.
- or Move the cursor to the left with arrow Q to set the left-hand digits. Enter the cable diameter via the keypad. • Press ENTER to select. The indicator FLAG 2 will be highlighted on the display. FLAG 2 mode can print flags for cables or wires with a maximum diameter of 1000mm or 40 inch. - When asking multiple copies the printer will print after each label 2 small points to indicate the place to cutt off.
• Press ENTER to select. C ) you wish to set as the fixed distance between the blocks or ports. • The machine will now prompt you to input the step (C The display will show C = xx, where xx defaults to 12mm or 0.5inch. • Use the cursor keys H or P to increase or decrease the settings (min. increments of 0.1 mm or 0.1 inch) until you have reached the distance you require. - or Move the cursor to the left with arrow Q to set the left-hand digits. Enter the step via the keypad.
• Press the BCODE MODE key. Then use the cursor keys H or P to scroll through to the MODULE PRINTING mode: • Press ENTER to select. The annunciator FIXED + TBLOCK will be highlighted. • You will be asked to enter the length of the smallest module. The Default value is set at 17,5mm or 0.75 inch. • Use the keyboard to enter the numbers. Move the cursor to the left with arrow Q to set the left-hand digits. Press ENTER to select.
NOTE: • If you have selected more labels than you have defined modules, only the first labels will be printed. • If you have selected less labels than you have defined modules , only the selected labels will be printed. The rest of the label will be left blank. • If one label inside the selection creates an error against the available features the printer will produce a blank label. Saving labels and preferences SAVE Saving a label + You can save up to 8 labels in the memory of the printer. SAVE 1.
Downloading labels, files and graphics onto a memory card (see also PART II DYMO ILP219 Card loader software). Using files on the memory card Inserting a memory card Insert the memory card as shown in the illustration below. You can check the name of the card by pressing H + . The card ID will appear on the top line of the display. A card contains 64 kb and can store up to 32 file names (= groups) and 32 different graphics. Each file can contain an unlimited number of labels. GRAPHIC Selecting a file 1.
Printing Pressing the PRINT button will bring you into the Print Mode menu. The display will show a range of five options, which you can select with H or P on the navigator key. Different printing options 1. CURRENT Press ENTER and the ILP219 prints one copy of the current label. Pressing print again will do the same 2. COPIES You can print multiple copies of the same label. Use the H or P to scroll to this option in the printing menu. Press ENTER to select this option .
T° ADJUSTING PRINT HEAD TEMPERATURE + Certain types of materials may require a different print head temperature. The print head temperature setting can be adjusted to darken or lighten your printed legend. T° , and you will be prompted to enter an increase or reduction in the print head To change the temperature, press + temperature. This can be raised till + 5, or reduced by up to 20 in increments of 1 ( were + results in a darker print). Cleaning Clean the cutter blade regularly.
PART II : Software Manual Card Loader Software Getting Started This manual describes how to use the DYMO ILP219 Card Loader software to create and download files that contain libraries of labels and graphics for use with the DYMO ILP219 industrial label printer. Overview The DYMO ILP219 Card Loader software provides an easy method for creating sets of labels and graphics which can then be downloaded to the DYMO ILP219 industrial label printer.
Registering the Software The first time you start the ILP219 Card Loader application, you will be asked to register the software. We highly recommend that you register your ILP219 Card Loader software so that you can receive customer support, information on product updates, and special announcements from DYMO. If you choose not to register the software at this time, you will be prompted the next three times you start the program. You can register the software at any time as described below.
The As Lines view shows each line of the label in a separate column. This allows you to select a column of data and perform a global action, such as deleting a line of text or applying a barcode. Groups View The Groups view displays the contents of your label set in a tree view displaying your labels organized by groups. You can have up to 32 groups within a label set. The number of labels that you can create in each label set is limited only by the amount of memory available on the memory card.
Menus and Commands This section summarizes the commands available to you. For more detailed information about a particular command, refer to the Help. File Menu The following commands are available from the File menu. Toolbar Icon Menu Command Description New Label Set Closes the current label set, prompting you to save the set if necessary, and opens a new, unnamed label set. Open Displays the Open File dialog box to select a label set to open.
Edit Menu The following commands are available from the Edit menu Toolbar Icon View Menu Undoes the last action. Cut Cuts the selection to the clipboard. Copy Copies the selection to the clipboard. Paste If the clipboard contains text, pastes the clipboard contents onto the current label. If the clipboard contains a graphic, pastes the image into the graphics list. Delete Deletes the currently selected label, group, or image.
Creating Labels The ILP219 Card Loader software allows you to create and group labels that you can download to the memory card in an ILP219 label printer. You can then print the labels contained on the memory card any number of times and in any combination. You can also choose add one or two of the images included in the label set to your labels. This chapter gives you an overview of creating labels with ILP219 Card Loader software. For more information on any of these features, refer to the Help.
Adding Label Text You add text to labels in the label set using the Labels view. Labels can contain up to four lines of text. If you are going to add a barcode then the labels are limited to two lines. See Appendix A for a list of supported characters. To create a label 1. Start the ILP219 Card Loader program. The main window appears in the Labels view. 2. Type up to four lines of text in one of the label rows for each label you wish to create.
About Barcodes You can choose to add a barcode to your label. This feature can be very useful, for example, if you are labeling items that will be scanned with a barcode reader. When you add a barcode to your label, the label is limited to two lines instead of four. In As Labels mode, clicking Apply Barcode when you have more than one label selected applies a barcode to the first line of each selected label.
To insert a barcode to an individual line of text 1. Select the Labels tab. 2. Select As Lines or As Labels under View Mode. 3. Select a line of text to which you wish to apply a barcode. 4. Select Apply Barcode. The Insert Barcode dialog box appears. 5. Select the type of barcode from the Barcode type drop-down list. 6. Click OK. The font is changed to bold and underline to indicate that it will print as a barcode on the label.
Renaming Groups Group names are limited to 12 alphanumeric characters and can contain spaces. To rename a group 1. Select the Groups tab. 2. Select the group you wish to rename. 3. Select Rename Group from the File menu. You can also right-click on the group name and select Rename Group. 4. Enter the new name for the group. Moving Labels within Groups If you do not have a specific group selected when you add a new label, the label is added to the *UNASSIGNED* group.
If you wish to rotate the image, you must do so at this point prior to actually inserting the image in the label set. This is because images are resized for optimal height as they are imported. Rotating an image after it is imported would impact the image quality. 4. Click one of the following: • to rotate the image 90 degrees to the left. • to rotate the image 90 degrees to the right. 5. Click Open. The image you selected appears in the Graphics view with the same name as the source file.
Downloading the Label Set When your label set is complete, you can download it to a memory card in an ILP219 printer attached to your computer. The label set can be downloaded as many times as you wish to different memory cards allowing several people to use the same label information on their individual label printers. To download the label set 1. Save the label set using the Save command on the File menu. 2. Click or select Download from the File menu.
For example, the following lines of text (if List Separator in Regional Settings is set to comma): DYMO Corp., 44 Commerce Road, “Stamford, CT 06902” Esselte, 48 South Service Road,”Melville, NY 11471” will create two three-line labels: one for DYMO and one for Esselte. In another example, the following three lines of text will create three two-line labels (if List Separator in Regional Settings is set to comma): Pencils, 3 for $1.00 Pens, $0.50 each Erasers, $1.
Creating Labels Using Smart Paste This section explains how text copied from different sources is turned into labels using the Smart Paste command. To create labels using Smart Paste 1. Copy the text you wish to print as labels to the clipboard. 2. Select Smart Paste from the Edit menu. A dialog box appears telling you how many labels were imported. 3. Click OK. Importing a File from Another Program You can import a .csv or .txt file containing label text directly into the ILP219 Card Loader software.
Service and Support Technical Support If you experience problems with the set up or use of the ILP219 Card Loader software, carefully read this manual and consult the Help to make sure you have not missed something that is covered in the documentation. If you cannot resolve your problem by consulting the documentation, you can obtain additional information at any time from the Support section on the DYMO Web site or by contacting DYMO Technical Support.
Appendix A Supported Character Set The DYMO ILP219 label printer supports a specific set of characters. Therefore, you need to be sure that you use only those characters when creating labels in the ILP219 Card Loader software. If you enter text containing a character that is not supported by the ILP219 printer into labels either directly, by importing, or by pasting, the unsupported character is displayed in green and the icon for the label in the Groups view includes an exclamation point.
Table 3. Turkish - Turkish. Table 4. Baltic - Estonian, Latvian, and Lithuanian.
Declaration of Conformity DYMO Corporation 44 Commerce Road Stamford, CT 06902-4561 Phone: (203) 355-9000 Fax: (203) 355-9090 Equipment Information Description: Thermal Transfer Printer Model: ILP219 This equipment has been tested and found to comply with the limits for a Class B digital device, pursuant to Part 15 of the FCC (Federal Communications Committee) rules. These limits are designed to provide reasonable protection against harmful interference in a residential installation.