User Guide DYMO LabelWriter Label Printers ® ®
Copyright © 2009-2010 Sanford, L.P. All rights reserved. Revised 10/10. No part of this document or the software may be reproduced or transmitted in any form or by any means or translated into another language without the prior written consent of Sanford, L.P. Trademarks DYMO and LabelWriter are registered marks in the United States and other countries. All other trademarks are the property of their respective holders.
Contents About the LabelWriter Printer . . . . . . . . . . . . . . . . . . . . . . . . . . . . . . . . . . . . . . . . . . . . . . . . . . . . . . . . . . . 1 LabelWriter Printer Features . . . . . . . . . . . . . . . . . . . . . . . . . . . . . . . . . . . . . . . . . . . . . . . . . . . . . . System Requirements. . . . . . . . . . . . . . . . . . . . . . . . . . . . . . . . . . . . . . . . . . . . . . . . . . . . . . . . . . . . Printing Labels . . . . . . . . . . . . . . . . . . . . . . . . . . . . . . .
iii
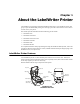
Chapter 1 About the LabelWriter Printer Congratulations on purchasing a DYMO LabelWriter label printer. Your LabelWriter printer will give you years of reliable label printing. We encourage you to take a few minutes to review how to use and care for your printer.
About the LabelWriter Printer Serial number Top cover USB connector Label guide Label roll DC power connector Reverse label button Label spool S/N 00000-0000000 Form-feed button and status light Label release Label feed path and tear bar Cable channels LabelWriter 450 Twin Turbo Top cover Label roll Label spool USB connector DC power connector Label guide Reverse label button Label release Label feed path and tear bar Form-feed button and status light Label exit slot Open label cassette t
System Requirements Label spool Label roll Serial connector USB connector Cable channel Label release USB 10101 S/N 00000-0000000 Top cover 24VDC DC power connector Serial number Form-feed button and status light Label feed path and tear bar LabelWriter SE450 The form-feed button on the front of the printer advances a single label. The reverse label button is used to remove labels from the printer when changing rolls. The LabelWriter SE450 printer does not include a reverse label button.
About the LabelWriter Printer • In cases where you want to automate printing and take advantage of the label printing power built into DYMO Label software, a Software Developer’s Kit (SDK) is included in your LabelWriter CD. The SDK provides COM and .NET interfaces. For more information, visit the Developer Program page on the DYMO web site. www.dymo.com. You can check the Developer’s forum on the DYMO Web site at www.dymo.com for the latest news.
Chapter 2 About Labels DYMO LabelWriter printers use advanced thermal printing technology to print on specially treated, heat-sensitive labels. This means you will never have to replace toner, ink cartridges, or a ribbon to print labels. Note DYMO’s warranty does not cover malfunction or damage that may be caused by the use of labels other than DYMO-branded labels. Because DYMO LabelWriter printers use thermal printing technology, you must use specially designed and manufactured labels.
About Labels Important! In order for the labels to feed properly during printing, pay attention to the following when loading labels on the spool and into the printer: • The label spool guide must be pushed flush against the label roll, with no gap. See Figure 2. • The labels must be loaded with the left edge of the label inserted against the left edge of the label feed slot. See Figure 4. Figures 3 and 4 in this section show loading labels in a LabelWriter 450 printer.
Ordering Labels To load a label cassette (LabelWriter Duo) 1 Remove cardboard insert Press the button on the front of the printer to open the label cassette tray. Note The first time you use the printer, remove the protective cardboard insert from the label exit slot. See Figure 5. 2 Make sure the label and ribbon are taut across the mouth of the cassette and that the label passes between the label guides. Figure 5 If necessary, turn the ribbon rewind spool clockwise to tighten the ribbon.
About Labels This page intentionally left blank for double-sided printing.
Chapter 3 Printing Over a Network This chapter describes how to print to a DYMO label printer over a network. The topics covered in this chapter are: • “Printing to a Shared Printer from Windows” • “Printing to a Shared Printer from Mac OS” • “Using a Print Server” The following are the general steps you need to follow to set up a printer for printing over a network. These steps are provided as a general overview and reminder that you must be able to print locally to the printer before you can share it.
Printing Over a Network To share the printer (Windows XP) 1 Choose Printers and Faxes from the Start menu. The Printers and Faxes control panel is displayed. 2 Right-click the printer you want to share and select Sharing. The DYMO label printer Properties dialog boxappears with the Sharing tab selected. 10 3 Select Share this printer. 4 Optionally, enter a different name for the printer in the Share name box. This is the printer name that appears to other users on the network. 5 Click OK.
Printing to a Shared Printer from Windows To share the printer (Windows Vista) 1 Choose Control Panel from the Start menu. 2 In Control Panel, double-click Printers. The Printers control panel is displayed. 3 Right-click the printer you want to share and select Sharing. The DYMO label printer Properties dialog boxappears with the Sharing tab selected. 4 Select the Share this printer check box. 5 Optionally, enter a different name for the printer in the Share name box.
Printing Over a Network To share the printer (Windows 7) 1 Choose Devices and Printers from the Start menu. The Devices and Printers control panel is displayed. 2 Right-click the printer you want to share and select Printer properties. The DYMO label printer Properties dialog is displayed. 12 3 Select the Sharing tab. 4 Select the Share this printer check box. 5 Optionally, enter a different name for the printer in the Share name box.
Printing to a Shared Printer from Mac OS Adding a Network Printer Before you can print to a shared network printer, you need to install DYMO Label Software (DLS) on your local computer and then add each network label printer you wish to use. Note The LabelWriter Duo printer is actually two printers (label and tape) so you must run the Add Printer Wizard twice; once for the LabelWriter Duo label printer and once for the LabelWriter Duo tape printer.
Printing Over a Network 3 Select the printer you want to share and then click Sharing. The Sharing pane is displayed. Note To share the DYMO LabelWriter Duo printer, which can print on both labels and tape, select both the LabelWriter DUO Label and the LabelWriter DUO Tape 128 printers. 4 Select the Share these printers with other computers check box and then select the check box in front of each printer you wish to share. 5 Close the Print & Fax dialog box.
Using a Print Server 4 Select the printer and then click Add. The shared printer is added to the Printer List dialog box. Note The LabelWriter Duo printer is actually two printers (Label and Tape), so you must add both printers separately. 5 Close the Printer List dialog box. Using a Print Server You can print over a network to a DYMO label printer connected to a wired or wireless USB print server. DYMO now offers a LabelWriter Print Server to easily share your LabelWriter printer on a network.
Printing Over a Network Printer Firmware Versions that Support Print Servers Refer to the table below for information about the label printer firmware versions that support print servers. You can determine your printer’s firmware version by checking the serial number printed on the bottom of the printer.
Chapter 4 Caring for Your Printer The LabelWriter printer is designed to give you long and trouble-free service, while requiring very little maintenance. You will get the best possible performance from your LabelWriter printer if you follow the setup instructions that appear in the Quick Start Guide and the procedures described in this section. You can easily clean your LabelWriter printer using the following items: • Lint-free cloth.
Caring for Your Printer To clean the tape print head (LabelWriter Duo only) 1 Press the button on the front of the label cassette tray. 2 Remove the label cassette. 3 Use a small, soft brush or cotton swab to wipe away paper dust and other stray particles from the inside of the tray. 4 Remove the cleaning tool from the inside of the tray. 5 Gently wipe the print head with the tool. The print head is very delicate, so use care when cleaning.
Chapter 5 Getting Help Your LabelWriter printer should offer years of trouble-free printing with very little maintenance. However, in the event that you encounter a problem, this chapter offers suggestions for resolving problems that can occur when using the printer. If you are unable to solve a problem, this chapter also describes how to contact DYMO Technical Support.
Getting Help Performing a Printer Self-Test If you experience problems with broken characters or other print quality issues, perform a printer self-test. The self-test verifies that all elements of the print head and printing mechanism are in working condition. To perform a self-test 1 With a roll of labels in the printer, press and hold the form-feed button on the front of the printer for five to ten seconds. The printer begins printing vertical lines along the width of the printer.
Troubleshooting • Make sure your labels are loaded properly and that the left edge of the label is aligned with the left edge of the label feed slot. See "Loading Labels" on page 5. • Make sure you are using DYMO-branded labels. The perforated holes between the labels made by other manufacturers are frequently not detectable by DYMO printers. When the perforations are not detected, the labels will not feed correctly. Using third-party labels may also void your warranty.
Getting Help Limited Warranty Your DYMO® LabelWriter® printer comes with a warranty against defects in materials, design, or workmanship, for two years from the original date of purchase (LabelWriter SE450 for one year from the original date of purchase), when used in accordance with all operating instructions. Normal wear and tear is not covered, nor is excessive use, abuse or damage caused by a user either intentionally or accidentally.
Chapter 6 Technical and Environmental Information This chapter contains technical and certification information for the LabelWriter printer. Technical Specifications 450 Print Method Print Resolution Print Speed (labels/min for address label in text mode) 450 Turbo 450 Twin Turbo 4XL 450 Duo (Label Printer) 450 Duo (Tape Printer) Direct Thermal Thermal Transfer 300 dots per inch (11.8 dots per mm) 180 dots per inch (7.09 dots per mm) 51 71 71 53 71 N/A Maximum Print Width 2.
Technical and Environmental Information LabelWriter SE450 Printer Technical Specifications For complete information about connecting the LabelWriter SE450 printer to the host computer or other device, and for information about programming and using the LabelWriter SE450 printer, refer to the LabelWriter SE450 Technical Reference Guide, available from the Developers Program page on the DYMO Web site (www.dymo.com).
Environmental Information Environmental Information The equipment that you bought has required the extraction and use of natural resources for its production. It may contain hazardous substances for the health and the environment. In order to avoid the dissemination of those substances in our environment and to diminish the pressure on the natural resources, we encourage you to use the appropriate take-back systems.