
User Manual
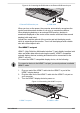
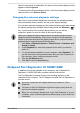

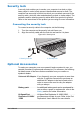
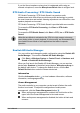
Table Of Contents
- Table of Contents
- Chapter 1 Legal, Regulatory, and Safety
- Copyright, Disclaimer and Trademarks
- Regulatory Information
- FCC information
- California Prop 65 Warning
- Export Administration Regulation
- EU Declaration of Conformity
- VCCI Class B Information (Japan Only)
- Canadian regulatory information (Canada only)
- Canadian Notice
- Following information is only valid for EU-member States:
- REACH - Compliance Statement
- Following information is only for Turkey:
- Following information is only for India:
- Video Standard Notice
- OpenSSL Toolkit License Issues
- FreeType License Issues
- ENERGY STAR® Program
- Disposing of the computer and the computer's batteries
- Optical disc drive safety instructions
- General Precautions
- Safety Icons
- Chapter 2 Getting Started
- Chapter 3 The Grand Tour
- Chapter 4 Operating Basics
- Using the Touch Screen
- Using the Touch Pad
- The Keyboard
- Optical disc drive
- CyberLink PowerDVD 14 DVD for dynabook
- Using the AccuPoint
- Using the Fingerprint Sensor
- Battery
- Wireless WAN Device
- GPS Function
- Additional memory module
- LAN
- Memory media
- Smart Card
- External Display
- Hi-Speed Port Replicator III 180W/120W
- Security lock
- Optional Accessories
- Sound System and Video mode
- Chapter 5 Utilities and Advanced Usage
- Chapter 6 Troubleshooting
- Chapter 7 Appendix
- Index

Removing memory media
The following instructions apply to all types of supported media devices. To
remove memory media, do the following:
1. Click the Safely Remove Hardware and Eject Media icon on the
Windows Taskbar.
2. Select the memory media that you want to remove.
3. Push the memory media until you hear a click to partially release it.
4. Grasp the media and remove it.
If you remove the memory media or turn off the power while the
computer is accessing the memory media, you might lose data or
damage the media.
Do not remove the memory media while the computer is in Sleep or
Hibernation Mode. The computer might become unstable or data in
the memory media might be lost.
Do not remove only the miniSD/microSD Card while leaving the
adaptor in the memory media slot.
Smart Card
A Smart Card is a credit card sized plastic card. An extremely thin
integrated circuit (IC chip) is embedded into the card on which information
can be recorded. These cards can be used for a wide variety of
applications including telephone related and electronic monetary payments.
This section contains information on the proper use of the Smart Card slot,
and it is strongly recommended that you read it before operating the
computer.
Some models are equipped with a Smart Card slot.
Your computer supports ISO7816-3 asynchronous cards (support protocols
are T=0 and T=1) with a working voltage of 5 V.
Inserting a Smart Card
The Smart Card slot is on the side of the computer. The Windows hot-
install feature allows you to insert a Smart Card while the computer is
turned on.
To insert a Smart Card, do the following:
1. Insert the Smart Card into the Smart Card slot with the metal
connectors facing up.
2. Press the Smart Card gently to ensure a firm connection is made.
When inserting a Smart Card into the Smart Card slot, make sure to
confirm that the card is oriented correctly before inserting.
User's Manual 4-35