
Installation guide

Installation Guide
48
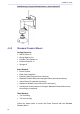
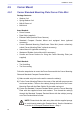
4.6 Pole Mount
4.6.1 Pole Thin/Wide Direct Mounting
Package Contents:
• Stainless Steel Straps x4
• M8x16 Screw x4
• Washer x4
• Spring Washer-8 x4
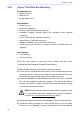
Items Needed:
• Dome Camera
• Data Cable (supplied)
• Ethernet Cable (network Dome Camera)
• Standard/ Compact Pendent Mount and equipped items (optional
accessory)
• Pole Thin/Wide Direct Mounting (optional accessory)
• Indoor Mount Kit (optional accessory)
• Waterproof Rubber (Indoor Mount Kit’s accessory)
• Stainless Steel Straps for fixing the Pole Thin/Wide Direct Mounting
(optional accessory)
Tools Needed:
• Stainless Strap Cutter
• Tool for screwing
Follow the steps below to mount the Dome Camera with the Pole Thin/Wide
Direct Mounting and Standard/ Compact Pendent Mount.
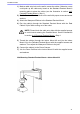
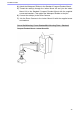
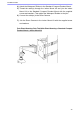
1) Fasten the Pole Thin/Wide Direct Mounting on a pole with equipped
stainless straps.
2) Run the cable(s) through the hole on the Pole Thin/Wide Direct Mounting
with the Data Cable’s 22-pin cable coming out.
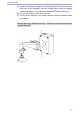
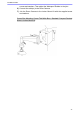
3) Fasten the Standard/ Compact Pendent Mount onto the Pole Thin/Wide
Direct Mounting with the supplied screws and washers. Then thread the
cable(s) through the Standard/ Compact Pendent Mount with the cable(s)
coming out of the Pendent Mount’s outlet.
NOTE: Please block the cable entry hole with the supplied sponge
to avoid insects entering the Pendent Mount. See the illustrations
in section 4.4.2 Compact Pendent Mount > Step 4.