
Wireless Modem Router User's Manual
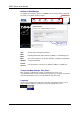
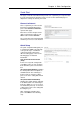
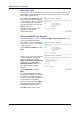
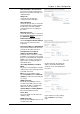


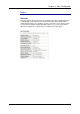
Table Of Contents
- Version 2.4
- Before You Use
- Unpacking
- Features
- ADSL Compliance
- ADSL2 Compliance
- ADSL2+ Compliance
- Wireless LAN Compliance
- ATM Features
- Bridging Features
- Routing Features
- Security Features
- Configuration and Management
- Subscription for ADSL Service
- Notes and Cautions
- Chapter 1: Overview
- Physical Outlook
- Front Panel
- LED Indicators
- Rear Panel
- Chapter 2: System Requirement and Installation
- System Requirement
- Choosing a place for the ADSL Router
- Connecting the ADSL Router
- USB Driver Installation
- For Windows ME
- For Windows 2000
- For Windows XP
- For Windows Vista
- Uninstalling the USB Driver
- For Windows ME
- For Windows 2000
- For Windows XP
- For Windows Vista
- Setting up TCP/IP
- For Windows 98
- For Windows ME
- For Windows NT
- For Windows 2000
- For Windows XP
- For Windows Vista
- Renewing IP Address on Client PC
- For Windows 98/ME
- For Windows NT/2000/XP
- For Windows Vista
- Chapter 3: Accessing the Internet
- PPP over ATM (PPPoA) Mode
- Description:
- Configuration:
- PPP over ATM (PPPoA) IP Extension Mode
- Description:
- Configuration:
- PPP over Ethernet (PPPoE) Mode
- Description:
- Configuration:
- PPP over Ethernet (PPPoE) IP Extension Mode
- Description:
- Configuration:
- Numbered IP over ATM (IPoA)
- Description:
- Configuration:
- Numbered IP over ATM (IPoA)+NAT
- Description:
- Configuration:
- Unnumbered IP over ATM (IPoA)
- Description:
- Configuration:
- Unnumbered IP over ATM (IPoA)+NAT
- Description:
- Configuration:
- Bridge Mode
- Description:
- Configuration:
- MER
- Description:
- Configuration:
- Chapter 4: Web Configuration
- Using Web-Based Manager
- Outline of Web Manager
- To Have the New Settings Take Effect
- Language
- Quick Start
- Connect to Internet
- Quick Setup
- Connection Type
- PPP over ATM/ PPP over Ethernet
- IP over ATM
- Bridging
- Status
- Overview
- ADSL Line
- ADSL BER Test
- Internet Connection
- Traffic Statistics
- DHCP Table
- Wireless Clients
- Routing Table
- ARP Table
- Advanced Setup
- Local Network – IP Address
- Local Network – DHCP Server
- Local Network – UPnP
- Local Network – IGMP Snooping
- Internet – Connections
- Adding a New One
- Internet – DNS Server
- Internet – IGMP Proxy
- Internet – ADSL
- IP Routing – Static Route
- Adding a New One
- Remove Static Route
- Example – Static Route
- IP Routing – Dynamic Routing
- Operation: There are two modes for you to choose, Active and Passive. Select Active for transmitting and receiving data, or select Passive for receiving data only.
- Virtual Server – Port Forwarding
- IP Address seen by Internet Users
- Add New Port Forwarding
- Virtual Server – Port Triggering
- Virtual Server – DMZ Host
- Virtual Server – Dynamic DNS
- Virtual Server – Static DNS
- NAT ALG Configuration
- Firewall
- Firewall – Bridge Filtering
- Firewall – IP Filtering
- Quality of Service
- Quality of Service – Bridge QoS
- Quality of Service – IP QoS
- Port Mapping
- Wireless
- Basic Settings
- Security
- For 64-bit WEP/128-bit WEP
- For 802.1X Wireless Network
- 802.1x environment Configuration
- For WPA (Wi-Fi Protected Access)
- For WPA-PSK; WPA2-PSK; Mixed WPA2/WPA-PSK
- For WPA-2; Mixed WPA2/WPA
- Access Control
- Repeater
- Management
- Diagnostics
- Management Accounts
- Management Control – From Remote
- Management Control – From Local
- TR-069 Client Configuration
- Identify the Validation of Certificate from ACS
- Internet Time
- System Log
- Configuring System Log
- Example
- System Log Configuration
- Viewing System Log – Remote Side (Server)
- Viewing System Log – Local Side (ADSL Router)
- Backup Config
- Update Firmware
- Reset Router
- UPnP for XP
- Chapter 5: Troubleshooting
- Problems with LAN
- Problems with WAN
- Problems with Upgrading
- Chapter 6: Glossary
- ARP (Address Resolution Protocol )
- DHCP (Dynamic Host Configuration Protocol)
- LAN (Local Area Network) & WAN (Wide Area Network)
- NAT (Network Address Translation) IP Address
- Private IP Address
- Public IP Address
- PVC (Permanent Virtual Circuit)
- RIP (Routing Information Protocol)
- UDP (User Datagram Protocol)
- Virtual Server
- VPI (Virtual Path Identifier) & VCI (Virtual Channel Identifier)
- Appendix A: Specifications
- Appendix B: Client Setup for 802.1x, WPA, and WPA-PSK
- Retreiving Client Certificate
- Enabling 802.1x Authentication and Security
- Enabling WPA Authentication and Security
- Enabling WPA-PSK Authentication and Security
Chapter 4: Web Configuration
71
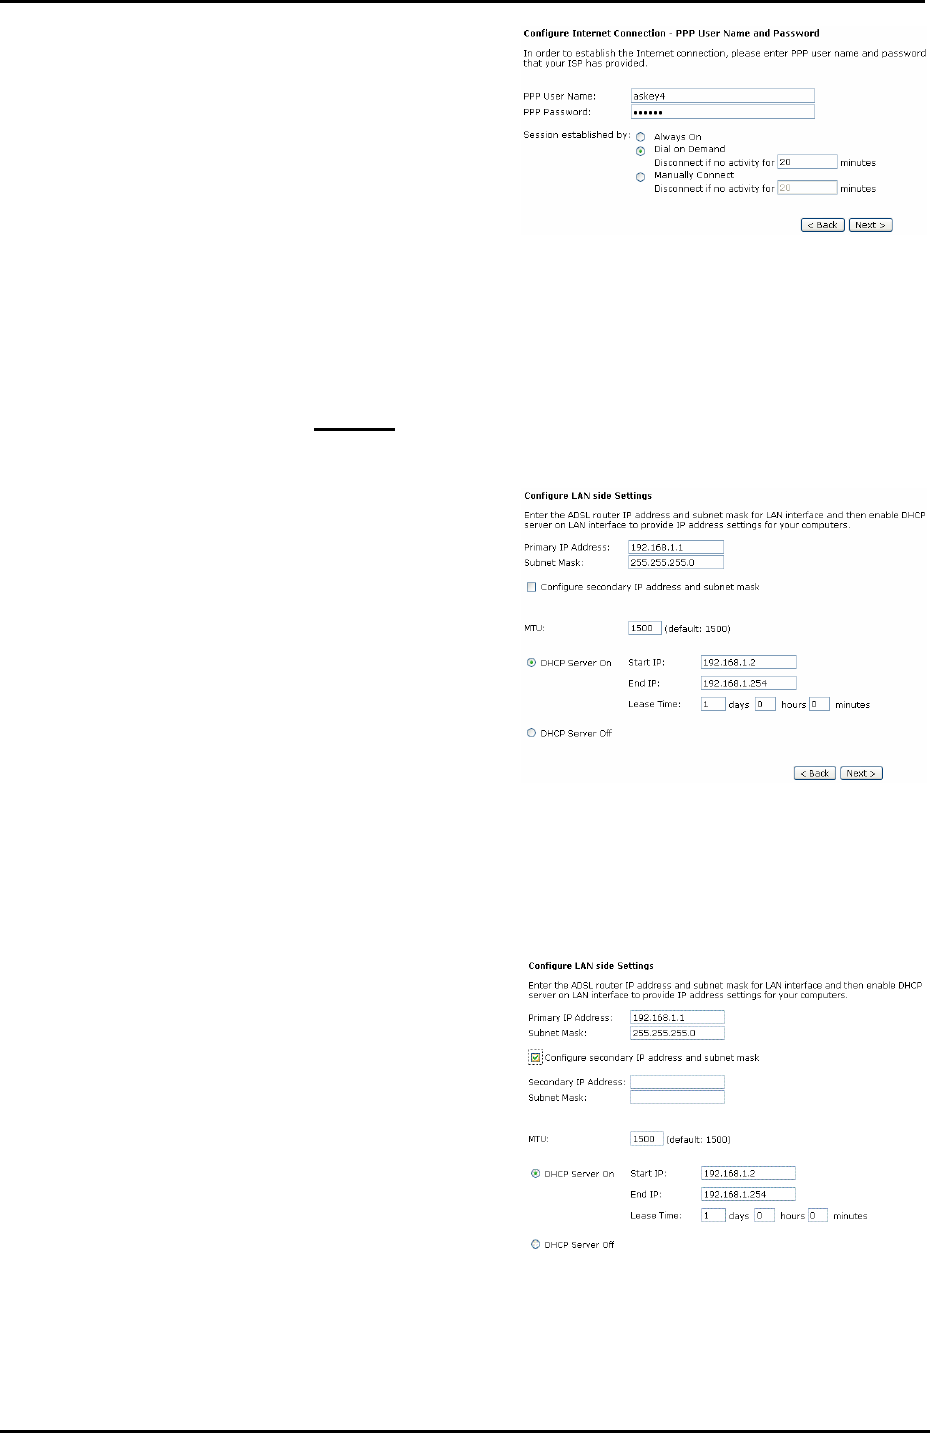
PPP Username & PPP Password:
Key in the username and password
that you received from your ISP. (e.g.,
askey4/askey4)
Always On:
Select this item to make the
connection active all the time.
Dial on Demand:
Select this item to make a connection
automatically while in demand. Enter
the timeout to cut off the network
connection if there is no activity for
this router.
Manually Connect:
Select this item to make a connection
by pressing the Connect
hyperlink on
the Advanced Setup-
Internet-Connections web page.
On the Configure LAN side Settings
page, you have to fill in the data
requested.
Primary IP Address & Subnet Mask:
Key in the information that offered by
your ISP for the LAN connection.
Configure the secondary IP
Address and Subnet Mask:
Check this box to set up a secondary
IP Address to connect to your router if
they are not included in the range that
DHCP server accepts. See the next
figure for the secondary IP address
and subnet mask.
Secondary IP Address & Subnet
Mask:
Key in the second IP address and the
subnet mask received from the ISP for
your LAN connection.
MTU: (refer to the WAN section)
The default MTU value for LAN side
Settings is 1500. You may modify it if
necessary.
DHCP Server On:
Check this item if DHCP service is
needed on the LAN side. The router
will assign IP address and gateway
address for each of your PCs.
Start IP Address & End IP Address:
Enter the information needed.
Lease Time:
Key in the duration for the time. The
default is 1day.
DHCP Server Off:
Check this item if DHCP service is not
needed on the LAN.
On this web page, the primary IP
address and subnet mask will be
shown on it. You can modify them
if needed.
Key in all the necessary settings
and click Next for the coming
page.