
User Manual


AMP 331 Instructions for Users
Dynastream Innovations Inc.
DOCUMENT NO: D00000381 Rev. 0.E SHEET: 11 of 11
6 AMP WARE
AMP Ware is the software application that downloads the data from the pod to your computer and then displays
the data in MS® Excel. This application also allows you to associate subject and trial information with the data.
6.1 Installing AMP Ware
1. Insert the AMP 331 CD into the CD drive.
2. Copy the directory called AMP Ware from the CD onto your computer’s hard drive. You can create an
AMP 331 directory or copy the folder to the “Program Files” directory.
3. To create an icon on your desktop that can be used to start AMP Ware, open the AMP Ware folder on
your desktop and right click on the file called “AMP Ware.exe”. Select “Create Shortcut” from the drop
down menu.
4. A file called “Shortcut to AMP Ware.exe” will be created. Drag this file to your desktop and drop it
there.
6.2 MS® Excel Settings
The AMP data will be downloaded to an MS® Excel workbook where macros are used to format and display
the data. In order for AMP Ware to be able to run these macros, the security settings in Excel must be set
appropriately. Please check that:
1. The macro security level is set to “Medium” or “Low”. To do this, open Excel, go to the “Tools” option
on the task bar, select “Macro” from the drop down list, and then “Security” from the following list.
Under the “Security Level” tab of the dialog box, select “Low” or “Medium”.
2. For Office XP users only: select the “Trusted Sources” tab on the same dialog box as above and select
the checkbox that says “Trust access to Visual Basic Project”.
3. If prompted to enable macros following downloading, do so. (This will happen if the security level is
set to “Medium”. If the security level is set to “Low” you will not be prompted.)
6.3 Using AMP Ware
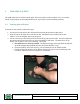
Follow the instructions below to download data from a pod.
6.3.1 Downloading Data For a New Subject
1. Start AMP Ware by double-clicking on the AMP Ware icon on your desktop.
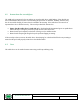
2. On the palette that opens, click on the “Create Subject” button.
3. Selecting “Create Subject” opens a window titled “Subject”.