©2010-2011 Dynojet Research, Inc. All Rights Reserved. Installation Guide For Model SD12 Scooter Dynamometers. This manual is copyrighted by Dynojet Research, Inc., hereafter referred to as Dynojet, and all rights are reserved. This manual is furnished under license and may only be used or copied in accordance with the terms of such license. This manual is furnished for informational use only, is subject to change without notice, and should not be construed as a commitment by Dynojet.
TABLE OF CONTENTS Warnings Chapter 1 . . . . . . . . . . . . . . . . . . . . . . . . . . . . . . . . . . . . . . . . . . . . . . . . iii Specifications and Operating Requirements Introduction . . . . . . . . . . . . . . . . . . . . . . . . . . . . . . . . . . . . . . . . . . . . . . . . . . 1-2 Conventions Used In This Manual . . . . . . . . . . . . . . . . . . . . . . . . . . . . . . . 1-2 Technical Support . . . . . . . . . . . . . . . . . . . . . . . . . . . . . . . . . . . . . . . . . . .
TA B L E O F C O N T E N T S Chapter 3 Basic Dyno Operation Loading the Vehicle . . . . . . . . . . . . . . . . . . . . . . . . . . . . . . . . . . . . . . . . . . . 3-2 Connecting the RPM Pickup . . . . . . . . . . . . . . . . . . . . . . . . . . . . . . . . . . . . 3-4 RPM Pickup Descriptions . . . . . . . . . . . . . . . . . . . . . . . . . . . . . . . . . . . . . . 3-4 Connecting the Secondary Inductive Pickup . . . . . . . . . . . . . . . . . . . . . . . 3-5 Connecting The Primary Inductive Pickup .
WARNINGS Disclaimers Dynojet Research, Inc. (Dynojet) makes no representation or warranties with respect to the contents hereof and specifically disclaims any implied warranties of merchantability for any particular purpose. Dynojet reserves the right to revise this publication and to make changes from time to time in the content hereof without obligation of Dynojet to notify any person of such revision or changes.
WA R N I N G S Electrostatic Discharge Precautions Electrostatic Discharge Electrostatic Discharge (ESD), or static shock, can damage electronic components within the dynamometer. The damage may occur at the time of an ESD occurrence, or the shock may degrade the component, resulting in a premature component failure later. To avoid ESD damage, always practice good ESD control precautions when servicing the dynamometer.
WA R N I N G S Other Potential Hazards The AC power outlet shall be installed near the equipment and it shall be easily accessible to allow for disconnect before service. The dynamometer should be located in a well ventilated area. There is a carbon monoxide hazard with all internal combustion engines. Engine exhaust contains poisonous carbon monoxide gas. Breathing it could cause death. Any dyno room design must incorporate sufficient exhaust extraction.
CHAPTER 1 SPECIFICATIONS AND OPERATING REQUIREMENTS Thank you for purchasing Dynojet’s Model SD12 Scooter Dynamometer. Dynojet’s software and dynamometers will give you the power to get the maximum performance out of vehicles you evaluate. Whether you are new to the benefits of a chassis dynamometer or an experienced performance leader, the repeatability and diagnostic tools of WinPEP 7 software and a Dynojet dynamometer will give you the professional results you are looking for.
CHAPTER 1 Introduction INTRODUCTION ................................... Before installing your dyno, please take a moment to read this guide for installation instructions, dyno features, and other important information. This guide is designed to be a reference tool in your everyday work and includes the following chapters and information: SPECIFICATIONS AND OPERATING REQUIREMENTS This chapter describes the requirements and specifications for the dyno.
SPECIFICATIONS AND OPERATING REQUIREMENTS Introduction YOUR DYNO ROOM This section is not meant to imply that a dyno room is essential to repeatable results on a Dynojet dynamometer. However, a dyno room with an engine cooling intake fan, exhaust extraction, and noise reduction capabilities can add a new dimension to your shop. A proper dyno room design will help to ensure repeatable, accurate runs.
CHAPTER 1 Dynamometer Specifications and Requirements DYNAMOMETER SPECIFICATIONS AND REQUIREMENTS ................................... The following specifications and requirements will help you set up your dyno area and verify you have the requirements to operate your dyno safely.
SPECIFICATIONS AND OPERATING REQUIREMENTS Dynamometer Specifications and Requirements 48.21 cm (18.98 in) 86.36 cm (34.00 in) 335.92 cm (131.25 in) SD001 218.70 cm (86.10 in) 61.10 cm (24.05 in) 31.00 cm (12.
CHAPTER 1 Dynamometer Specifications and Requirements COMPRESSED AIR REQUIREMENTS The following requirements are needed for optional compressed air pump assembly: • Clean and dry air, 100 psi or greater, 5 CFM or better flow • Fittings to hook your air system to a 3/8-inch inside diameter hose (if no air brake is present) • optional air regulator COMPUTER SPECIFICATIONS You will need to provide a computer system to run the WinPEP software. WinPEP 7 includes complete documentation in online Help.
SPECIFICATIONS AND OPERATING REQUIREMENTS Dyno Electronics DYNO ELECTRONICS ................................... The standard dyno electronics package is comprised of four interconnected modules: Atmospheric Sensing Module, RPM Module, Dynamometer Input/Output Module, and the CPU Module. For more information refer to your WinPEP 7 User Guide (P/N 98118103).
CHAPTER 2 INSTALLATION This chapter will walk you through unpacking and installing the dynamometer. To ensure safety and accuracy in the procedures, perform the procedures as they are described.
CHAPTER 2 Unpacking the Dyno UNPACKING THE DYNO ................................... When you receive your dyno, examine the exterior of the shipping container for any visible damage. If damage is detected at this stage, contact the shipper or Dynojet before proceeding with unpacking. Use the following steps to unload your dyno. You will need to provide equipment capable of lifting a minimum of 454 kg (1000 pounds) to move the crated dyno into position in your dyno room.
INSTALLATION Unpacking the Dyno part description axle shaft (2) P/N 22100011 part description inductive primary pickup clip P/N DE100-110L retaining ring, 1/2" (4) P/N 32800000 cable tie, 4” (2) P/N 197104130 screw, 1/4-20 x 5/8”, panhead, torx (2) P/N 36561045 REMOVING THE DRUM FROM THE CRATE You will need to provide a 5/8-inch x 3-foot steel bar to lift the drum off the crate and into position in your dyno room. Lifting the drum will require two people.
CHAPTER 2 Installation INSTALLATION ................................... Use the following steps to install the scooter dyno. You will need the following parts: • • • • • • • • Drum Front Support Ramp 197104130 Cable Tie, 4" (2) 22100011 Axle Shaft (2) 32800000 Retaining Ring, 1/2" (4) 36561045 Screw, 1/4-20 x 5/8", Pan-head, Torx (2) 71300003 Wheel Clamp INSTALLING THE FRONT SUPPORT 1 Place the front support on the drum.
INSTALLATION Installation 2 3 Install the front support axle shaft. Secure the shaft in place using two retaining rings. axle shaft axle shaft SD004 retaining ring Figure 2-3: Install the Axle Shaft and Retaining Rings 4 5 Slide the wheel clamp onto the front support. Lift the spring plunger to slide the wheel clamp to a different position. Release the spring plunger to lock the wheel clamp in the new position. Note: The wheel clamp may already be installed.
CHAPTER 2 Installation 6 Route the control cable, lever, and control lever bracket from the drum along the inside of the front support. Note: The control cable is coiled up and secured to the drum. 7 Secure the control lever bracket to the inside of the front support using two 1/4-20 x 5/8-inch pan-head torx screws. Secure the control cable to the inside of the front support using two cable ties.
INSTALLATION Installation ROUTING CABLES 1 Route the pickup card cable to the Breakout board. Note: The pickup card is already installed and is located on the drum. 2 Route the 25-pin RS232 computer cable from the Breakout board to the dyno electronics CPU Module. Route the 9-pin cable from the RS232 port on the dyno electronics to your computer. 3 For more information on wiring the Breakout board, refer to “Wiring the Breakout Board” on page 2-8.
CHAPTER 2 Installation WIRING THE BREAKOUT BOARD 1 2 3 Attach the pickup card cable to the Breakout board. The pickup card cable has four wires which connect to the wiring block labeled DRUM 1. • Red wire connects to R1 • Black wire connects to B1 • White wire connects to W1 • Ground (shield) wire connects to S1 Attach the 25-pin RS232 computer cable to the Breakout board. Verify jumpers J1 and J2 are set for the digital brake as shown in Figure 2-7.
INSTALLATION Installation INSTALLING THE RAMP 1 2 3 Place the ramp on the drum. Install the ramp axle shaft. Secure the shaft in place using two retaining rings.
CHAPTER 2 Fold and Move the Dyno FOLD AND MOVE THE DYNO ................................... Use the following instructions to fold and move the scooter dyno. FOLDING THE DYNO 1 2 3 4 Lift the front support up until it clicks and locks into place. Lift the spring plunger and slide the wheel clamp forward on the front support. Release the spring plunger to lock the wheel clamp in position. Raise the ramp until it comes in contact with the front support.
INSTALLATION Fold and Move the Dyno MOVING THE DYNO 1 2 3 With the scooter dyno in the folded position, grab the front support leg brace. Tilt the dyno towards you. Roll the dyno to the desired position.
CHAPTER 2 Fold and Move the Dyno OPENING THE DYNO 1 2 3 4 Lift the spring plunger and slide the wheel clamp forward. Release the spring plunger to lock the wheel clamp in position. Lower the ramp to the floor. Squeeze the control lever to release the front support. Lower the front support to the floor.
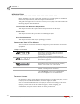
INSTALLATION Accessories ACCESSORIES ................................... This section describes the various optional accessories that are available for the scooter dyno to meet your individual needs. For more information about these accessories, please contact Dynojet’s Product Specialists at 1-800-992-3525 for pricing and availability. Complete installation instruction manuals may also be found by browsing the Manuals folder on your WinPEP installation CD.
CHAPTER 3 BASIC DYNO OPERATION This chapter includes instructions for basic dyno operation. For more detailed instructions, refer to the WinPEP 7 User Guide. This manual can be found on your WinPEP CD or at www.dynojet.com.
CHAPTER 3 Loading the Vehicle LOADING THE VEHICLE ................................... Use the following steps to load a vehicle on the dyno. Risk of injury. Always wear proper eye and ear protection when operating the dyno. 1 2 Verify your computer is running. Verify the wheel clamp is at the front of the front support. Lift the spring plunger to slide the wheel clamp to a different position. Release the spring plunger to lock the wheel clamp in the new position.
BASIC DYNO OPERATION Loading the Vehicle 8 Extend the tie-down outriggers. 8a Remove the spring pins. 8b Slide out the tie-down outriggers. 8c Replace the spring pins. spring pin tie-down outrigger SD002 Figure 3-2: Extend the Tie-Down Outriggers 9 Attach two tie-down straps from the tie-downs on the dyno to the frame or luggage rack of the vehicle. 10 Tighten the tie-down straps evenly making sure the drive wheel remains centered on the drum.
CHAPTER 3 Connecting the RPM Pickup CONNECTING THE RPM PICKUP ................................... Your Dynojet dynamometer includes a primary wire inductive pickup and two secondary wire inductive pickups. These small “clothespin like” inductive pickups are used to sense RPM. An RPM pickup is required if you want to view torque graphs. Generally you will use one secondary wire inductive pickup on a spark plug wire. Vehicles with wasted spark ignition systems may require two secondary inductive pickups.
BASIC DYNO OPERATION Connecting the RPM Pickup CONNECTING THE SECONDARY INDUCTIVE PICKUP The secondary inductive pickup cannot be in contact with, or it’s connecting wire be crossing, other engine electrical wires or stray RF interference may result. The inductive pickups contain a fragile Ferrite Core that is sensitive to engine heat and vibration. Do not drop the inductive pickup or snap the pickup closed. Use extreme care in handling and placement of the pickups.
CHAPTER 3 Connecting the RPM Pickup CONNECTING THE PRIMARY INDUCTIVE PICKUP The primary inductive pickup cannot be in contact with, or it’s connecting wire be crossing, other engine electrical wires or stray RF interference may result. The inductive pickups contain a fragile Ferrite Core that is sensitive to engine heat and vibration. Do not drop the inductive pickup or snap the pickup closed. Use extreme care in handling and placement of the pickups.
BASIC DYNO OPERATION Pre-Run Inspection PRE-RUN INSPECTION ................................... Perform a vehicle inspection before making a run. Check the following: • Check the radiator coolant (if applicable) and oil levels. • Check the fuel source. • Rotate the drum and check for rocks caught in the tire tread that could fly out. • For scooters equipped with a drive chain, check the chain and the chain master link. Make sure it is lubricated and adjusted to the proper tension.
CHAPTER 3 Pre-Run Inspection BEFORE STARTING THE ENGINE Connect an exhaust hose or hoses (if dual exhaust) on the vehicle, make sure the hose fits over the tail pipe, is not plugged or kinked and the hose is vented correctly out of the dyno room. Engine exhaust contains poisonous carbon monoxide gas. Breathing it could cause death. Operate machine in well ventilated area. ENGINE WARM UP Warm the vehicle’s engine and drivetrain before beginning testing.
BASIC DYNO OPERATION Making a Test Run MAKING A TEST RUN ................................... Dyno runs provide safe, reliable road testing right in the shop. The dyno allows you to measure, record, and diagnose performance problems quickly. The dyno combined with WinPEP 7 produces consistent, easily interpretable power graphs. Use the following instructions to ensure repeatable and accurate measurements. 1 2 3 4 5 Verify the vehicle is secured properly.
CHAPTER 3 Preventative Maintenance PREVENTATIVE MAINTENANCE ................................... This section contains basic preventative maintenance and troubleshooting information. To maintain proper dynamometer operation, Dynojet recommends you make routine checks of the dyno. • Drum—keep the drum clean and keep all objects clear of the drum. • Carriage Slide—keep the carriage slide clean and lightly lubricated. ADJUSTING THE BRAKE Use the following instructions to prevent the brake from dragging.
BASIC DYNO OPERATION Preventative Maintenance ADJUSTING THE BRAKE TENSION Use the following instructions to adjust the brake tension. 1 2 3 Locate the eyebolt brake tension adjuster. With the brake release pedal in the up position, turn the 1/4-20 nut on the eyebolt clockwise to increase the spring tension until the drum can no longer be turned by hand. Verify the brake releases when the pedal is fully depressed. Note: The eyebolt can be adjusted until it touches the lever on the release shaft mechanism.
INDEX A accessories 1-5 compressed air pump 2-13 stand alone blowers 2-13 air pump assembly 2-13 axle shaft 2-5 B battery hazards iv blowers 2-13 brake tension, adjusting 3-11 brake, adjusting 3-10 breakout board jumpers 2-8 pickup card 2-8 C cables pickup card 2-8 RS232 2-8 chassis specifications 1-4 height 1-4 length 1-4 weight 1-4 width 1-4 compressed air 1-6 compressed air pump 2-13 computer specifications 1-6 control cable 2-6 conventions 1-2 CPU module 2-7 crate remove dyno 2-3 D dimensions 1-
INDEX H hazards v height 1-4 I Industrial Noise Control, Inc.