
Installation Guide Instruction Manual


Autopilot Installation and Configuration
FlightDEK-D180 Installation Guide 8-21
MAX AIRSPEED – REDUCE POWER
Airspeed Maximum is specified in knots, kilometers/hr, or miles/hr, depending on the units
chosen in the EFIS > SETUP > UNITS > IAS menu. Maximum/default: 5% below V
NE
.
To set the AIRSP MAX, perform the following (continuing from AIRSP MIN):
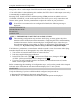
DOWN▼ > (AIRSP MAX: value is highlighted)
Press DEC - and INC + to adjust APRSP MAX to preferred initial setting for the aircraft.
Step 4e – Set Pitch Servo VSPD Maximum: The PITCH SERVO > VSPD MAX parameter is
specified in feet/minute (or meters/second, if the setting chosen in the EFIS > SETUP > UNITS
> ALT is METERS). This parameter sets the average vertical speed the autopilot will command
for climbs and descents. If you set this value above a vertical speed the aircraft can achieve, the
AP will run into the airspeed limiter in climbs and descents. Minimum: 100 feet/minute; default:
500 feet/minute; maximum: 4,000 feet/minute.
On the EFIS, perform the following (continuing from Pitch Servo Airspeed Maximum):
DOWN▼ > (VSPD MAX: value is highlighted)
Press DEC - and INC + to adjust VSPD MAX to preferred initial setting for the aircraft.
> BACK > EXIT
STEP 5 – DISENGAGE/CWS BUTTON CONFIGURATION
We recommend that you perform the following on the ground at zero airspeed.
Step 5a – Enable/Disable Hold to Engage: Setting HOLD TO ENGAGE to Y allows you to
engage the Autopilot by holding the Disengage/CWS Button for more than 2 seconds. This
allows for a convenient alternative to engaging the Autopilot via the menus and/or AP74 AP
button. Default is N.
When this mode is active, anytime the autopilot is disengaged you can engage it by pressing and
holding the Disengage/CWS Button for more than 2 seconds. Note that after 2 seconds, the AP
status indicator at lower left of the EFIS screen shows AP:CWS-CWS. This indicates that the
servos are in Control Wheel Steering mode and are waiting for the button to be released before
engaging.
Step 5b – Enable/Disable Broken Disengage Line Detect: The BUTTON CONFIG >
RESISTOR INST parameter should only be set to Y if the optional 5 kΩ resistor is installed
across the Disengage/CWS Button, as shown on page 8-3. If the resistor is installed and this
param
eter is set to Y, the EFIS continuously monitors the AP Disengage/CWS Button circuit for
proper resistance. If a broken line is detected the following message is displayed on the EFIS:
AUTOPILOT DISCONNECT LINE BROKEN
If the AP is engaged when this condition is detected, it will remain engaged.
Set to Y if the optional 5 kΩ resistor is installed across the 2 terminals of the Disengage/CWS
Button. Set to N if the resistor is not installed. Default is N.
Step 5c – Enable/Disable Control Wheel Steering: When set to Y, the BUTTON CONFIG >
CTRL WHEEL STEER > ENABLED option enables a secondary mode of the AP
Disengage/CWS Button. This mode allows you to be flying under AP control, press and hold the