
Instruction Manual

7
EN
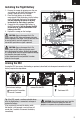
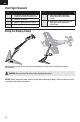
Before the fi rst fl ights, or in the event of an ac-
cident, make sure the fl ight control surfaces are
centered. Adjust the linkages mechanically if the
control surfaces are not centered.
1. Make sure the transmitter sub-trims are set
to zero and the servo arms are perpendicular
to the servo case.
2. When an adjustment of linkages is needed, pull
the tube from the clevis to the linkage.
3. Carefully spread the clevis and adjust the
length of the linkage by screwing the clevis in
or out. Reattach the clevis in the proper hole in
the control horn.
4. Move the tube to tighten the clevis onto the
control horn.
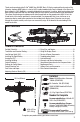
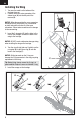
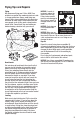
Control Centering
Settings for Control Horns
The following illustration shows the factory settings
for linkages on the control horns. After fl ying, you
may choose to adjust the linkage positions for the
desired control response.
Elevator and Rudder
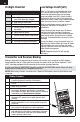
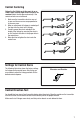
Control Direction Test
You should bind your aircraft and transmitter before doing these tests. Move the controls on the transmitter
to make sure the aircraft control surfaces move correctly and in the proper direction.
Make sure the tail linkages move freely and that paint or decals are not adhered to them.