User's Guide Natural Writing in a Digital World TM
E-Pen InMotion, Inc. P.O. Box 261548 Plano, Texas 75026-1548 E-Pen USB Version EP100 Tested to Comply with FCC Standards FOR HOME OR OFFICE USE Patent Pending Copyright © 2001 E-Pen InMotion Inc. or its subsidiaries. All rights reserved. E-Pen InMotion, the E-Pen InMotion logo, E-Pen, DigiWrite and InkSoft are trademarks of E-Pen InMotion, Inc. or its subsidiaries. Other product and brand names may be trademarks or registered trademarks of their respective owners.
TABLE OF CONTENTS Chapter 1: Introducing the E-PenTM...................................................1 Package Contents........................................................................ 2 Chapter 2: Getting Started..................................................................3 Installing the DigiWriteTM Software..................................................3 Uninstalling the DigiWriteTM Software..............................................5 Connecting the Receiver to your Computer........
Replacing the Refill ...................................................................21 Storing the E-Pen.......................................................................21 Chapter 6: Troubleshooting..............................................................
CHAPTER 1: INTRODUCING THE E-PEN Congratulations on your purchase of the E-Pen — a unique wireless digital pen that can be used to write on just about any surface, including plain paper. This guide will help you get maximum performance from your E-Pen system. TM The E-Pen system captures your handwriting and converts it into "digital ink.
PACKAGE CONTENTS This package contains an E-Pen, Receiver, photo lithium battery, E-Pen DigiWrite software installation CD and a printed Guide to Getting Started. E-Pen. The E-Pen is a natural input device that provides enhanced usability for mobile, wireless devices, by allowing you to write on just about any surface and have that information captured for use in a variety of applications. Receiver.
CHAPTER 2: GETTING STARTED This chapter describes: n Installing the battery n Installing and Uninstalling the DigiWrite software n Connecting the Receiver to your computer n Attaching the clip to paper n Page position and Writing area INSTALLING THE BATTERY The E-Pen cannot transmit a signal until the battery is installed. Follow these steps to install the battery for the first time: 1.
To install the DigiWrite software: TM 1. Start Windows. 2. Insert the DigiWrite CD-ROM into your computer's CD-ROM drive. If your CD-ROM drive has Auto Insert Notification enabled, it automatically recognizes the setup.exe file and starts the DigiWrite installation. Continue with step 4. If it does not, go to step 3. 3. From the Windows Start menu, select Run and type d:Setup.exe (where "d" is the letter of your CD-ROM drive.) The Installation Wizard appears. 4.
UNINSTALLING THE SOFTWARE WARNING: This procedure will permanently remove the E-Pen application from your computer. The uninstall procedure will remove the E-Pen software ONLY. It will NOT remove your E-Pen digital ink files. If you are using NT 4.0, log in as an Administrator or another user with Administrator privileges. To uninstall the DigiWrite software: 1.From the Windows Start menu select Settings > Control Panel. The Control Panel dialog box appears. 2.
CONNECTING THE RECEIVER TO YOUR COMPUTER The Receiver connects to your computer via a USB port. To connect the Receiver to the computer: 1. Locate the computer’s USB port. If you are not familiar with the computer’s setup, please refer to the computer’s hardware manual. 2. Connect the E-Pen to the computer by inserting the USB connector into the USB port on the computer. The LED on the Receiver unit lights up when the connector is properly connected. 3. Start the E-Pen DigiWrite application.
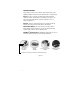
To insert the pages into the clip: 1. Release the "paper clip" at the bottom of the Receiver and flip it to the front as illustrated in Figure 2 below. Figure 2 2. Place the Receiver on a flat surface with the paper clip to the front. 3. Insert up to ten (10) pieces of any type of paper, up to A4 size into the clip by pressing down on the raised area at the back of the clip and sliding the paper into the clip, more-or-less in the center as illustrated in Figure 6. 4.
Page Position After attaching the clip to the top of the paper, place the page and Receiver at any angle comfortable for writing, provided that: n The Receiver is kept perpendicular to the page. n The Receiver is placed in the center of the page. n The pages are inserted all the way into the clip. Figure 4 While writing, hold the pen at a consistent angle as you write across the page and do NOT block or create a barrier between the E-Pen and Receiver as it will interfere with ink capture.
Writing Area The active writing area begins approximately 8cm from the edge of the Receiver, and includes an area of approximately 9cm on the left and right side of the center axis of the Receiver. Figure 6 Possible Sources of Signal Interference Operation of the pen in areas of extreme and/or sudden noise can interrupt transmission from the E-Pen to the Receiver and can result in interruptions in the text/drawing on the computer screen.
CHAPTER 3: USING THE E-PEN This chapter describes: n Starting the DigiWrite application n Main menu icons and their functions n How to use the DigiWrite application STARTING THE DIGIWRITE APPLICATION TM n From the Windows Start menu select Programs > E-Pen InMotion Inc > DigiWrite Application The DigiWrite main window appears. A detailed description of the main window follows. The Main Window When you start the DigiWrite program, the main window appears with the entire page displayed onscreen.
Toolbar Menu bar The application task menu provides quick access to menu options. A description of the menu options and toolbar buttons follows. FILE Menu Toolbar Description New Opens a new page. Open Opens an existing file. Save Saves the current page. If this page has not been previously saved, you are prompted to assign a name to the file.
bmp, or epn format. Send Automatically attaches the page to an email message in jpg format. Use Pen Activates the E-Pen. Print Prints the current page. Print Preview Displays each page as it will look when printed. Print Setup Allows you to set up your printer. Exit Exits the DigiWrite application. EDIT Menu Undo Undoes prior actions in a file. You can also use the Undo option to undo actions in an existing file that has been reopened. Redo Redoes the action you undid using the Undo button.
VIEW Menu Toolbar Displays the toolbar. Fit in Window Fits the page to the DigiWrite main window. Actual Size Scales the page while saving the proportions of what is actually written and what is displayed. Scroll bars appear to allow you to view the entire page. HELP Menu Displays the online help. DEFINING THE PAGE (BACKGROUND) COLOR You can choose the background color of the page in the main window from a list of predefined colors, or define a custom color for the page background.
2. You can do one of the following: n Select one of the basic colors and click OK to apply the change. Or, n Click the Define Custom Colors >> button to define a custom color from the palette. Select the color and then click the Add to Custom Colors button. Click OK to apply the new color. DEFINING THE LINE COLOR AND THICKNESS You can change the color and the thickness of the line that appears on the page in the DigiWrite main screen. To change the line color: 1.
2. You can do one of the following: n Select one of the basic colors and click OK to apply the change. Or, n Click the Define Custom Colors >> button to define a custom color from the palette. Select the color and then click the Add to Custom Color button. Click OK to apply the new color. To define the line thickness: 1. From the Edit menu, select the Set Line Thickness option, or click the Line Thickness button on the toolbar. 2.
PAGE VIEW OPTIONS When the DigiWrite main screen appears, the entire page is displayed onscreen and anything you write or draw will be scaled to fit the page You can also view the page in its natural size and maintain the actual size of the text/drawing onscreen. To accommodate this 1:1 ratio, scrolling bars are added to the page to allow viewing the entire page. n n 16 To view the actual size of the page, select the Actual size option in the View menu, or click on the toolbar.
CHAPTER 4: WRITING AND DRAWING WITH THE E-PEN Use the E-Pen as you would a regular pen to write or draw on the page you have attached to the Receiver. When you write or draw with the E-Pen, the red LED on the Receiver blinks, indicating that the Receiver is receiving a signal from the E-Pen. You can change the color and thickness of the line during operation enabling you to use multiple styles in one page. Several options are available to you when you’ve finished writing or drawing on the page.
Save As Allows you to save the page with a new name, or save the page in jpg or bmp format. EDITING AN EXISTING FILE After saving page you can open it at any time and use the Undo button or Windows shortcut (CTRL Z) to remove text/drawings starting with most recent. You can then save the edited page under the same file name, or save it as a new file.
To send the page as an e-mail attachment: 1. Create or open an existing page. 2. From the File menu, select the Send option. Your computer’s default email application opens a new message. The name of the currently displayed page is automatically attached to the email message in jpg format. The DigiWrite software is not required to open the attached file. It can be opened by any application that reads jpg files. 3.
CHAPTER 5: E-PEN MAINTENANCE This chapter describes: n How to replace the battery n How to replace the ink refill n How to maintain and store your E-Pen REPLACING THE BATTERY The E-Pen uses the following types of standard photo-lithium 3-volt battery: n Energizer 2L76, Duracell DL 1/3N (or equivalent) n Two “button” batteries (LR44) To replace the battery: 1. Remove the battery cover by placing a finger on the end of the pen, applying light pressure and turning the cap counter-clockwise.
REPLACING THE REFILL The E-Pen uses the following types of ink refill cartridge. n Zebra 4-C To replace the refill: 1. Gently pull the used refill out of the pen, while holding the nib. (The nib is the tip of the ink refill.) See Figure 9. 2. Insert the new refill and gently push it into the pen until you feel slight resistance and only the nib is visible. Figure 9 Figure 10 STORING THE E-PEN Store the pen horizontally with the cap on to protect the tip and prevent ink from leaking out of the refill.
CHAPTER 6: TROUBLESHOOTING This chapter provides answers to questions/problems that can arise while using the E-Pen. Question/Problem: When writing on the page, nothing appears onscreen. You should: 1. Make sure that the Receiver is securely connected to the computer. 2. Restart the computer if you have not already done so. 3. Make sure your hand or other object is not creating a barrier/blocking the communication path between the pen and Receiver. 4.
6. Check for noise/interference such as nearby infrared transmissions. Refer to Possible Sources of Signal Interference in Chapter 3. Question/Problem: When writing, the line is continuous on the page but interrupted onscreen. You should: 1. Look for sources of background noise/interference. Sudden noises and certain types of acoustics can interrupt rendering of the line onscreen as the receiver will regard it as a secondary signal source and will try to filter it out. 2.