
User`s guide


6
CONNECTING THE RECEIVER TO YOUR COMPUTER
The Receiver connects to your computer via a USB port.
To connect the Receiver to the computer:
1. Locate the computer’s USB port. If you are not familiar with the
computer’s setup, please refer to the computer’s hardware
manual.
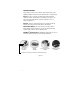
2. Connect the E-Pen to the computer by inserting the USB
connector into the USB port on the computer. The LED on the
Receiver unit lights up when the connector is properly connected.
3. Start the E-Pen DigiWrite application.
Refer to Using the DigiWrite Application, later in this guide, for
instructions on how to use the software.
BEFORE USING THE E-PEN
This section highlights some of the operating requirements you should
follow to enable optimal performance of your E-Pen system.
WARNING: The tip of the pen (see Figure 1) contains ultrasonic and infrared
technology. This part of the pen, consisting of the "transducer" (flat silver ring) and
"light pipe" (clear plastic tip), must be handled with care and must not be subjected
to excessive moisture, pressure or banging. Do NOT place your fingers on this part of
the pen to hold it; Do NOT cover this part of the pen at any point in time as it
transmits and receives information to/from the Receiver.
Attention should also be taken NOT to drop the pen as it could damage the tip.
Attaching the Clip to the Paper
For best results when using the E-Pen, you should use A4 (8,268” x
11,693” / 21cm x 29,7cm) or Letter (8,5” x 11” / 21,59cm x
27,94cm) sized paper.
The clip is designed to hold up to ten (10) standard weight pages/sheets.