Operation Manual for Shuttle Personnel Carrier
Thanks for buy our product. For your better use, please read through this manual before operate this vehicle to avoid any possible damage due to improper operation; and keep it in a proper way after reading for future reference.
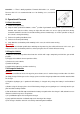
Index 1. Brief Introduction .............................................................................................................................................. 1 2. Technical Description........................................................................................................................................ 1 3. Important Labels............................................................................................................................................... 1 4.
1. Brief Introduction Our electric shuttle personnel carrier is a kind of environment-friendly passenger vehicle. It can be used in vacationland, villa areas, garden-style hotels, tourist scenic spots, etc.. Our electric shuttle personnel carrier is an ideal off-road electric vehicle with excellent performance, fashionable design, luxurious and delicate internal decoration as well as comfortable and safe ride. 2.
Label Content -2
4. Operation System 1) Schematic Figure of Operation System 2) Functions of Operating System Power Key —— Control the power supply of the whole vehicle. When the key being inserted into it and turned clockwise, it will switch on lights, horn and the control system; when the key being turned back, the power will be switched off. Acceleration Pedal —— Control the speed. It should be stepped down slowly.
Voltameter—— Indicate the voltage of battery. On Metric Standard Meter, it ranges from 20V to 60V (for 48V system) and 30V to 96V (for 72V system) from left to right, including 3 sections highlighted by Red, Yellow and Green. Green section represents the battery is full in capacity. With the consumption of the power, the indicator will fall from the right to the left gradually.
Gearshift —— There is totally 5 positions. Forward shift includes 1, 2, 3 and 4. Reverse shift is R. It is recommended to use 1 for climbing, use 2, 3 and 4 for flat road. 5. Operational Process 5.1 Start the vehicle 1) Switch on the power key; 2) Step the clutch pedal to the bottom, select 1st position if go forward and R position if go backward. If go forward, after start the vehicle, change to right shift and make sure to use right speed when driving.
10) The charger should be packed properly if not used for long time.
l Keep your hands on the steering wheel and your eyes on the path you are going. l Always back the vehicle slowly and watch the back carefully. l Avoid starting and stopping suddenly. l Avoid turning the vehicle too sharply at high speed. l Always drive slowly up and down on the slope. l l Do not make any modification or addition which may affect the capacity or safety. Children are not allowed to play in the vehicle.
cause a short circuit, dangerous spark or may cause damage to the battery or injury to your body. 4) Recharging a. As long as you use the vehicle, regardless of how long you have used it, the battery shall be recharged fully on the same day. Any delay on the re-charging will cause negative effect on the battery. Notes: the lead-acid battery does not develop a memory, so need not be fully discharged before recharging. b.
Step by step watering procedure: 1. Open the vent caps and look inside the fill wells. 2. Check electrolyte level; the minimum level is at the top of the plates. 3. If necessary add just enough water to cover the plates at this time. 4. Put batteries on a complete charge before adding any additional water (refer to the Charging section). 5. Once charging is completed, open the vent caps and look inside the fill wells. 6. Add water until the electrolyte level is 1/8" below the bottom of the fill well. 7.
If any specific gravity readings still register low then follow the steps below. 1. Check voltage level(s). 2. Perform equalization charge. Refer to the Equalizing section for the proper procedure. 3. Take specific gravity readings again. If any specific gravity reading still registers lower than the factory specification of 1.277+/- .007 then one or more of the following conditions may exist: 1. The battery is old and approaching the end of its life. 2.
60 1.195 6.12 8.16 12.24 24.48 36.72 48.96 50 1.172 6.05 8.07 12.10 24.20 36.31 48.41 40 1.148 5.98 7.97 11.96 23.92 35.87 47.83 30 1.124 5.91 7.88 11.81 23.63 35.44 47.26 20 1.098 5.83 7.77 11.66 23.32 34.97 46.63 10 1.073 5.75 7.67 11.51 23.02 34.52 46.03 7) Battery installation Tighten the battery cables to battery terminals with torque of 95-105lbs.inch or 10.7-11.9 N.M.
press spring. Trouble-Shooting for Motor: ▼ ▼W Waarrnniinngg:: Only Qualified Electrician Can Change and Adjust The carbon Brush and Commutator. Item Symptoms Possible Causes 1 All copper plates turn black. The pressure of brush is incorrect. 2 The commutator turns black Short circuit in the commutator or armature coil; poor in a certain order and in welding or disconnection between the commutators groups. and the armature coil.
·When the vehicle starts, the SRO (protection unit in the controller) will effect. The controller will self-check when the vehicle is running. If any defect inspected, the controller will stop the vehicle to protect the operator and the vehicle. ① Periodical Maintenance: a. Check if the contact between contacting points of the contactor is in good condition, check if any contact sticks or is jammed mechanically. b. Check if the micro switch in the accelerator can be switched on and off properly. c.
7.7 Running-in of New Vehicle: In order to guarantee the performance of the vehicle and enhance its reliability and working lift, all parts in motor should experience a certain period of running-in before the motor works with its maximum capacity, thus, each new vehicle is required to give one month of running-in time, detail procedure as per the following: ① Check the levels of oil, water and liquids carefully before running-in and fill them as requested if insufficient.
▼ ▼W Waarrnniinngg:: Make sure to turn off the power key and apply the park brake when you do the maintenance unless specified. If the owner is not familiar with the maintenance of this vehicle, the dealer should do the work. 1D – per day 1W – per week 1M – per month 1Q – per quarter 1Y – per year item Descriptions 1D 1W Battery 1. Check the liquid level. Please add the distilled water if Y necessary. 2. Charge the battery Y 3. Tighten the nut on the battery cable 4.
24. Adjust the toe-in of the front end Y 25. Clean the body and seat Y After above maintenance, drive the vehicle to check if the vehicle works properly. 8. Storage Please follow the steps as below when the vehicle is stored. 1. Check the liquid level inside the battery; recharge it fully before storing the vehicle. ▼ ▼W Waarrnniinngg:: Please charge the battery once a month if your vehicle will be stored more than one month. 2.
2) Lose control when vehicle starts running: speed cannot be adjusted Malfunction Possible reason 1.Terminals of Solenoid stick together Vehicle runs at full speed when it just starts Vehicle stops immediately after it starts Normal at low speed Weak power at high speed 2.Controller failure Troubleshooting Check, repair Change 3.Potentiometer failure Repair, change 1. Internal short of Motor Repair, change 2.Motor is assembled too tight or blocked Repair, change 3.
5.Clearance of tension rod ball is too big 6. Steering knuckle and master pin is not lubricating 7.Steering shaft or its plastic cover wear out 1.Rack of redirector wear out Steering unstable (wheels flirt) 2.Screw plug of Redirector is too tight 3.Toe-in adjust improperly 4.Bearing of front wheel wear out 5.Tie rod ball and joint wear out Deflected Running Adjust Adjust Change Change tie rod Inflate 2.Toe-in is too big or too small Adjust 3.
Braking deviation 1.The clearance of left brake drum shoe and right brake drum shoe is different Adjust 2.Oil on one arrester’s brake shoe Dispose or change 3.tyre pressure is different Repair or Change 4.One wheel cylinder’s piston blocks Adjust 5.Wheel alignment improperly Adjust 6.Brake drum becomes out of round 1.Brake pedal has no free travel Braking drag Braking noise Change Adjust 2.Clearance between brake shoe and drum is too small or releasing spring is disable. Adjust or Change 3.
FIG.
FIG.