
User's Manual


How to attach to your ATV:
Position the M20 centered on either the front or rear luggage rack on
your ATV. Next using the included “Double J-Bolts” connect the rear
cross bars to the luggage rack cross bar closest to the seat or handle-
bars. Using two “Double J-Bolts” attach the M20 to the luggage rack
securing it to the outer most rail on the luggage rack. Tighten all fasten-
ers and cut any excessive bolt lengths that extend beyond the nuts on the
“J-Bolts” and smooth if necessary.
Prior to each use and occasionally during times of extended use, inspect the mounting and spreader hardware for
loosening to ensure the rigidity of the mount. This is done by tightening any loose hardware either on the
Spreader or Luggage Rack mounts.
Connecting the Power
After your spreader is securely attached to your
ATV, connect the wiring harness to the spreader
motor, then to the battery. The motor is to rotate in a clockwise direction when properly con-
nected, if not reverse the battery connection wires from the spreader to ensure a clockwise when
looking in the hopper.
Secure all wires so that they will not become entangled with operator or machinery with proper wire
fastening straps.
If rate settings are not available use the following procedure to calculate the setting:
1. Determine how much material is to be applied per 1,000 sq/ft.
2. Measure off a distance of 50 feet, preferably on a paved surface such as a parking lot.
3. Weigh out enough of the material to be applied to fill the hopper at least half full. Record the weight for future use.
4. With the unit mounted on the vehicle and the hopper at least half full of the material to be spread, position the vehi-
cle far enough before the beginning of the 50 foot test area so that the vehicle will achieve the desired speed before
you reach the starting line.
5. Set the rate setting stop at a position that you feel would be an appropriate setting.
6. Start the vehicle in motion and as you cross the starting line (of the 50 feet) move the rate lever to the open position
against the stop. Take care to be aware of what is going on around you maintaining control of the vehicle.
7. Continue from the starting line with the unit spreading the material. As you cross the finish line move the rate lever
to the closed position.
8. Stop the vehicle and note the width of the spread path that was just completed.
9. Return to the start point and empty the remaining material from the hopper into your weighing container and re-
weigh.
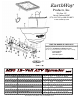
Mounting
locations