
Owner`s manual


49
This blueprint will always work assuming that you have a non-zero
Total Price. You may want to use a different tare than that of the PLU
that you are calling up, use a different price, use a different piece
count, or weigh the Net Weight Statement. In any case, these are
features that are accessed using different keys that can add steps to
this basic blueprint. All of these features will be covered in the
sections to follow. You may have realized that this basic blueprint can
work for By Count PLUs; although By Count PLUs need not be
weighed, you can place them on the platter when you do a transaction.
Whenever you call up a PLU, you need to know whether the PLU is By
Count or By Weight. Remember that By Count PLUs do not need to
be weighed so you can save yourself the step of having to place the
item on the scale. This can increase your productivity. The easiest
way to tell the a PLU is By Count is that the Weight Display is blank.
Additionally, the “$/Pcs” Lamp will be on. Conversely, the “$/lb” Lamp
will be on for By Weight PLUs.
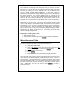
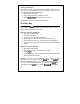
Selecting or “Calling Up” a PLU:
1. Start in Sales mode.
2. Type the PLU number and press
PLU
or press a Speed Key.
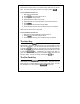
Miscellaneous PLUs
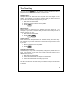
The basic “blueprint” of a Misc. PLU sales transaction is:
Start at the Initial State
Type a By Weight price using the numeric keys or a By
Count price using the numeric and
FOR
keys.
Place the item on the scale
Press
PRINT
Remove the item from the scale and apply the label
There are also many other functions and options that can add or some
more steps to the basic blueprint mentioned above, but it is more or
less the same. One important note to mention is that the first 2 steps
are interchangeable; that is, you can either type a price and then place
the item on the scale or place the item on the scale and then type a
price. Additionally, you may not need to press
PRINT
if you are in
Auto-Print mode.