MV-F2E-E-1.0.6.
Directory 1. SYSTEM REQUIREMENTS ............................................................................................................ 2 1.1. IPCAM REQUIREMENTS ................................................................................................................ 2 1.2. HOST SYSTEM REQUIREMENTS ...................................................................................................... 2 2. LOGIN SYSTEM ..............................................................................
1. System Requirements 1.1. IPCAM Requirements 1.M Series 2.M1 Series 3.F2 Series 4.F Series 1.2. Host System Requirements Operation System Requirements: Above version of Windows2000 Server or WindowsXP Professional . Memory Requirements:above DDR 2 GB Hard Disk Requirements:The above 320GB Resolution Requirements: above 1280 * 1024 2 MV-F2E-E-1.0.6.
2. Login System Double Click to run the main process ,a dialog box shows: You can enter into Main Interface after input accurate UserName and Password .And system have a default administrater named admin ,use this UserName , with this UserName you can enter into Main Interface without password. Notice:If Login as a common user ,some functions can’t be used. 3. Automatic Configuration Guide Click the login interface will enter the automatic configuration guide: 3 MV-F2E-E-1.0.6.
Interface will automatically search the LAN online IPCAM, listed in the list, and the default state is not selected. 1. The list of IPCAM, which checkbox will be play automatically in the liveview interface.otherwise, will not play automatically. It will popup a dialog for entering ip camera’s username and password when checkbox. As shown: 4 MV-F2E-E-1.0.6.
If you do not enter, name default “admin” and password default “”. 2. automatically set the mode, select [Play at the top, covering the previously set IPCAM], will be searched and added to the playlist Da Shanggou the IPCAM the top of the window.
4. Main Interface Main Interface After login successfully, a dialog box shows: 6 MV-F2E-E-1.0.6.
4.1 LiveView 1. General Control Play the window 2. Play : Play the window which has been selected,and the button turns to Stop Play at the same time. >>: PageDown <<: PageUp Play Current Page: Right-Click the selected window, a pop-up menu shows like below: Then click the item named Play Current Page,It will play at last. Stop Current Page: Right-Click the selected window ,a menu shows like above , Then click the item named Stop Current Page ,The current playing windows will be stopped at last. 3.
Down Left Right + Near Far Stop The camera tilted downward The camera shake to the left The camera shake to the right To make the camera zoom is far To make the camera zoom close Near the camera focus Far from the camera to focus on Stop PZT control Notice: Hold down the mouse over the operation, the operation should be carried out relative,when the release of the mouse,the operation will be stopped relative. 4. 5.
7. Record Video features the main interface, the main interface, including video button [Start Video], [Stop recording], [state] [Browse] and right menu [video] items. [Start Video]: Click to start recording, will start recording all current windows. [Stop recording]: Click to stop recording, all windows will stop the current video. [Status]: Click the status button, will pop the current video information display form. [browse]: Click on the button, can choose record’s save path. 9 MV-F2E-E-1.0.6.
4.
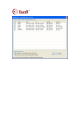
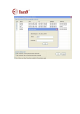
4.3 IP Search Find the network server’s IP quickly,While you press the Search button,it will show all of the nerwork server’s IP that have line connecting with yours. 1. IP Camera Search Table:Show the network information table which is the result of search.
Default: ConfigIE: Back to the original configuration on the camera Change the IE, in order to guarantee the camera’s normal play 2. Preview: Double-click to preview the current selected network camera 3.
Index: Sequence of video files. Add Edit : Add clip : Refresh : Browse : Download: Adding a certain period of time to download video files. Select multiple video files to download. Refresh. Choose to download video files stored path. Video file downloads. (Note: The downloaded file will show the progress) Clip List : Manage downloaded video files. Index : Download the file order. InChannel : Display the downloaded video file window.
Pause button: “《,》”button: Click to pause play the file. Play the file rewind, fast-forward. (Motion Jpeg bitstream cann’t use “<<” or “>>” funtion) RewPlay : The file down broadcast. (Motion Jepg bitstream cann’t use RewPlay funtion) BackUP : Backup of the file. (Note: The backup format for AVI files) 4.6 Syncplay(Just for av format playback) Play button: Stop button: Pause button: “《,》”button: Add File: Click on the file for playback. Click to stop file playback. Click to pause play the file.
NOTE: You can also add four windows file playback. Del File: Delete Windows files Syncplay: Select "Syncplay" when the four windows can simultaneously playback; do not choose to "Syncplay" when the four windows can be synchronized playback. 4.
Left double-click the downloaded videos will play the downloaded video. Click the Browse button to change the download directory path. 4.8 MJPG SD (unused now) MJPG SD Card: MJPG Ipcam SD card device window IP drop-down list select the PC's SD card inserted, the left will list the video card list all the video events, including the channel, start time, end time; Left double-click the video event, the right side of the screen to a video broadcast of this event.
4.9 SDPlay OnLine Playback online for motion jpeg format ip camera ‘s SD card. Select one of ip cameras which online and have SD card. If there is some data in the SD card, it will be shown on the listcontrol. Select one of records on the listcontrol and click on the play button, then it will play at the left . Click on the Refresh button, will refresh the content of listcontrol. 17 MV-F2E-E-1.0.6.
5. Menu Explain 5.1 system 1. Save config The current settings(the path of REC file ,the path of snapshot, OSD, time-sharing record and so on),stored in the ini format configuration file. 2. Load config Load the ini format configuration file. 3. Option User Manager: Add,Delete,Edit Users There are two kinds of purview: Manager , User 18 MV-F2E-E-1.0.6.
GPIO Config: Output1: The main interface GPIO button 1 Output2: The main interface GPIO button 2 Output3: The main interface GPIO button 3 Output4: The main interface GPIO button 4 4. Exit The Exit of entire process. 19 MV-F2E-E-1.0.6.
Style 5.2 Four kinds of Style:1 Window 4 Windows 9 Windows 16Windows 25Windows 36Windows 49 Windows 64Windows 8 1Windows 100Windows (225Windows and 1000Windows in another version) Full Screen: Full Screen of the correlated window Show different style of the windows: 1. 100 Windows 2. 8 1Windows 20 MV-F2E-E-1.0.6.
3. 64Windows 21 MV-F2E-E-1.0.6.
4. 49 Windows 5. 36Windows 22 MV-F2E-E-1.0.6.
6. 25 Windows 7. 16Windows 23 MV-F2E-E-1.0.6.
8. 9Windows 9. 4Windows 24 MV-F2E-E-1.0.6.
10. 1Windows 11. Full Screen 25 MV-F2E-E-1.0.6.
5.3 IPCAM Table When the user only input the address and didn’t input the UserName, Password or input the wrong UserName ,Password,only can play, the parameter settings and other changes will not work. Type : Is divided into three kinds of M Series, M1 Series, F Series,F2 Series。 4.When you select F or F2, channel is set to empty.
5.4 Camera Setting 1. Status In this interface,you can see the camera,ocx control,and other basic info Index: The number of the window Camera Type: The type of the camera Firmware Version: The current version of the firmware.When the need to determine whether or not to upgrade need to check this.Under normal circumstances,not only through firmware upgrades can be correted BUG, and sometimes will provide more new functions. OCX Version: Control the current version.
2. AVSettings Index: The number of the window Video Config: CBR: Fixed bit rate Limited Frame Rate: Frame Rate Compression: Compression rate P/I Ratio(P frame,I frame): P/I Rate Audio Config: IP Camera Audio Enable: PC Audio Enable: IPCAM audio switch PC audio witch 28 MV-F2E-E-1.0.6.
3. OSD Index: The number of the window OSD Config: OSD Enabled: OSD Text: Whether opening the function of OSD or not Color: The OSD words which need to be shown,the maximal word are 32 The color of OSS words,can get from Pick Color X: The relative abscissa of OSD words Y: The relatice ordinate of OSD words OSD Fontsize: The size of OSD words Show Time: Display time(system time or ip camera time) or not in 29 MV-F2E-E-1.0.6.
the liveview interface. Refresh Button: OK Button: Resume initial value. To take effect for setting. Cancel Button: Cancel which had setting. Apply Button: Apply setting. 30 MV-F2E-E-1.0.6.
4. Network Index: The number of the window Network Config: Obtain IP Address via DHCP: Obtain IP address via start DHCP User the follow IP Address: Set the IP address manually IP Address: Set Netmask: Set network GateWay: Set gateway IP address manually DNS Configuration: Obtain DNS Server Address via DHCP:Obtain DNS server automatically via start DHCP 31 MV-F2E-E-1.0.6.
User the follow DNS Address Server: Set DNS server manually Primary DNS server: The ip address of primary DNS server Secondary DNS server: The ip address of secondary DNS server HTTP Port: Visit the http port of IPCAM,the default port is 80. Notice: If set the IP address of secondary DNS server,the IP address of primary DNS server must be filled out.
5. PPPoE Index: The number of the window Config: PPPoE Enable: PPPoE switch User Name: Input the account provided by ISP Password: Input the password provided by ISP。 Email Notification when IP is changed: While the ip address changed,whether Email notify users or not. Status: When the connection is successful,we can see the Ip addres,DNS,connection status and other information provided by ISP in this area. 33 MV-F2E-E-1.0.6.
6. DDNS In this function can set DNS services.if you need to use the DDNS services,you must register on the DDNS Server witch provided by us freely,otherwise you cann’t use it. You can see about the related information on our website. DDNS Server: Choose the DDNS Server you want to use,we are providing Dyndns and PeanutHull these two dynamic domain name services for your use. DDNS Account: For example,if you application is TestDyndnsOrg,then this is your account.
7. RecSetting (Just for 440E、45X、Motion Jpeg Ip Camera) In this feature you can set the SD card storage。 Index: The number of the window. Record Type: Here is the video mode, is divided into Do not Record, Always Record, Record Schedule. Record Firm Size: Set the resolution of video file size, Note:CIF,D1,QCIF,FREE。(Motion Jpeg ip camera do not have the item) Record Schedule: Event Log. Record the following model events: NO, 60 MIN, MOTION, GPIO, ALL Event.
8. Snapshot Path Config : Index : Browse : The number of the window. Choose to download video files stored path. 36 MV-F2E-E-1.0.6.
5.4 Language Multi-Language Support. 5.5 Motion Detection Note:this feature is only valid when channel playing 37 MV-F2E-E-1.0.6.
1. MotionDetection Setting: Motion Detection Enabled: Is EMD feature opened Begin: Begin Paint MD Region End: End MD Region Remove: Remove MD Region Sensitivity: MD Sensitivity Show Motion Region on Live-View Page: Alarm Event: Send E-Mail with a JPEG or Send to FTP with a JPEG: Feedback when EMD Alram Event Motion Record Time: Motion Record when EMD Alram Event 38 MV-F2E-E-1.0.6.
2. FTP Setting FTP Server: FTP Server Address User Name: FTP Account Username Password: FTP Account Password FTP Command Port: FTP Command Port Path & File Name: FTP Server Update Path Note:this feature provide the “FTP *.jpg” Alarm Event 39 MV-F2E-E-1.0.6.
3. SMTP Setting Mail Server: From E-mail Address: To E-mail Address: Authorization: Username: Password: Mail Server Address Send Mail Account Address Receive Mail Account Address Send Mail Server is need Authorization Send Mail Account Username Send Mail Account Password Note:this feature provide the “Email-JPEG” Alarm Event 5.6 Mode 1. Show automatic guided configuration 40 MV-F2E-E-1.0.6.
Select this subitem will show automatic guided configuration interface when restart multiwindow. 2. FullScreen Mode1 Select this subitem will not reserve panel on the left. 3. FullScreen Mode2 Select this subitem will reserve panel on the left. 4. AdaptWindow Mode Select this subitem, image will fill the whole display window. As shown: 41 MV-F2E-E-1.0.6.
5. AdaptImage Mode Select this subitem, image will display based on rate of image’s width and height. (As shown:) 5.7 HELP Version and CopyRight of the MultiWindow. 42 MV-F2E-E-1.0.6.
6. Record Record Interface: Week: Start Time: Stop Time: Add: Del: Del All: Choose the Record Week Time The start time of the record file The stop time of the record file Add the imformation of the record (Time region,channel and so on) Delete the Record Imformation which is seleted in the list Delete all of the Record Information Channel: Select All: Select the channel which you need to record Select all of the channel 43 MV-F2E-E-1.0.6.
Clear All: Clear all of the selected channel Auto Start Record: Auto to record the file Record Path: The save path of the record file Add Path: Add save path, when the residual disk spaces less than the Min disk free spacees, switch to next path to contimue save the record file Del Path: Delete the save path of the record file Disk: Auto Delete The Earliest File: System will delete the earliest record file when the residual disk spaces less than the min disk free spaces Auto Change Record Path: System will
45 MV-F2E-E-1.0.6.