
Specifications


12
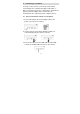
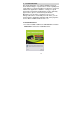
4. Power on your PC, and then connect the large end of the
USB cable to a USB port on your PC.
5. Press and hold the Power button for 0.5 seconds.
6. When the scanner connects successfully with a
computer, a Removable Disk (F) (F represents the
removable drive letter) will be shown in Windows
Explorer. If a memory card or flash disk is inserted to
the scanner, the Removable Disk will be replaced with
the name of the memory card or flash disk.
7. After your scan, a folder titled PHOTO1 is added to the
memory card or flash disk and the scanned image will
be saved in JPEG file format.
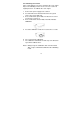
Each scanned image is given a file name with the prefix
scan followed by a 4- digit sequential number in the
order the images are stored. For example, IMG0001.jpg,
IMG0002.jpg. If the file name reaches IMG9999.jpg in
the Photo1 folder, a new folder titled Photo2 will
automatically be created to store subsequent new files,
and so on.
8. You can now view or edit the files on the memory card
or flash disk using your own graphic editing software.